background image

Executing Auto Gradation Adjustment

67

Mai

n

te

nan

c

e

5

Executing Auto Gradation Adjustment

The machine can automatically adjust gradation when the reproducibility of density or 
color in copies and prints has deteriorated. The machine can adjust the gradation for 
each screen type.

The following three types of screen is available.

z

Copy Job

Adjusts the gradation for copying documents.

z

Print Job 1

Basic screen for printing.

For PCL printer drivers

Adjusts the gradation for items other than [CAD] and [Presentation] of [Image Type] 
in the [Graphics] tab.

For PostScript printers
Adjusts the gradation for [Auto] and [Standard] of [Screen] in the [Graphics] tab.

Note

• Displayed Screen may differ corresponding to settings of [Image Type], [RGB Correction] 

and [CMYK Correction], when [Auto] is selected.

z

Print Job 2

For PCL printer drivers
Adjusts the gradation for [Presentation] at [Image Type] in the [Graphics] tab.

For PostScript printers
Adjusts the gradation for [Auto] and [Gradation] of [Screen] in the [Graphics] tab.

Note

• Displayed Screen may differ corresponding to settings of [Image Type], [RGB Correction] 

and [CMYK Correction], when [Auto] is selected.

The following paper sizes are available for the gradation adjustment: A3, A4 , 11 x 17 
inches, and 8.5 x 11 inches .

Note

• We recommend executing auto gradation adjustment for all three of the screen types. When 

the adjustment for one screen type is complete, specify the next screen type and repeat the 
procedure.

• If color shift is not compensated for despite the periodic execution of auto gradation 

adjustment, contact our Customer Support Center.

• The auto gradation adjustment does not execute when [Text] or [Map] is selected for 

[Original Type] in the [Image Quality] tab for copying.

• To make sure that [Copy Defaults] in the System Administration mode is set as following 

before executing auto gradation adjustment:
Lighten/Darken/Contrast: Normal, Color Shift: Normal, Sharpness/Color Saturation: Normal, 
Color Balance: 0. After finishing the auto gradation adjustment, change the settings of [Copy 
Defaults] if necessary.

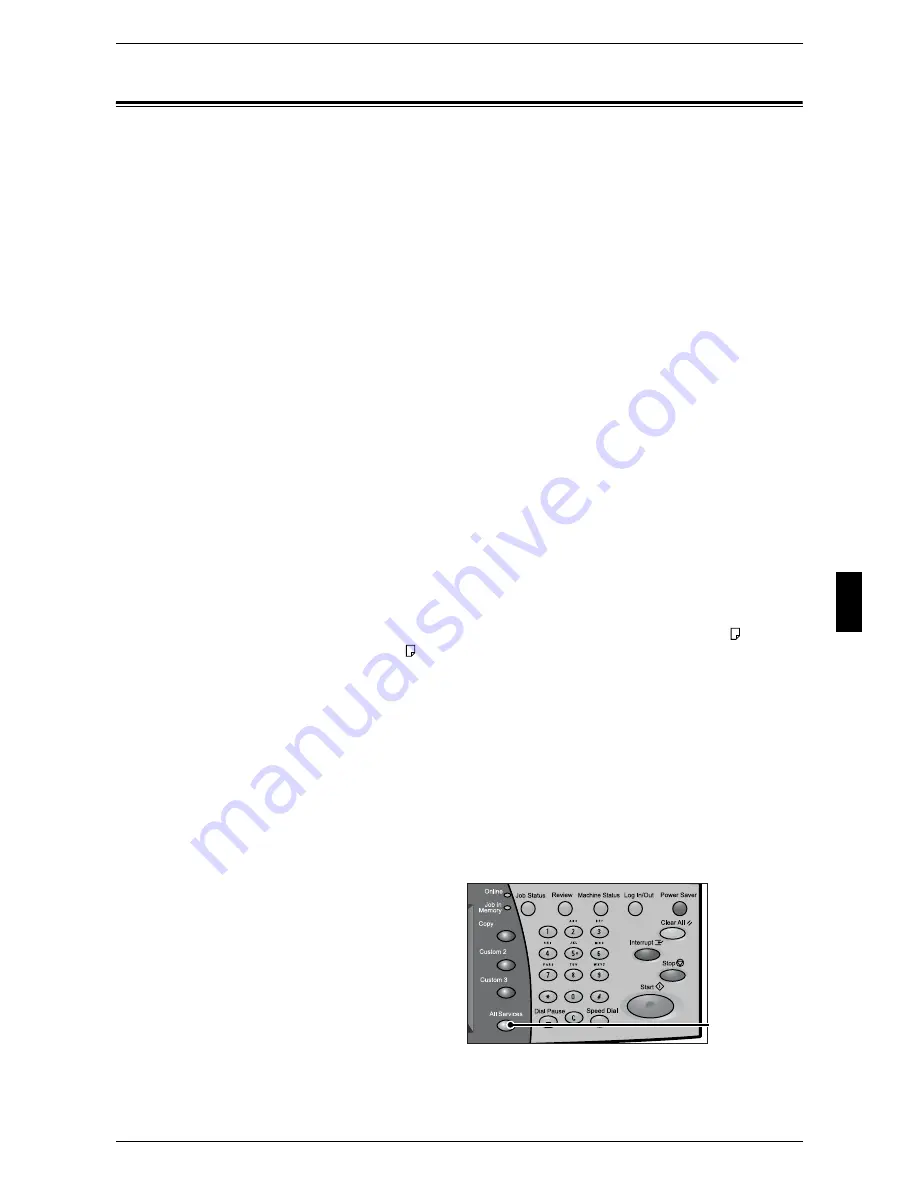
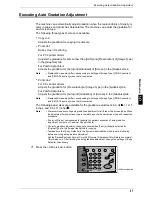
1

Press the <All Services> button

.

<All Services>button

Содержание ApeoSport C5540I

Страница 1: ...ApeosPort C6550 I C5540 I DocuCentre C6550 I C5540 I Quick Reference Guide ...

Страница 2: ...isk of the machine may be lost if there is any problem in the hard disk Fuji Xerox is not responsible for any direct and indirect damages arising from or caused by such data loss Fuji Xerox is not responsible for any breakdown of machines due to infection of computer virus or computer hacking Important 1 This manual is copyrighted with all rights reserved Under the copyright laws this manual may n...

Страница 3: ...anel 17 3 Basic Operations 19 Copying 20 Step 1 Loading Documents 20 Step 2 Selecting Features 22 Step 3 Entering the Quantity 22 Step 4 Starting the Copy Job 23 Step 5 Confirming the Copy Job in the Job Status 24 Operations during Copying 24 Printing 26 Scanning 27 Step 1 Loading Documents 27 Step 2 Selecting Features 29 Step 3 Starting the Scan Job 30 Step 4 Confirming the Scan Job in the Job St...

Страница 4: ...3 Replacing the Booklet Staple Cartridge Booklet finisher C 64 Emptying Punch Scrap Container Finisher C or Booklet finisher C 66 Executing Auto Gradation Adjustment 67 6 Problem Solving 71 Fault Clearance Procedure 72 Image Quality Problems 73 Paper Jams 74 Paper Jams in the Trays 1 to 2 75 Paper Jams in the Tray 3 75 Paper Jams in the Tray 4 76 Paper Jams in the Tray 5 Bypass 76 Paper Jams in th...

Страница 5: ...1 Before Using the Machine This chapter contains descriptions about how to use this document as well as cautions on using the product safely and legally z Preface 4 z Using This Guide 5 ...

Страница 6: ... International Energy Star Program Fuji Xerox confirms this product satisfies the requirements for International Energy Star Program standards Fuji Xerox shares the global concern about environmental conservation and has integrated that concern in its business activities from research and development to disposal We have implemented a number of programs to lessen the burden on the environment For e...

Страница 7: ...cument as well as cautions on using the product safely and legally 2 Product Overview Describes basic information such as identifying the major components how to switch the machine on and off how to use the touch screen and how to set the power saver feature 3 Basic Operations Describes the basic operations of the machine including copying printing and scanning 4 Paper and Other Media Describes th...

Страница 8: ...en messages and input text Refers to folders files applications button or menu names displayed in the touch screen as well as the names of menus commands windows or dialog boxes displayed on the computer screen and their buttons and menu names button Indicates a hardware button on the computer key Indicates a key on the keyboard of the computer z Orientation of documents or paper is described in t...

Страница 9: ...n about the machine such as the names of each component switching on and off of the machine and the operation of the touch screen and power saving settings z Machine Components 8 z Power On Off 12 z Circuit Breaker 13 z Power Saver Mode 14 z Control panel 17 ...

Страница 10: ...nt glass Load documents here 3 Control panel It consists of operation buttons LED indicators and a touch screen Refer to Control panel P 17 4 Power switch Switches the power of the machine on off 5 Toner cover Open this cover to access the insides of the machine to replace the toner cartridge 6 Front cover Open this cover to access the insides of the machine to clear paper jams or replace consumab...

Страница 11: ...l Use to connect a USB cable 15 Ethernet 10Base T 100Base TX connector Use to connect a network cable No Component Function 16 Left cover The left cover slightly opens when the top cover is opened Open this cover widely to clear paper jams 17 Top cover Open this cover to access the insides of the machine to clear paper jams 18 Confirmation indicator This indicator lights to confirm that the docume...

Страница 12: ...irst 26 Waste toner container cover Open this cover to access the insides of the machine to replace the waste toner container 27 Waste toner container Used to collect waste toner 28 Fuser Fuses the printed image on the paper by fusing the toner Do not touch this unit as it is extremely hot 29 Lever Used to draw out the transfer unit 30 Transfer unit Transfers toner images on the drum to paper Open...

Страница 13: ...ves documents when stapling or punching is selected 5 Staple cartridge Staples are stored Remove this cartridge to replace staples or clear staple jams 6 Booklet tray Booklet finisher C only Receives documents when folding is selected in the Booklet Creation 7 Front cover Open this cover to access the insides of the machine to clear paper or staple jams replace staples or throw punch dust away 8 B...

Страница 14: ...age indicates that the machine is warming up The machine cannot be used while it is warming up Powering Off The procedure for turning the power off is as follows Important Switching off the power of the machine during data processing stored in the memory may cause loss of data being processed 1 Before turning the power off make sure that all copy or print jobs have completely finished Also make su...

Страница 15: ...reaker will automatically cut off the power circuit to prevent any leakage or fire from occurring The circuit breaker is normally pressed to the upper side respectively as shown in the figure on the right If the circuit breaker is pressed to the lower sides respectively unusual conditions may occur Please contact our Customer Support Center ...

Страница 16: ...ower Saver feature is canceled Sleep Mode Power consumption ApeosPort C6550 I DocuCentre C6550 I5 7W ApeosPort C5540 I DocuCentre C5540 I3 8W In this mode the power is lowered more than in the Low Power mode The touch screen goes out and the Power Saver button on the control panel lights To use the machine press the Power Saver button The Power Saver button goes out to indicate that the Power Save...

Страница 17: ...er Mode after the last operation Note The default for From Last Selection to Low Power Mode is 15 minutes The Low Power Mode cannot be set to Disabled From Last Selection to Sleep Mode Set the time to move to the Sleep Mode after the last operation Note The default for From Last Selection to Sleep Mode is 60 minutes Configure the From Last Selection to Sleep Mode time to be longer than the From La...

Страница 18: ...iting the Power Saver Mode The following describes how to exit the Power Saver mode The Power Saver mode is cancelled in the following instances z Pressing the Power Saver button z Receiving data 1 Press the Power Saver button Power Saver button ...

Страница 19: ... and scan features whose settings have changed from the defaults In text descriptions this button is indicated as the Review button 7 Machine Status button Pressing this button allows you to confirm the machine status and meters check the state of consumables and print reports In text descriptions this button is indicated as the Machine Status button 8 Log In Out button When this button is pressed...

Страница 20: ...on to start copying or scanning In text descriptions this button is indicated as the Start button 15 Numeric keypad Press these buttons to enter the number of copies passwords and other numerical values In text descriptions these buttons are indicated as the numeric keypad 16 C Clear button Press this button if you have entered the wrong numerical value with the numeric keypad In text descriptions...

Страница 21: ...3 Basic Operations This chapter describes the basic operations of the machine z Copying 20 z Printing 26 z Scanning 27 z Mailbox 33 z System Settings Procedure 34 ...

Страница 22: ...nt Feeder The document feeder supports single and multiple sheet documents with sizes from 139 7 x 210 mm A5 A5 5 5 x 8 5 inches 5 5 x 8 5 inches to 297 x 432 mm A3 11 x 17 inches The document feeder accepts the following number of sheets The document feeder automatically detects standard size documents For non standard size documents input the size in the Original Size field Important Place folde...

Страница 23: ...432 mm A3 11 x 17 inches on the document glass The document feeder automatically detects standard size documents For non standard size documents input the size in the Original Size field 1 Open the document cover 2 Place the document face down and align it against the top left corner of the document glass 3 Close the document cover Note When a standard size document is placed on the document glass...

Страница 24: ...UserID Ask the system administrator for the UserID and Password 1 Press the All Services button 2 Select Copy 3 If the previous settings still remain press the Clear All button 4 Select the features to set from each tab as necessary Step 3 Entering the Quantity You can enter up to 9999 for the number of copies 1 Enter the number of copies using the numeric keypad The number of copies entered appea...

Страница 25: ...ment select the Next Original on the touch screen while the current document is being scanned You can scan multiple documents for later output 1 Select Next Original while scanning is in progress Note When using the document feeder load the next document after the machine has finished scanning the first document When the above screen is displayed and no operation is performed during a certain peri...

Страница 26: ...ribes available operations during copying The following shows the reference section for each feature Stopping the Copy Job 24 Changing the Number of Copies 25 Interrupting the Copy Job 25 Stopping the Copy Job To cancel copying follow the procedure below 1 Press either Stop on the touch screen or the Stop button on the Control Panel 2 Select Stop 3 If the screen of step 1 does not appear press the...

Страница 27: ...lready copied the copy job is not executed Interrupting the Copy Job You can temporarily suspend the current continuous copy job to give another job higher priority 1 Press the Interrupt button Note The interrupt indicator lights up to indicate the machine is in the job interrupt mode 2 Load the interrupt document and set features if necessary 3 Set the number of copies with the numeric keypad 4 P...

Страница 28: ...ending on the application software you are using For more information refer to the documentation provided with each application 1 Select Print from the application s File menu 2 Confirm the Printer Name and click Properties if necessary 3 Configure the properties if necessary 4 Click OK 5 Click OK in the Print dialog box ...

Страница 29: ...The document feeder supports single and multiple sheet documents with sizes from 140 x 210 mm A5 A5 5 5 x 8 5 inches 5 5 x 8 5 inches to 297 x 432 mm A3 11 x 17 inches The document feeder accepts the following number of sheets The document feeder automatically detects standard size documents For non standard size documents input the size in the Original Size field Important Place folded or creased...

Страница 30: ...of sizes up to 297 x 432mm A3 11 x 17 inches The document feeder automatically detects standard size documents For non standard size documents input the size in the Scan Size field 1 Open the document cover 2 Place the document face down and align it against the top left corner of the document glass 3 Close the document cover Note When a standard size document is placed on the document glass the s...

Страница 31: ...g the file job template set with scanning conditions information about the forwarding destination server and others Scan to FTP SMB Scans a document and sends the scanned data to a network computer via the FTP or SMB protocols Note Features displayed may vary depending on the model you are using When using the Auditron mode a UserID and password might be required Ask the machine administrator for ...

Страница 32: ...the touch screen while the current document is being scanned This allows you to scan several documents as one set of data Up to 999 pages can be stored Note If the number of document pages exceeds this maximum then scanning stops Follow the displayed message and either abort the operation or save the scanned document data 1 While documents are being scanned select Next Original Note When using the...

Страница 33: ...ove to the next screen Step 5 Saving the Scanned Data When you select Scan to Mailbox the document stored in a mailbox of the machine is imported into your computer Importing can be done in the following ways Import using application Uses a network scan driver Import using Mailbox Viewer 2 Uses Mailbox Viewer 2 application software produced by Fuji Xerox Import using CentreWare Internet Services U...

Страница 34: ...either Stop on the touch screen or the Stop button on the Control Panel 2 Select Stop 3 If the screen in procedure 1 does not appear press the Job Status button 4 Select the job to cancel and then select Stop Note When a scan is cancelled scan data already stored in a mailbox is deleted Stop button JobStatus button ...

Страница 35: ... Note Select to return to the previous screen or to move to the next screen By entering a three digit number with the numeric keypad you can specify the mailbox directly 4 When creating a new mailbox the password setting screen appears z Not setting a password 1 Select Off and then select Save z Setting a password 1 Select On and then enter a password 2 Select Save 5 Select the item to be set and ...

Страница 36: ...rID value is 11111 When using the Authentication feature a password is required The default password value is x admin 3 Select System Settings User Mode While still in the System Administration mode you can carry out normal operations such as copying and scanning Note To exit a mode entered from User Mode use the following procedure 1 Press the Log In Out button 2 In the System Administrator Login...

Страница 37: ...System Settings Procedure 35 Basic Operations 3 7 When the settings are completed select Close until the System Settings screen appears 8 Select Exit ...

Страница 38: ......

Страница 39: ...Other Media This chapter describes the types of paper that can be used on the machine precautions when handling paper and how to load paper in trays z Paper Types 38 z Loading Paper 41 z Changing the Paper Size 46 ...

Страница 40: ...e differs from the paper specified by the printer driver or printing from a tray not supporting the loaded paper can result in paper jams To ensure correct printing select the correct paper size paper type and paper tray Note Basic weight means a weight of 1 m2 of a paper sheet Ream weight means weight of 1 000 sheets of paper in duodecimo size 788x 1 091mm When paper smaller than B5 in size such ...

Страница 41: ...ech 90 g m2 FX J Paper 80 g m2 FX JD Paper 98 g m2 OHP V516 FXK X A704 A4 75 g m2 AG KXPI Blue A3 80 g m2 Paper Q 80 g m2 Premier 3R91720 80 g m2 Purple Wrap 80 g m2 No 1 Xerox Brand 80 g m2 No2 Package Green 80 g m2 Purple Wrap 212A00297 80 g m2 Premier Black 80 g m2 Business 3R91820 80 g m2 Paper GSM Unit g m2 and Paper type FXK H H804 A4 80 g m2 Plain A 64 80 g m2 Indagiat K704 A4 75 g m2 Plain...

Страница 42: ...s or warping Please adhere to the following when setting paper into the tray z Align the stack of paper neatly before setting it in the tray z Do not use paper that is folded creased or heavily warped z Do not use waved or curled paper z Do not load paper of mixed size together into the tray z Transparency paper and label paper can cause paper jams and multiple sheets can be fed to the printer at ...

Страница 43: ...on trays whose Paper Type Priority setting is set to Off are not targeted in Automatic Tray Selection Also if the Paper Priority setting is exactly the same automatic tray selection is determined by Tray Priority Adding paper When the machine runs out of paper during copying or printing a message is displayed on the control panel Add paper according to the displayed instructions Copying or Printin...

Страница 44: ...to a stop Loading Paper in the Tray 3 Following describes the procedure for loading paper in the Tray 3 For information about changing the paper size and orientation refer to Changing the Paper Size P 46 1 Pull out the Tray 3 towards you until it stops Important While the machine processes a job do not pull the tray out that the job uses Do not add new paper to the paper on the tray in order to pr...

Страница 45: ...um fill line It might cause paper jams or machine malfunctions 3 Push the tray in gently until it comes to a stop Loading Paper in the Tray 5 Bypass When printing or copying with paper sizes or types that cannot be set in the Trays 1 to 4 and 6 use the Tray 5 bypass The following describes how to load paper into the Tray 5 bypass To make detailed instructions during printings specify the instructi...

Страница 46: ...y 6 For information about changing the paper size and orientation refer to Changing the Paper Size P 46 1 Pull out the Tray 6 towards you until it stops Important Do not pull the tray out while the machine processes the job Do not add new paper to the paper on the tray in order to prevent paper jams or making mistakes of paper loading Remove any paper remaining in the tray and then load the paper ...

Страница 47: ... the extension flap The extension flap can be extended in two stages When pulling out the extension flap do it gently 2 Hold the center of the paper guides and slide them to the desired paper size 3 Load paper with the side to be copied or printed on facing up and the top edge frontward and insert the paper lightly along the paper guide until it comes to a stop Important Do not load mixed paper ty...

Страница 48: ... prevent paper jams or making mistakes of paper loading Remove any paper remaining in the tray and then load the paper on newly loaded paper 2 Remove any paper loaded on the tray 3 Hold the long side paper guide and slide it to the desired paper size 1 Hold the short side paper guide on the right side and slide it to the desired paper size 2 4 Check the position of the paper guides and then releas...

Страница 49: ... out that the job uses Do not add new paper to the paper on the tray in order to prevent paper jams or making mistakes of paper loading Remove any paper remaining in the tray and then load the paper on newly loaded paper 2 Remove any paper loaded on the tray 3 Hold the paper guide and slide it to the desired paper size 4 Check the position of the paper guides and then release them 5 Load and align...

Страница 50: ... tray and then load the paper on newly loaded paper 2 Remove any paper loaded on the tray 3 Hold the paper guide and slide it to the desired paper size 4 Check the position of the paper guides and then release them 5 Load and align the edge of the paper against the left edge of the tray with the side to be copied or printed on facing up Important Do not load paper exceeding the maximum fill line I...

Страница 51: ...move any paper remaining in the tray and then load the paper on newly loaded paper 2 Remove any paper loaded on the tray 3 Open the end guide and unscrew the screw Then remove the guide from the Tray 4 Insert the small protrusions at the bottom of the guide into holes corresponding to the paper size 1 Insert the screw into a hole corresponding to the paper size on the top of the guide and screw up...

Страница 52: ...ze 2 and press the lever down 3 Note The slot on the left of 8 5 is not used 8 Open the end guide and load and align the edge of the paper against the right edge of the tray with the side to be copied or printed on facing up Note Do not load paper exceeding the maximum fill line MAX in the figure or the maximum capacity of the Tray 9 Close the end guide tightly Note Set the guide to gently touch t...

Страница 53: ...5 Maintenance This chapter describes how to replace consumables clean the machine and perform auto gradation adjustment z Replacing Consumables 52 z Executing Auto Gradation Adjustment 67 ...

Страница 54: ...tomer Support Center The use of toner cartridges not recommended by Fuji Xerox may impair quality and performance Use only toner cartridges recommended by Fuji Xerox for the machine When only a small amount of toner remains in a toner cartridge the machine may stop during printing and display a message If this happens replace the toner cartridge to continue copying or printing Replace toner cartri...

Страница 55: ...port Center for disposal 4 Take out the new toner cartridge of the same color as the old one from its box and gently tilt the cartridge up and down and then left and right several times 5 Insert the toner cartridge in gently until it comes to a stop Note Be sure to insert the toner cartridge until you hear it click into place 6 Close the toner cover Warning Toner remaining in the cartridge can cau...

Страница 56: ...nly waste toner containers recommended by Xerox for the machine Replace the waste toner container while the machine is on Note The number of pages is for when A4 paper is used The number of pages that you can copy or print is only an estimate and varies depending on conditions such as the content paper size paper type and the computer environment 1 Make sure that the machine has stopped before ope...

Страница 57: ...g ring rubber provided with the bag If the zipper is left open the toner may leak out during disposal 6 Hold the center part on the top of a new container and insert it until it comes to a stop Important When inserting the waste toner container do not grip the handle of the container 7 Close the waste toner container cover 8 Close the front cover Note A message will be displayed and the machine wi...

Страница 58: ...when the drum cartridges are exposed to light The use of drum cartridges not recommended by Xerox may impair quality and performance Use only drum cartridges recommended by Xerox for the machine Note Do not expose drum cartridges to direct sunlight or strong light from indoor fluorescent lighting Do not touch or scratch the surface of the drum Doing so may result in unsatisfactory printing Used dr...

Страница 59: ... unit and pull out it 5 Place a black sheet supplied with the new drum cartridge onto the unit other than the drum cartridge R1 Important Make sure to place the black sheet It may affect image quality 6 Remove the drum cartridge upward while holding rings provided at the both ends of the drum cartridge 7 Place the replaced drum cartridge into the empty container ...

Страница 60: ...ridge and place it under the cartridge 10 Grip rings provided at the both ends of the drum cartridge to uplift Important Do not touch the surface of the drum cartridge 11 Place the drum cartridge along with the guide with the side marked with frontward 12 Press the both ends of the drum cartridge to place it in a horizontal position Note Make sure that the marks and face each other 13 Remove the b...

Страница 61: ...inting will no longer be possible once the following number of pages have been copied or printed z For ApeosPort C6550 I DocuCentre C6550 I About 1 100 pages z For ApeosPort C5540 I DocuCentre C5540 I About 1 000 pages Important Before replacing a drum cartridge you need to receive instruction for how to replace it from our customer engineer Place a black sheet supplied with a new drum cartridge o...

Страница 62: ...rint is only an estimate and varies depending on conditions such as the content paper size paper type and the computer environment After the massage Replace the drum cartridge RX appears image quality of printed documents or copies may deteriorate 1 Take out a new drum cartridge and a black sheet from its container Important Put the drum cartridge on a flat place Do not place the new drum cartridg...

Страница 63: ...w drum cartridge onto the unit Important Make sure to place the black sheet It may affect image quality 8 Open a bag including a new drum cartridge and take it out Important Do not touch or scratch the surface of the drum when you take it out from the bag 9 Unwrap a sheet covering the drum cartridge and place it under the cartridge 10 Remove the black sheet from the unit 11 Grip rings provided at ...

Страница 64: ...in a horizontal position Note Make sure that the marks and face each other 14 Remove the film on the drum cartridge 15 Insert the unit completely and return the handle to the original position 16 Return the lever R1 R4 to the original position 17 Close the front cover Note A message will be displayed and the machine will not operate if the front cover is even slightly open ...

Страница 65: ...rtridges not recommended by Fuji Xerox may impair quality and performance Use only staple cartridges recommended by Fuji Xerox for the machine Note To order a staple cartridge contact our Customer Support Center 1 Make sure that the machine has stopped before opening the front cover of the finisher 2 Grip the lever R1 of the staple cartridge holder and pull out the holder to the right towards you ...

Страница 66: ... Staple Cartridge Booklet finisher C When a booklet finisher optional is installed and it is time to replace the booklet staple cartridge a message appears on the display When this message appears replace the staple cartridge with a new one Important The use of staple cartridges not recommended by Fuji Xerox may impair quality and performance Use only staple cartridges recommended by Fuji Xerox fo...

Страница 67: ... a new booklet staple cartridge return the cartridge to the original position and gently push it until you hear it click into place 5 Return the unit to its original position 6 Close the front cover of the finisher Note A message will be displayed and the machine will not operate if the front cover of the finisher is even slightly open ...

Страница 68: ...s are discarded If there are scraps remaining the container may be full before the next message is displayed It may cause machine malfunctions Important Pull the container out while the power is on If you switch off the power when emptying the scrap container the machine will not be able to detect that the scraps have been disposed 1 Make sure that the machine has stopped before opening the front ...

Страница 69: ... for Auto and Gradation of Screen in the Graphics tab Note Displayed Screen may differ corresponding to settings of Image Type RGB Correction and CMYK Correction when Auto is selected The following paper sizes are available for the gradation adjustment A3 A4 11 x 17 inches and 8 5 x 11 inches Note We recommend executing auto gradation adjustment for all three of the screen types When the adjustmen...

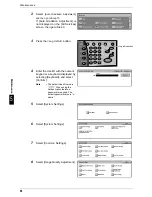
Страница 70: ...e Log In Out button 4 Enter the UserID with the numeric keypad or a keyboard displayed by selecting Keyboard and select Confirm Note The default UserID value is 11111 When using the Authentication feature a password is required The default password value is x admin 5 Select System Settings 6 Select System Settings 7 Select Common Settings 8 Select Image Quality Adjustment Log In Out button ...

Страница 71: ... adjustment and then select Close Note Normally select Copy Print for Applicable Area When using external calibration for print output set Applicable Area if necessary 14 Select Start Note The message Printing the Gradation Adjustment Chart Copy Job appears and the document for gradation adjustment Gradation Adjustment Chart is printed 15 Align the magenta patch of the printed Gradation Adjustment...

Страница 72: ...re is a problem the machine stops the adjustment and displays an error message Follow the displayed message 18 Select Confirm 19 To continue automatic gradation adjustment for other screen types repeat steps 11 to 17 20 When you started the adjustment from the All Services menu select Close and then go to Step 21 When you started the adjustment in the System Administration mode select Close until ...

Страница 73: ...em Solving This chapter describes troubles that may occur with the machine and their solutions z Fault Clearance Procedure 72 z Image Quality Problems 73 z Paper Jams 74 z Document Jams 94 z Stapler Faults 97 ...

Страница 74: ...lution z If a fault occurs first refer to the screen messages and animated graphics and clear the fault in the order specified z If the problem is not solved by following the screen messages and graphics contact the System Administrator for assistance z Alternatively contact the System Administrator for assistance z In some cases it may be necessary to switch the machine off and then on For inform...

Страница 75: ...e output Check the following conditions to ensure optimum copy performance If you still cannot resolve the problem contact the System Administrator z Do not locate the machine in direct sunlight or near a radiator z Follow regular maintenance schedules for cleaning areas such as the document glass and output trays ...

Страница 76: ...aper Jams in the Tray 5 Bypass 76 Paper Jams in the Tray 6 77 Paper Jams in the Transfer Module 79 Paper jams in the Bottom Left Cover 80 Paper jams in the Bottom Right Cover 81 Paper jams in the Output Tray 82 Paper jams in the Finisher C and the Booklet finisher C 83 Important When a paper jam occurs paper is sometimes torn and remains inside the machine if you pull out a paper tray without chec...

Страница 77: ...med paper Note If paper is torn check for any torn pieces of paper inside the machine 3 Push the tray in gently until it comes to a stop Paper Jams in the Tray 3 The following describes how to clear paper jams in the Tray 3 1 Pull out the Tray 3 Important Paper is sometimes torn and remains inside the machine if you pull out a tray without checking the paper jam position This may cause machine mal...

Страница 78: ...k where the paper jam occurred first 2 Remove the jammed paper Note If paper is torn check for any torn pieces of paper inside the machine 3 If paper is jammed in the paper feed section open the inner cover and remove the paper 4 Push the tray in gently until it comes to a stop Paper Jams in the Tray 5 Bypass The following describes how to clear paper jams in the Tray 5 bypass 1 Open the Tray 5 by...

Страница 79: ...g edge lightly comes up against the paper feed entrance Paper Jams in the Tray 6 The following describes how to clear paper jams in the Tray 6 This section describes how to clear paper jams at the following locations The references are described below Paper Jams in the Tray 6 Exit 77 Paper Jams in the Tray 6 Top Cover 78 Paper Jams in the Tray 6 78 Paper Jams in the Tray 6 Exit 1 Gently move the T...

Страница 80: ... the Tray 6 top cover 3 Remove the jammed paper Note If paper is torn check for any torn pieces of paper inside the machine 4 Close the top cover 5 Gently put the Tray 6 back into position Paper Jams in the Tray 6 1 Pull out the Tray 6 2 Remove the jammed paper Note If paper is torn check for any torn pieces of paper inside the machine 3 Push the tray in gently until it comes to a stop 1 2 ...

Страница 81: ...en lever 2 at the center of the transfer module to the right until it is in the horizontal position and then pull the transfer module out to the end 3 Remove the visible jammed paper 4 Move lever 2a to the right and remove the jammed paper 5 Pull down the lever 2b and remove the jammed paper Warning Never touch a labeled area found on the fuser unit or nearby indicating High Temperature and Cautio...

Страница 82: ... will be displayed and the machine will not operate if the front cover is even slightly open Paper jams in the Bottom Left Cover Following describes how to clear paper jams in the bottom left cover 1 If the Tray 6 is installed gently move the Tray 6 to the left until it stops by gripping the handle on the top left side of the Tray 6 2 Open the bottom left cover while gripping the release lever 3 R...

Страница 83: ...y open 6 If the Tray 6 is installed in the machine gently put the Tray 6 back into position Paper jams in the Bottom Right Cover Following describes how to clear paper jams in the bottom right cover 1 If the finisher is installed open the front cover of the finisher and then pull down the lever 1a 2 Open the bottom right cover while pressing the downward arrow button 3 Remove the upper jammed pape...

Страница 84: ...e displayed and the machine will not operate if the bottom right cover is even slightly open 7 If the finisher is installed return the lever 1a to the original position and then close the front cover of the finisher Note A message will be displayed and the machine will not operate if the front cover of the finisher is even slightly open Paper jams in the Output Tray Following describes how to clea...

Страница 85: ...Lever 2a 86 Paper Jams at the Lever 2a Using the Wheel 2c 87 Paper Jams at the Lever 2b 88 Paper Jams at the Lever 2b Using the Wheel 2c 88 Paper Jams at the Lever 3 89 Paper Jams at the Lever 5 90 Paper Jams at the 4a for the Booklet finisher C 90 Paper Jams at the Lever 4b for the Booklet finisher C 91 Paper Jams at the Booklet Tray for the Booklet finisher C 92 The following example shows how t...

Страница 86: ...ver of the finisher 2 Move the lever 1d to the left and then move the lever 6 upward 3 Turn the wheel 1c to the direction indicated by the arrow and then remove the jammed paper 4 Return the lever 1d and 6 to the original position 5 Close the front cover of the finisher Note A message will be displayed and the machine will not operate if the front cover of the finisher is even slightly open Paper ...

Страница 87: ...ight 5 Gently pull out the paper to remove 6 Return the levers 1b and 1a to the original positions 7 Close the front cover of the finisher Note A message will be displayed and the machine will not operate if the front cover of the finisher is even slightly open Paper Jams at the Lever 2a 1 If the edge of the jammed paper comes out from the exit of the output tray gently pull out the paper to remov...

Страница 88: ...nal position 6 Close the front cover of the finisher Note A message will be displayed and the machine will not operate if the front cover of the finisher is even slightly open Paper Jams at the Lever 2a Using the Wheel 2c 1 If the edge of the jammed paper comes out from the exit of the output tray gently pull out the paper to remove 2 Open the front cover of the finisher ...

Страница 89: ...pull out the paper to remove 6 Return the lever 2a to the original position 7 Close the front cover of the finisher Note A message will be displayed and the machine will not operate if the front cover of the finisher is even slightly open Paper Jams at the Lever 2b 1 Open the front cover of the finisher 2 Move the lever 2b to the right and remove the jammed paper 2b ...

Страница 90: ... Jams at the Lever 2b Using the Wheel 2c 1 Open the front cover of the finisher 2 Move the lever 2b to the right 3 Turn the wheel 2c to the direction indicated by the arrow and then remove the jammed paper 4 Gently pull out the paper to remove 5 Return the lever 2b to the original position 6 Close the front cover of the finisher Note A message will be displayed and the machine will not operate if ...

Страница 91: ...lever 3 3 Remove the jammed paper 4 Return the lever 3 to the original position 5 Close the front cover of the finisher Note A message will be displayed and the machine will not operate if the front cover of the finisher is even slightly open Paper Jams at the Lever 5 1 Open the exit cover 5 of the finisher upward ...

Страница 92: ...r the Booklet finisher C 1 Open the front cover of the finisher 2 Pull out the unit 4 3 Turn the wheel 4a to the left and remove the jammed paper 4 Return the unit 4 to the original position 5 Close the front cover of the finisher Note A message will be displayed and the machine will not operate if the front cover of the finisher is even slightly open ...

Страница 93: ... front cover of the finisher 2 Move the lever 4b to the left 3 Remove the jammed paper if there is 4 Pull out the unit 4 5 Remove all jammed paper that comes out from the left upper side and inside the unit 6 Return the unit 4 to the original position 7 Return the lever 4b to the original position ...

Страница 94: ...even slightly open Paper Jams at the Booklet Tray for the Booklet finisher C 1 Open the front cover of the finisher 2 Turn the wheel 4a to the right to eject the jammed paper onto the booklet tray 3 Remove the jammed paper 4 Close the front cover of the finisher Note A message will be displayed and the machine will not operate if the front cover of the finisher is even slightly open ...

Страница 95: ...nt jam occurs Follow the instructions displayed and remove the jammed paper Document jams at the covers 1 Grip the handle of the top cover of the document feeder and open the top cover until it comes to a stop Note When you fully open the cover it enters a fixed position Open the cover gently 2 Open the left cover until it comes to a stop 3 If the document is not caught in the entry of the documen...

Страница 96: ...ep 8 then pick up the document feeder tray and remove the document 10 Gently return the document feeder tray 11 Make sure that the document is not torn wrinkled or folded and load the document again following the instructions displayed on the screen Note After removing the jammed document load the entire document again following the instructions displayed on the screen Already scanned document she...

Страница 97: ...ocument is not torn wrinkled or folded and load the document again following the instructions displayed on the screen Note After removing the jammed document load the entire document again following the instructions displayed on the screen Already scanned document sheets will automatically be skipped and scanning will resume from the unscanned document sheet Torn wrinkled or folded documents may c...

Страница 98: ...ed or staples are bent Contact our Customer Support Center if the problem persists after you have tried the following solutions If staples are stapled on the copies in the manner shown in the figures below contact our Customer Support Center Unstapled Bent staple One side of staple rising up Staple bent in reverse direction Flattened staple Entire staple rising up Staple rising up with center pres...

Страница 99: ... the same as for the finisher C 1 Make sure that the machine has stopped before opening the front cover of the finisher 2 Grip the lever R1 of the staple cartridge holder and pull out the holder to the right towards you 3 Remove the staple cartridge holder by gripping the orange lever Note The staple cartridge is firmly held When remove the staple cartridge strongly pull the cartridge 4 After remo...

Страница 100: ...finisher is even slightly open If the staples cannot be removed after carrying out the above procedures contact our Customer Support Center Staple Jams in the Booklet Staple Cartridge Booklet finisher C The following describes how to clear staple jams in the booklet staple cartridge when the booklet finisher C optional is installed 1 Make sure that the machine has stopped before opening the front ...

Страница 101: ...l position and gently push it until you hear it click into place 6 Return the unit to its original position 7 Close the front cover of the finisher Note A message will be displayed and the machine will not operate if the front cover of the finisher is even slightly open If the staples cannot be removed after carrying out the above procedures contact our Customer Support Center Warning Be careful w...

Страница 102: ......

Страница 103: ... change the paper size 46 circuit breaker 10 13 control panel 8 D document feeder 20 27 document feeder tray 9 document glass 8 21 28 document guides 9 document jams 94 document output tray 9 document stopper 9 drum cartridges 10 duplex automatic document feeder 8 E Ethernet 10Base T 100Base TX connector 9 exit cover 11 extension flap 43 F finisher tray 11 front cover 8 11 fuser 10 G gradation adj...

Страница 104: ...de 14 Special Media 39 Standard 39 staple cartridge 11 staple cartridge Finisher C 98 staple cartridge for Finisher C and Booklet finisher C 63 stapler faults 97 T toner cartridges 10 52 toner cover 8 top cover 9 touch screen 17 transfer unit 10 Tray 1 8 Tray 2 8 Tray 3 8 Tray 4 8 Tray 5 bypass 9 Tray 5 bypass top cover 9 Tray 6 9 Tray 6 top cover 9 U Usable paper 39 USB2 0 interface connector 9 W...

Страница 105: ...on Company or organization Address z About the Guide Other comments After completing this form detach and send it to the address below Please use your own envelope and postage stamp Thank you for your cooperation Fuji Xerox Co Ltd Ebina Prime Tower 2 9 50 Chuo Ebina shi Kanagawa ken JAPAN 243 0432 Strongly agree Neutral Strongly disagree 1 It is handy 1 2 3 4 5 2 It is easy to read 1 2 3 4 5 3 Tit...

Страница 106: ......

Страница 107: ...Port C6550 I C5540 I DocuCentre C6550 I C5540 I Quick Reference Guide Manual Group Human Interface Design Development Fuji Xerox Co Ltd DE3320E2 1 Edition 1 February 2005 Copyright 2005 by Fuji Xerox Co Ltd ...

Страница 108: ......
Отзывы: