15
Logix
®
420 Digital Positioner FCD LGENIM0106-07-AQ – 10/15
flowserve.com
8 STARTUP
8.1 Quick Start Instructions
Once installed, the DIP switch settings and Quick-Cal function listed
below are typically all that are needed to calibrate and tune the
positioner for use. This simple procedure takes only seconds for most
valves.
1. Using the Configuration Switches, select the desired configuration.
See section 8.3 CONFIGURATION SWITCH SETTINGS for details.
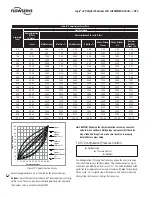
2. Hold the Quick-Cal button for 3 seconds. This will initiate a stroke
calibration. (LCD Screen must show the main menu before pressing
Quick-Cal button. See Figure 10.)
After the stroke calibration is complete, the positioner is ready for
control.
1
CAUTION: During the QUICK-CAL operation the valve may stroke
unexpectedly. Notify proper personnel that the valve will stroke,
and make sure the valve is properly isolated.
8.2 Local User Interface Overview
The Logix 420 local user interface allows the user to calibrate, configure
the basic operation, and tune the response of the positioner without
additional tools or configurators. The Local interface consists of:
•
Configuration Switches (7) –
Used to set basic configuration. See
explanations in section 8.3 CONFIGURATION SWITCH SETTINGS.
•
Interface Buttons –
Used to calibrate the positioner, perform special
functions and navigate the display menu.
►
QUICK-CAL / ACCEPT (Move Right)
▲
Up
▼
Down
◄
Back (Move Left)
•
Selectable GAIN Switch (Rotary) –
Used to manually fine-tune the
performance.
•
LED Indicators (Red, Yellow, and Green) –
Indicate status, alarms
and warnings.
• D
isplay (Optional) –
Provides a full menu of detailed information
and configuration options.
8.3 Configuration Switch Settings
Before placing the unit in service, set the Configuration Switches to the
desired control options.
NOTE:
The Configuration Switch settings are activated only by
performing a Stroke calibration (pressing the “QUICK-CAL” button for
3 seconds). However, the Configuration Switch settings may be edited
from the DTM or Handheld at any time.
8.3.1 Air Action Switch
This must be set to match the configuration of the valve/actuator
mechanical tubing connection since the tubing determines the air action
of the system.
ATO –
Increasing pressure from the output port causes the valve
to open.
ATC –
Increasing pressure the output port causes the valve to close.
8.3.2 Signal at Closed Switch
Normally this will be set to 4 mA for an Air-To-Open actuator configura-
tion, and 20 mA for Air-To-Close..
4 mA
– Selecting 4 mA will make the valve close when the signal is low
(4 mA) and open when the signal is high (20mA).
20 mA
– Selecting 20 mA will make the valve close when the signal is
high (20 mA) and open when the signal is low (4mA).
NOTE:
When using an Analog Output (AO) function of the Multi-
Function Card, the AO signal corresponds with the Signal At Closed
selection. If the valve closes with a 4 mA signal, the AO will show a 4
mA signal at closed. If the valve closes with a 20 mA signal, the AO will
show a 20 mA signal at closed.
8.3.3 Characterization Switch
The Characterization Switch allows a better match between the input
command and the actual fluid flow through the valve. This feature is
typically used with valves that have non-linear flow characteristics. The
positioner makes a correction by applying an adjustment to the input
command according to a characterization curve.
Linear –
Select Linear if the actuator position should be directly propor-
tional to the command input signal. (For most rotary valves, this setting
gives an =% Cv characteristic due to their inherent =% characteristics.)
Other –
Select Other if one of the pre-set characterization curves or a
custom curve is desired. The default will be the Custom curve which is
populated with a standard 30:1 equal percent rangeability curve which


