


19 |
P a g e
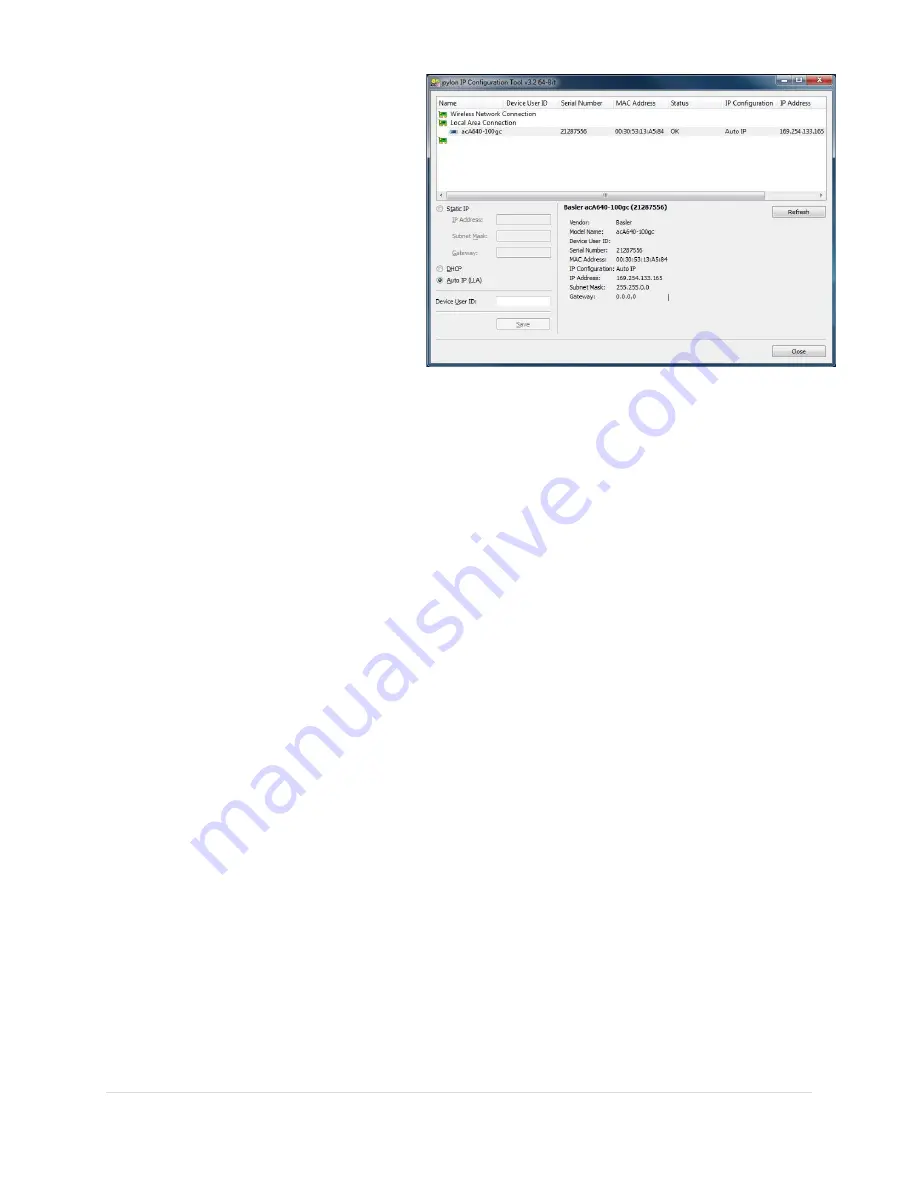
The IP Configuration Tool scans your
computer for network connections and
attached cameras. All discovered network
connections are displayed in the top panel
and information on the selected item is
shown below. The FAT cameras are listed
under Local Area Connection or Ethernet
with the default name beginning in “ac800-“.
When you select a network connection, the
information area displays the IP address and
Subnet Mask of the network adapter. The
camera and the computer must belong to
the same sub-network for the computer to
detect the camera. If the subnet mask of the network adaptor is 255.255.0.0, then the first 2 sets of
numbers of the camera’s and computer’s IP address must be the same. If the subnet mask is
255.255.255.0, then the first 3 sets of numbers of the camera’s and computer’s IP address must be the
same. Make note of the IP Address and Subnet Mask of the Local Area Connection/Ethernet that lists
the camera.
Click the camera in the upper panel. Any problem with the camera is shown in the status column and
additional information is given below. If your device is not reachable, you need to change the IP Address
of the camera with one of the following methods:
DHCP – Select his method if the computers are networked with a router, which assigns IP
addresses
Static IP – Select this method if the computers are networked through an unmanaged switch.
(The Trendnet POE Switch is unmanaged).
We do not recommend using Auto IP.
When you click
Save
, the new IP settings are saved with the camera and retained when the camera is
switched off and back on. When the camera status is listed as “OK”, click
Close
to return to the Camera
Settings. Click the camera drop down menu and the camera will be listed.
When attempting to change the camera’s IP address, you may be required to enter a temporary IP
Address and the Assign Temporary IP Address Windows automatically appears. Enter an IP address in
which the first 2 or 3 number sets are the same as the computer’s and the remaining set is different
from the computer or any other computer on the network. Click
OK
. The camera retains this temporary
address until you assign a new address or the camera is disconnected or powered off.
If the camera does not appear in the Pylon IP Configuration Tool:
1.
Verify the camera is properly connected as described in Section 2.1 and that all connections are
secure.
2.
Make sure all firewalls are turned off, including Windows and any third-party security programs,
such as Norton or McAfee. To turn off Windows Firewall:
a.
Click on the Windows
Start Menu
and then
Control Panel
.
b.
View by:
is located in the upper right-hand corner of the Control Panel Window. If viewing by
Categories, select
System and Security.


