517804 D
28
Example.
•
The Compressor is on
•
The FC fan is on
•
The PC fan is on
Note: In I/O mode the illumination of the LCD will turn off if the PC door is opened.
5.3 Fault
History
The Fault History will indicate the last fault that occurred with the product, however, this will only be displayed
for a period of 4 days, after which can only be accessed through a download.
It will also indicate if there are any faults with the display board. If an icemaker display fault has occurred,
these will be indicated by fault codes F30 or F31. (Refer to Section 2.3 Icemaker Display Faults.)
Note: This is fault history and may not necessarily be a current fault.
5.4
To Manually Force A Defrost
While pressing and holding the
MENU
button, press the
DOWN
button for 4 seconds. Note that there will be a
delay of two (2) minutes before the element starts to heat after going into this mode. This is known as the
warm up time.
5.5
To manually Force a Harvest
(Products before January 2009)
Press and hold down the MEASURED FILL + UP + DOWN buttons for 4 seconds. This will activate the
icemaker. Note: if the bins are removed to observe the icemaker operation, the icemaker will start to rotate.
However, if the bin lever device is in a down position the icemaker will not rotate. The lever-lock needs to be
either removed or pushed backwards for the icemaker to complete a full rotation.
(Products after January 2009)
Press
LOCK
key first, then
DOWN
+
UP
keys and hold all three (3) keys for 4 seconds. This will activate the
icemaker. Note: if the bins are removed to observe the icemaker operation, the icemaker will start to rotate.
However, if the bin lever device is in a down position the icemaker will not rotate. The lever-lock needs to be
either removed or pushed backwards for the icemaker to complete a full rotation.
NOTE:
A forced harvest will operate without the product being down to temperature. If the harvest does not
work the sensor may be not connected or open circuit. The Icemaker sensor must be in circuit for a forced
harvest to work.
Содержание E522BLXFDU
Страница 2: ......
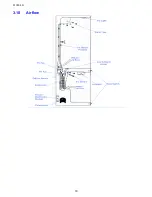
Страница 18: ...517804 D 18 3 10 Airflow...
Страница 32: ...517804 D 32 7 WIRING DIAGRAMS...


