7. Periodically remove the dust, using low pressure (3-
4bar / 20-30 PSI) from the inside of the power sour-
ce, to assure adequate heat dissipation from power
source during operation.
16.0 ADJUSTMENT OF THE
POWER SOURCE
“Stick out” (sometimes improperly called arc length)
should remain in the range 5mm ÷ 10 mm in order to
obtain best welding (and sound) performances.
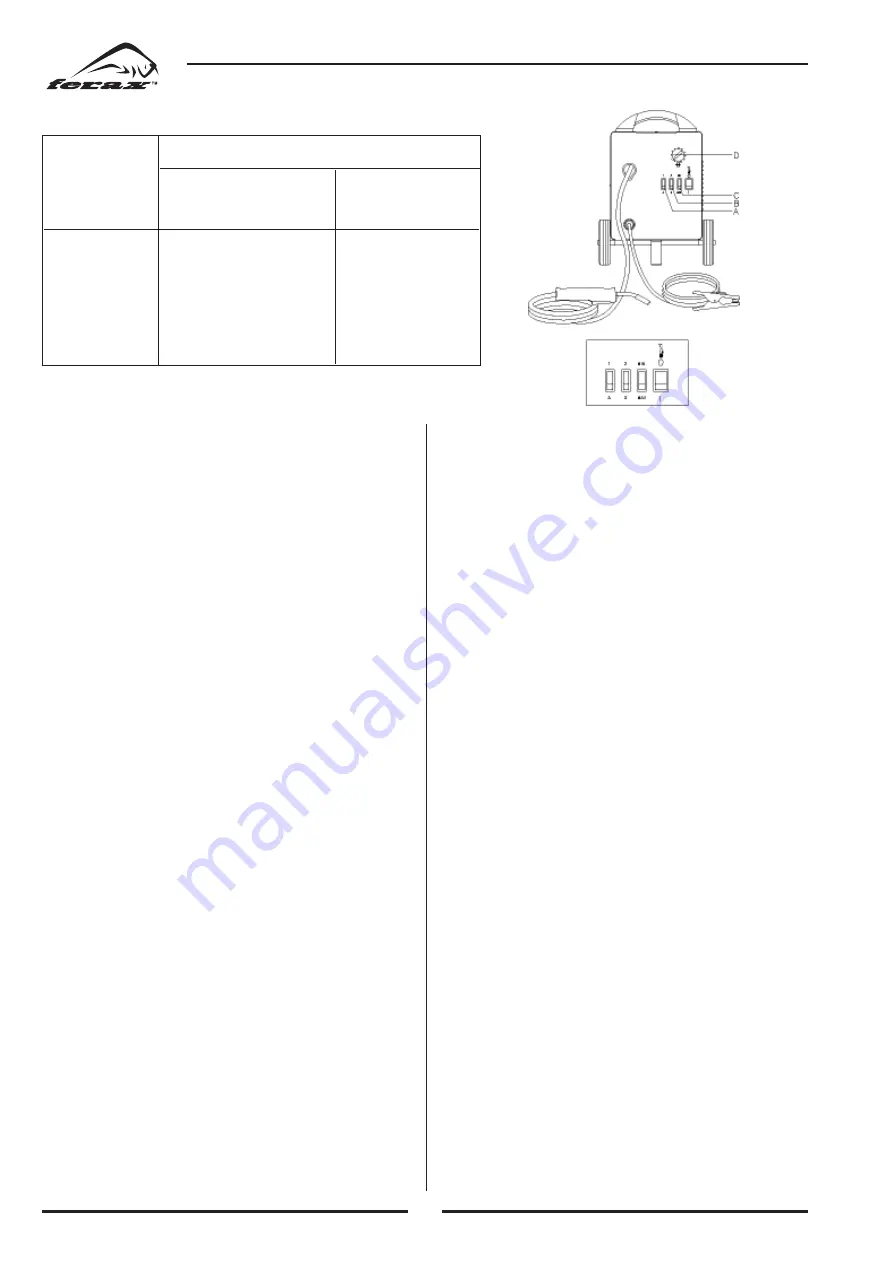
1. Position the voltage switch in the desired position
(TAB. 13.1, 13.2). Select lower position for lower
thickness and higher settings for higher thickness.
2. Adjust the wire speed. Start using a trial metal sheet
thoroughly cleaned from layers of rust or paint.
Connect the ground cable to the workpiece. Adjust
the wire speed at high setting. Press the torch switch
(note: The torch switch must be pressed thoroughly
in order to perform its three functions, gas flow, wire
feed and welding current). Start welding and decre-
ase the wire speed gradually. Continue to decrease
the wire speed and listen to the sound. The sound
will change from a crackling noise to a regular and
strong buzzing (similar to the sound of frying
bacon). This buzzing sound indicates the correct
wire speed for the workpiece being welded. When
the current regulation is changed set again the wire
speed.
Start always from a higher wire speed. This opera-
tion prevents from damaging the contact tip during
welding. During welding the torch should be kept
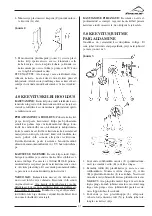
with the 45° angle from the workpiece. Keep the top
of the nozzle at 5-10mm from the work-piece.
36
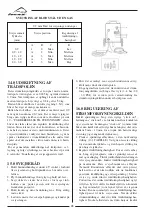
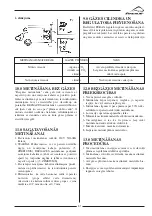
0,9 mm Gas Welding Wire
Workpiece
Welding Position
Wire Speed
Thickness (mm)
Adjustment
A
B
C
D
0,9
1
2
Max.
Low
0,9 - 1,0
A
2
Min.
Medium
1,0 - 1,2
A
3
Max.
Medium
1,2 - 2,0
A
3
Min.
Medium
2,0 - 3,0
A
3
Max.
High
SOFT STEEL FOR NO GAS
14.0 REPLACEMENT OF THE
WIRE SPOOL
Your welding power source is supplied with a mini
wire spool of about 0.5 Kg of 0.6mm diameter wire.
When the wire spool is finished it can be replaced with
a wire spool of 0.8Kg or 5.0Kg.
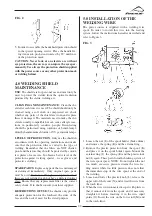
The wire is pushed by a roll (FIG..3, M) which is
moved by a series of mechanisms. The roll has two
grooves one marked by 0.9mm and the other marked
by 0.7mm. It is very important to use the correct groo-
ve as explained in page 10 – “ PREPARATION FOR
WELDING” – otherwise the wire will not be fed regu-
larly or it will be crashed; make sure that the torch tip
matches with the wire diameter. Your welding power
source is supplied with a torch complete of tip for the
wire included with the power source. For all the other
wire spools mount a tip that matches with the wire dia-
meter.
Make reference to figure 3 and follow the procedure
described at page 4 – “ INSTALLATION OF THE
WELDING WIRE “ for the replacement of the wire
spool.
15.0 WELDING TIPS
1. Keep the torch handle with an angle of 45° with
respect to the workpiece and maintain the nozzle
about 6mm from the surface.
2. Move the torch handle with prudence and steadi-
ness.
3. Avoid welding in areas with too much air. The air
that blows away the shielding gas from the weld
pool mainly causes porosity in the weld.
4. Keep the wire and its cover clean. Do not use rusted
wire.
5. Avoid sharp bends and kinks on the welding hose.
6. If possible, clean with compressed air the wire liner
when replacing the wire spool.


