


LOKAL 400 Operating Manual
Page 15
7.3.1. Filter settings
You will reach the filter setting mask either through the selection process of the manual measurement
mode in the second setting step or through the correlation main window by selecting the filter setting
options [10] by tapping on the touch screen or by applying the dial. A new window (as shown above) is
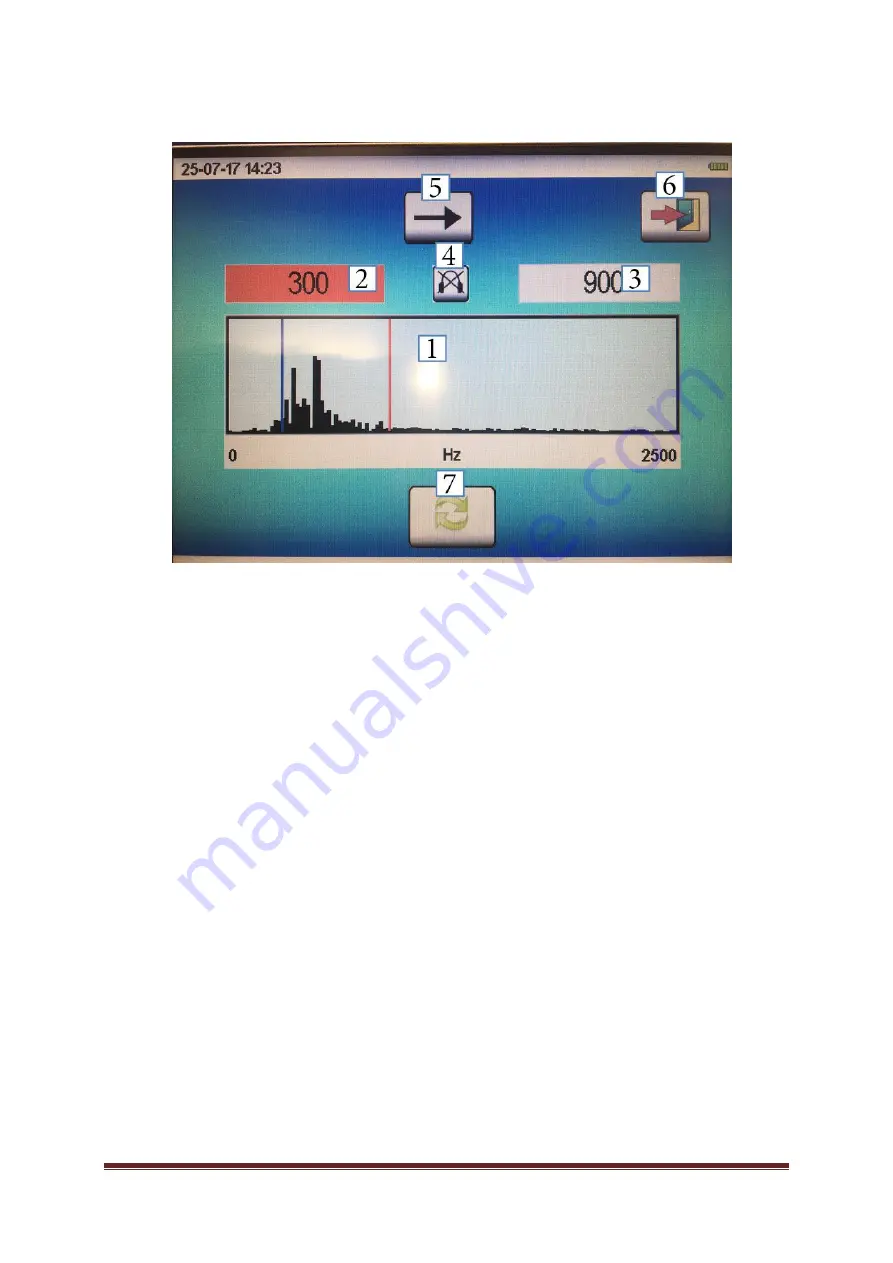
displayed, and the following functions are offered to the operator:
[1] Coherence image of both signals A and B
[2] Settings for the high-pass filter (HP)
[3] Settings for the low-pass filter (TP)
[4] Activating the headphone jack or Switching the headphone jack between Channel A and
Channel B
[5
] “Continue“ button
[6
] “Back“ button
[7] Updating the coherence image
In this filter selection menu, the coherence image [1] is always displayed as the result of the last
measurement procedure. Therefore, it is recommended to make the system re-calculate the coherence
image through the function [8] before the filters are set again to have the current coherence displayed. If
you press the “Update” button, it may take several seconds until the new image has been calculated.
The filter levels can be adjusted by selecting the appropriate high-pass filter [2] and low-pass filter [3]
fields. The set filters are displayed in the coherence image as additional red lines. If the high-pass filter or
the low-pass filter has been selected, the line turns blue in the image and the box is highlighted in red.
Now the filter selection can be changed by tapping on the image or by applying the dial.
Press the “Continue“ button [6] if you wish to reach the correlation main window. If you tap on the “Back“
button [7], the subsequent window to be displayed depends on whether you reached the
Filter settings
window via the second setting step in the manual measurement mode or via the correlation main window.
In the first case, the system will go back to the start screen; in the latter case, the system will go back to
the correlation main window.


