


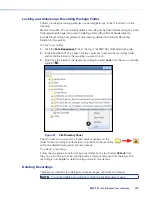


•
Network
Path:
— An entry is required in this field. Enter the network path or URL in
one of the following forms:
\\share_IP_address\share_name\optional_directory
or
\\ServerHostName\SharedFolderName
For additional information on the
network path format, options, and
allowed characters, click the
?
button
in the upper right corner of the
Network
-
Shares
dialog, as shown.
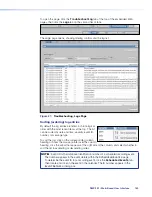
•
User Name: and Password:
—
Entries in these fields are optional and
used only if a network share requires
password log-in information. Use either
these two fields OR the
Options:
field, not both.
•
Options:
— Entries in this field are
optional and are used only if a network
share requires password log-in
information. The format is
user=
username
,
pass=
password
. Include
a space between the user name and
password entries. Use either this field
OR the
User
Name:
and
Password:
fields, but not both. They serve the
same function.
•
Local Name:
— This field can be left blank or you can enter a descriptive name
(without spaces or special characters), which appears in the list in the
Files
tab.
4.
Click
Save
to save the information and add the network share to the files list. The
Network
-
Shares
dialog closes and the link to the new network share is listed in the
Shares
folder.
NOTE:
The
Shares
folder is is created automatically if it was not present before
you added a network share.
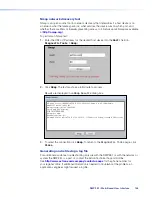
To view the network path of the share after it has been added, right-click the name of the
share and select
Shares
Info
from the pop-up dialog box.
To remove a network share, right-click on the name of the share and select
Unmount
share
from the pop-up dialog.
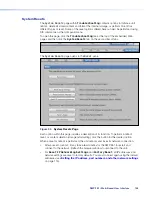
Upload Files to and Download Files From the SMP Using an SFTP Client
Automatic file uploading to a network location (see
Setting the default recording
destination
on page 117 or
Scheduling with an Opencast server
on page 71),
the recording re-transfer (re-upload) option within the
Scheduled
Events
page, and
the option listed on the previous page for uploading background image files to the unit
satisfy most file transfer needs. However, if there is a need to transfer files into or out of the
SMP 351 outside of those controls, use an SFTP client utility.
To use an SFTP client utility to transfer files:
1.
Click the
File
Management
tab.
2.
Copy the URL. The URL includes the SFTP protocol name (sftp), the address of the
SMP 351, and also the logical port number (usually
22022
) of the LAN port. For
example,
sftp://192.168.194.28:22022
.
SMP 351 • Web-Based User Interface
137