


EMV800 HD / EMV1200 HD Mobile DVR
9
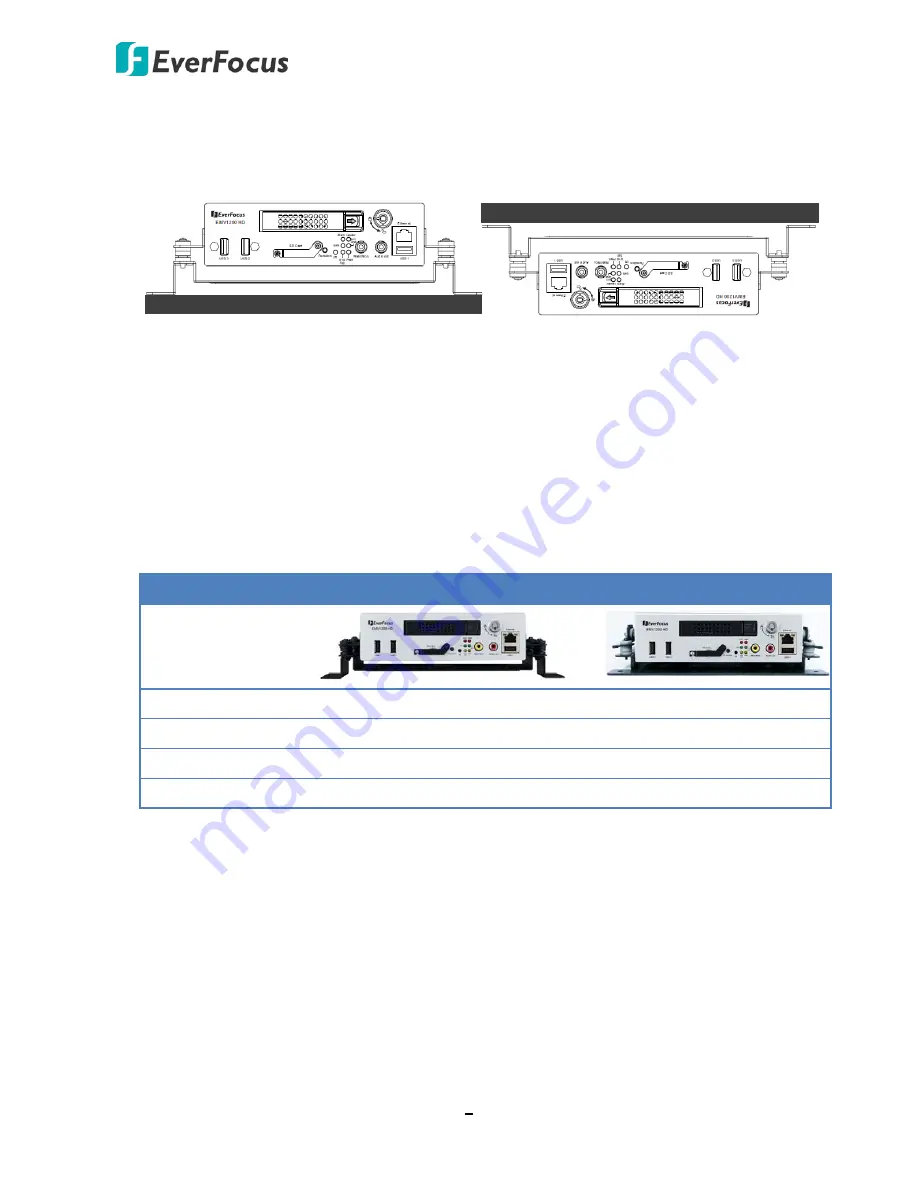
2.1.1
Mounting
You can use the provided mounting bracket in the package to mount the mobile DVR inside
the vehicle. Two mounting types are available,
Support-Mount
and
Suspend-Mount
.
Support-Mount
Suspend-Mount
Interface
Interface
If the mounting bracket you ordered is a
Z-Type Bracket
, both of the above two mounting
types are supported. Please note that to meet the EN50155 standard for the mobile DVR, the
Z-Type Bracket
is required to be used.
If the mounting bracket you ordered is an
Anti-Vibration Bracket
, only the
Support-Mount
is
supported. Please note that to meet the SAE-J1455 standard for the mobile DVR, the
Anti-
Vibration Bracket
is required to be used.
Z-Type Bracket
Anti-Vibration Bracket
EN50155 Standard
Yes
-
SAE-J1455 Standard
-
Yes
Support-Mount
Yes
Yes
Suspend-Mount
Yes
-


