22
Prepare
Tips:
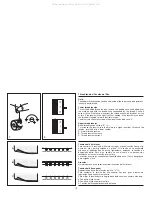
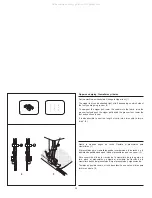
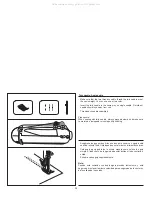
1. Take off the all purpose foot and attach the buttonhole foot.
2. Measure diameter and thickness of button and add 0.3 cm (1/8") for
bar tacks; mark buttonhole size on fabric.
3. Place fabric under the foot, so that mark on the buttonhole foot lines
up with the marking on the fabric. Lower the foot, so that the center
line of the fabric buttonhole comes to the center of the foot hole.
density varies according to the fabric. Always test sew a
buttonhole.
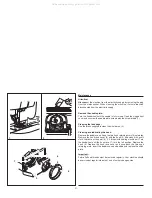
Follow the sequence. Take care not to sew too many stitches in stages 2
and 4. Use seam ripper and cut buttonhole open from both ends towards
the middle.
- Slightly reduce upper thread tension to produce better results.
- Use a backing for fine or stretchy fabrics.
- It is advisable to use heavy thread or cord for stretch or knit fabrics.
The zig-zag should sew over the gimp.
Note:
Buttonholes/ Coser ojales
1
3
2
4
2
4
Preparar
Consejos útiles:
1. Sacar el pié prensatelas universal y colocar el pié ojalador.
2. Midir el diámetro y el espesor del botón y agregar 0.3 cm (1/8") para
marcar los remates del ojal en la tela.
3. Colocar la tela bajo el pié de modo que la marca en el pié hojalador
coincida con la marca en la tela. Bajar el pié, de modo que la linea
central de la marca del ojal en la tela quede en el centro del pié.
La densidad varía según la tela. Pruebe siempre a coser un ojal
de práctica.
Seguir la secuencia. Tener cuidado de no coser demasiadas puntadas
en posiciones 2 y 4. Usar el abridor y cortar el ojal desde ambos
extremos hacia el centro.
- Reducir un poco la tensión superior produce buenos resultados.
- Usar un fondo para telas finas o elásticas.
- Es aconsejable usar cordón para telas strtch o tejidos de punto.
El zig-zag debe coser sobre el cordón.
Nota:
All manuals and user guides at all-guides.com
all-guides.com


