19
LS720 Microscope Manual 2021
A.
Creating a Z-Map
1.
Load desired labware with samples into labware carrier.
2.
Find a Live Image in a location as described in Section II.E.
above.
3.
Set up Autofocus using steps in Section II.J. above.
4.
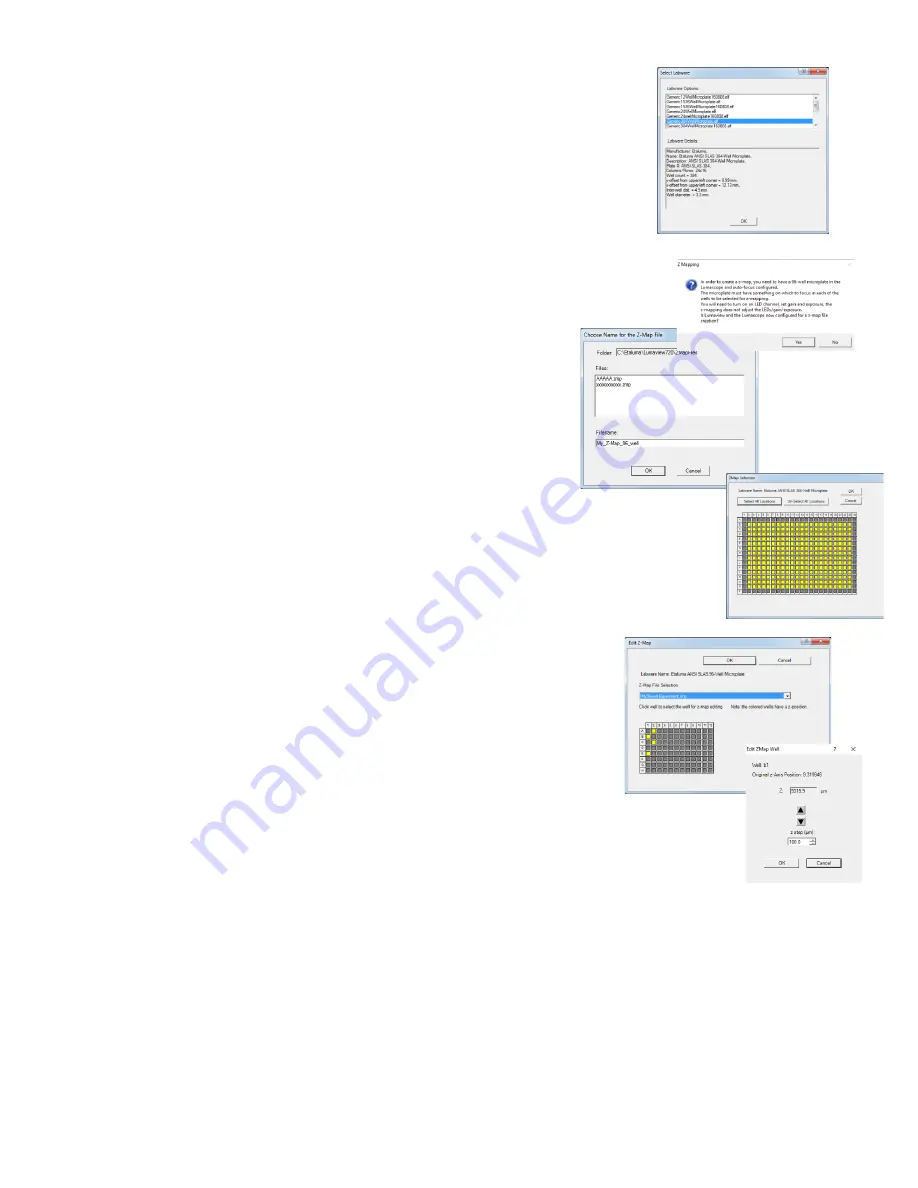
In Manual XYZ, click the Create Z-Map button near the bottom. The
Select Labware dialog box will open. Click on the labware type desired
to highlight it and then click OK.
5.
A Z-Mapping instruction dialog box will now open. Click Yes.
6.
The Choose Name for the Z-Map File dialog box will now
open. Choose the Filename for your Z-Map file and click OK.
7. The Z-Map Selection dialog box will now open. Select
the locations in the labware to be Z-Mapped. Locations can be
selected by clicking on them individually, clicking on the name of
any row (A, B, etc) or column (1, 2, etc), or clicking on Select All
.
8. Click OK and Z-Mapping will begin
.
B.
Editing a Z-Map
1. In Manual XYZ, click the Edit Z-Map button at the bottom to
open its dialog box. Select the Z-Map File to be edited.
2 Locations that were Z-Mapped become shaded in yellow. Click
on any Z-Mapped location and the Edit Z-Map Well dialog box
for that location will open. Click the up and down arrows to
manually change the focus. This allows both review of the Z-
Map value and making a change if desired.
3.
In Manual XYZ, click the Edit Z-Map button at the bottom to open its dialog box.
Select the Z-Map File to be edited.
4.
Review the Z-Map and make changes if desired. Click OK to return to Edit Z-Map. Click Cancel
to keep the Z-Map value as it was before. Click on other locations to check and/or change their
Z-map values. Be sure to click OK to save any changes before leaving Edit Z-Map
.


