12
LS720 Microscope Manual 2021
j.
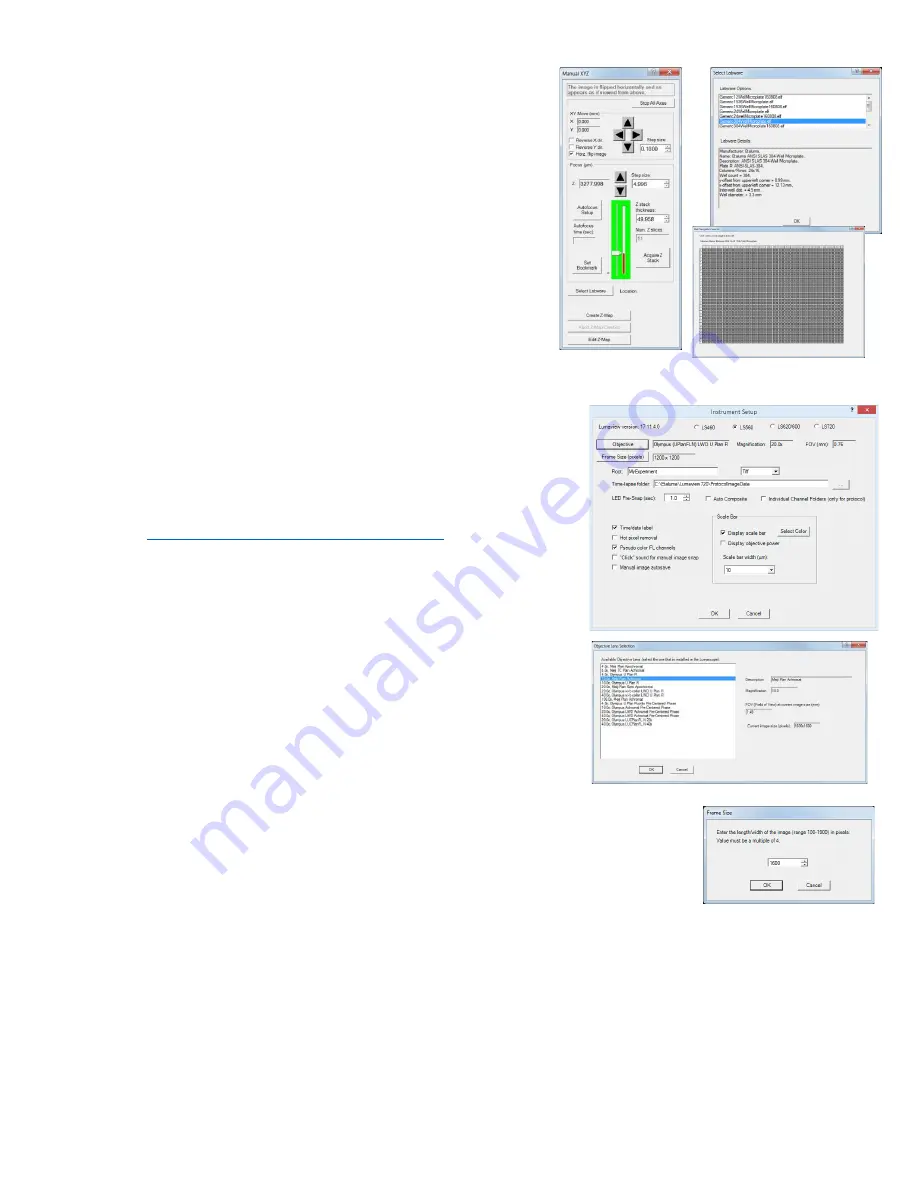
Test the calibration on other wells by clicking the
Select Labware button in Manual XYZ to opens its
dialog box. (If Manual XYZ is not already open, click
its icon in the left tool bar (second from top).
k.
Click on Generic1536WellMicroplate.elf to highlight
it and then click OK. The appropriate Labware Map
dialog box (1536 well in this case) will open. Click
on any well and the microplate carrier will move to
center that well over the objective. Test the
microplate corners and other wells distant from
each other. If any wells are not centered, repeat the
Calibration procedure described in this Section.
D.
Instrument Setup
1.
Click on Configuration in the File Menu bar to open the drop-
down menu and select Instrument Setup to open its dialog box.
2.
Check the Lumaview version to make sure it is the most
recently posted version on the Etaluma website
(
www.etaluma.com/products/downloads/
). Ensure that
the correct model microscope being used is checked. If it is
necessary to change the LS Microscope model number that
is checked, you will be prompted to restart the program. Be
sure to restart so that all functions work correctly.
3.
Click the Objective button to open its dialog box (called
Objective Lens Selection). Select the desired objective to
highlight it. Note that other fields about the objective and
image automatically fill based on magnification and a frame
size of 1200 x 1200 pixels. Click OK. Once selected, the same
information automatically fills in Instrument Setup.
4.
Click the Frame Size button to open its dialog box. Using the pull-down menu,
select frame size desired. While the maximum is 1900 x 1900 pixels, the
default is set to 1600 x 1600 pixels. 1200 x 1200 should be a square within
the circular area of the objective while 1600 x 1600 will surround this area
showing some darkening in the corners. If faster frame rates are needed, use
smaller frame sizes, e.g., 200 x 200 pixels and decrease the Exposure.


