


366
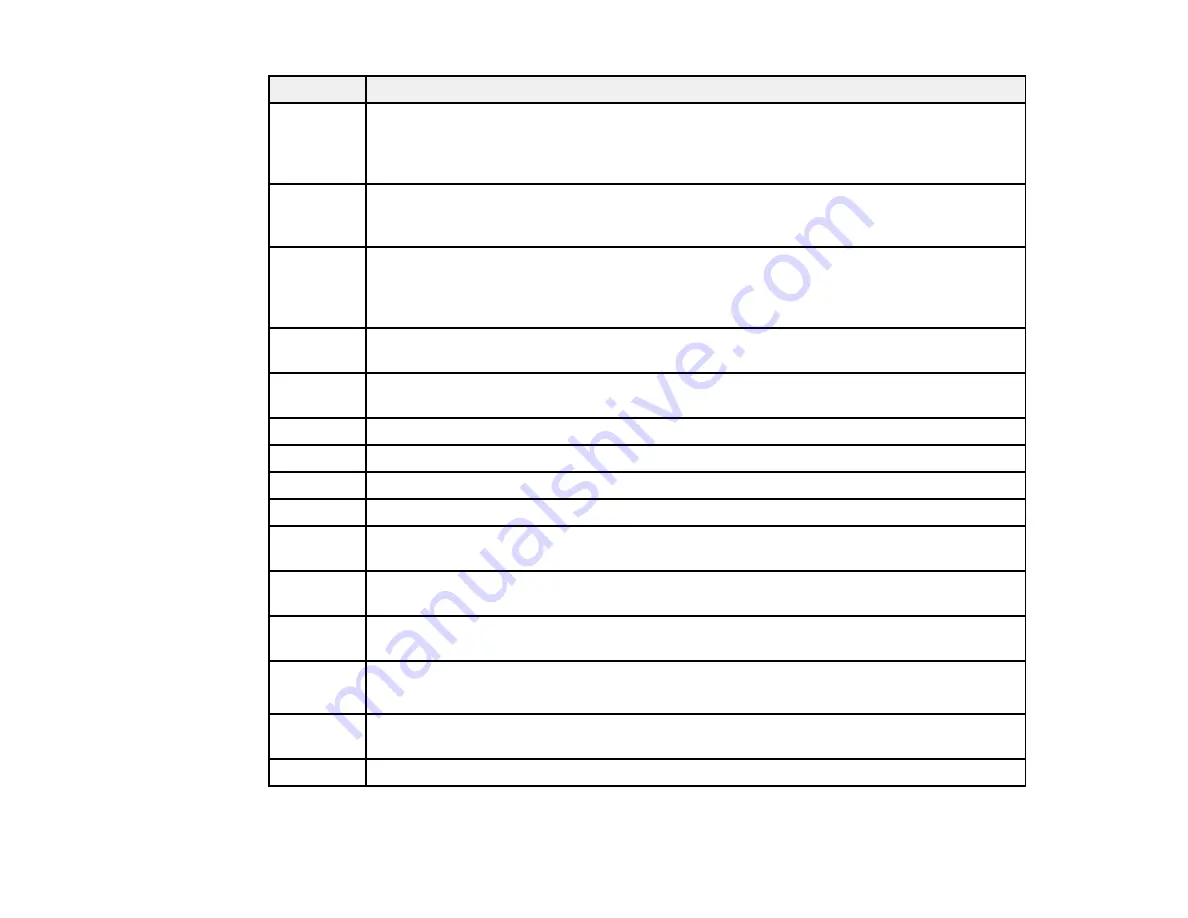
Code
Condition/solution
102
Collated printing has failed due to a lack of available memory. Clear fonts and macros
from the product's memory using the
PDL Font, Macro
option from the
Settings
>
General Settings
>
System Administration
>
Clear Internal Memory Data
menu,
reduce the size of the print job, or print one copy at a time.
103
Print quality was decreased due to a lack of available memory. If the quality of the printout
is unacceptable, try simplifying the page by reducing the number of graphics or the
number and size of the fonts.
104
Reverse printing has failed due to a lack of available memory. Clear fonts and macros
from the product's memory using the
PDL Font, Macro
option from the
Settings
>
General Settings
>
System Administration
>
Clear Internal Memory Data
menu or
reduce the data size of the print job.
106
Cannot print from the computer due to access control settings. Contact your product
administrator.
107
User authentication failed and the job has been canceled. Contact your product
administrator.
108
Confidential job data was deleted when the product was turned off.
109
The received fax was already deleted.
110
The job was printed 1-sided because the loaded paper does not support 2-sided printing.
111
Available memory is running low. Reduce the size of the print job.
120
Cannot communicate with a server using an open platform. Check the server or network
for errors.
130
Collated printing has failed due to a lack of available memory. Reduce the size of the print
job.
131
Reverse printing has failed due to a lack of available memory. Reduce the size of the print
job.
132
133
The product's memory is full. Reduce the size of the print job.
201
The product's memory is full. You can send pages individually, or print received faxes and
delete them to free up memory space.
202
The line was disconnected by the recipient's fax machine. Wait a moment, then try again.
Содержание WF-C869R
Страница 1: ...WF C869R User s Guide ...
Страница 2: ......
Страница 20: ...20 8 Attach the front cover to the stands 9 Remove the output tray from the product ...
Страница 25: ...25 5 Remove the output tray 6 Remove paper cassette 2 from the product ...
Страница 29: ...29 11 Insert a label into the holder indicating the paper size to be loaded in each of the paper cassettes ...
Страница 37: ...37 2 Select Settings 3 Select General Settings 4 Select Basic Settings 5 Select Date Time Settings ...
Страница 56: ...56 8 Optional cabinet 1 Rear paper feed edge guides 2 Paper support and extension ...
Страница 74: ...74 Parent topic Product Basics Related topics Wi Fi or Wired Networking ...
Страница 142: ...142 You see this window 3 Select the double sided printing options you want to use 4 Click OK to return to the Main tab ...
Страница 223: ...223 You see an Epson Scan 2 window like this ...
Страница 225: ...225 You see an Epson Scan 2 window like this ...
Страница 230: ...230 You see this window ...
Страница 246: ...246 DSL connection 1 Telephone wall jack 2 DSL filter 3 DSL modem ...
Страница 247: ...247 ISDN connection 1 ISDN wall jack 2 Terminal adapter or ISDN router ...
Страница 255: ...255 3 Select General Settings 4 Scroll down and select Fax Settings 5 Select Basic Settings 6 Select Rings to Answer ...
Страница 329: ...329 6 Pull out rear cover 2 D2 7 Remove the roller cover inside the printer ...
Страница 334: ...334 5 Open the rear cover E that matches with the paper cassette you removed ...
Страница 343: ...343 You see a window like this 4 Click Print ...
Страница 354: ...354 Parent topic Adjusting Print Quality Related topics Loading Paper ...
Страница 388: ...388 3 Carefully remove any jammed paper 4 Pull out rear cover 2 D2 ...
Страница 390: ...390 2 Open rear cover E on the optional paper cassette unit with the jammed paper ...
Страница 393: ...393 4 Carefully remove any jammed pages ...
Страница 394: ...394 5 Close the ADF cover then raise the document cover ...
Страница 395: ...395 6 Carefully remove any jammed pages 7 Lower the document cover ...


