226
7.
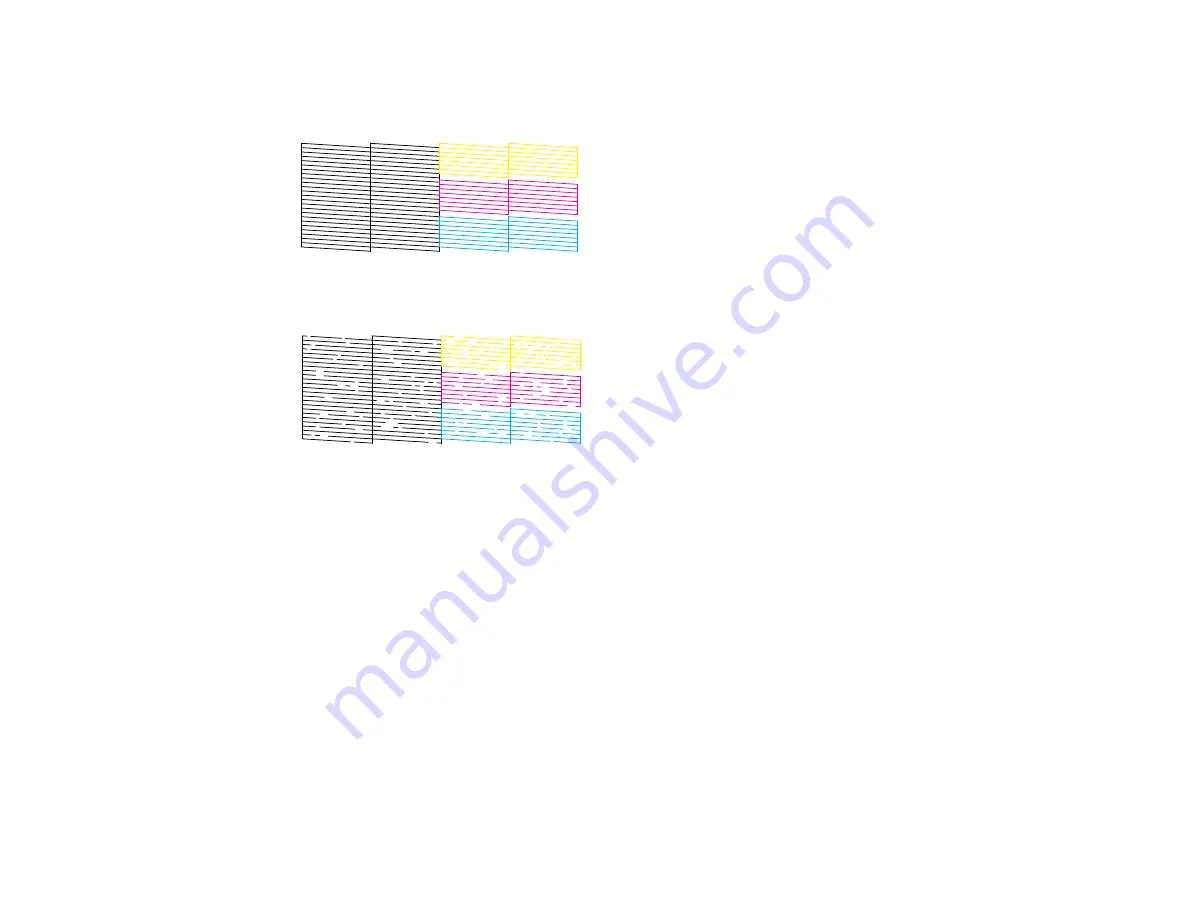
Check the printed pattern to see if there are gaps in the lines.
Print head is clean
Print head needs cleaning
8.
Do one of the following:
• If there are no gaps, select
Done
.
• If there are gaps or the pattern is faint, select
Clean the Print Head
and continue.
9.
Follow the instructions on the screen to clean the print head, check the nozzles, and repeat the
process as necessary.
If you don’t see any improvement after cleaning the print head up to 3 times, turn off the product and wait
at least 12 hours. Then check the print head nozzles and try cleaning the print head again, if necessary.
If quality still does not improve, contact Epson.
Parent topic:
Related concepts
Related tasks
Содержание ET-16500
Страница 1: ...ET 16500 User s Guide ...
Страница 2: ......
Страница 55: ...55 2 Pull out the paper cassette and remove the paper cassette cover 3 Slide the edge guides outward ...
Страница 61: ...61 2 Pull out the paper cassette and remove the paper cassette cover 3 Slide the edge guides outward ...
Страница 66: ...66 2 Pull out the paper cassette and remove the paper cassette cover 3 Slide the edge guides outward ...
Страница 70: ...70 3 Open the rear paper feed slot and push it back 4 Slide out the edge guides ...
Страница 88: ...88 Related topics Copying ...
Страница 132: ...132 You see an Epson Scan 2 window like this ...
Страница 134: ...134 You see an Epson Scan 2 window like this ...
Страница 136: ...136 You see this window ...
Страница 143: ...143 DSL connection 1 Telephone wall jack 2 DSL filter 3 DSL modem ...
Страница 144: ...144 ISDN connection 1 ISDN wall jack 2 Terminal adapter or ISDN router ...
Страница 155: ...155 You see this screen 6 Select Fax Output You see this screen 7 Select Settings ...
Страница 176: ...176 Windows OS X 5 To add an entry do one of the following Windows Select an empty entry and click the icon ...
Страница 223: ...223 6 Close the rear cover Parent topic Refilling Ink Related references Ink Bottle and Maintenance Box Part Numbers ...
Страница 264: ...264 2 Press the tabs and open the rear cover 3 Remove the duplexer ...
Страница 265: ...265 4 Carefully remove any jammed paper Note Do not touch the paper rollers 5 Remove any jammed paper from the duplexer ...
Страница 266: ...266 6 Open the duplexer 7 Carefully remove any jammed paper stuck inside 8 Reinstall the duplexer ...


