


3.
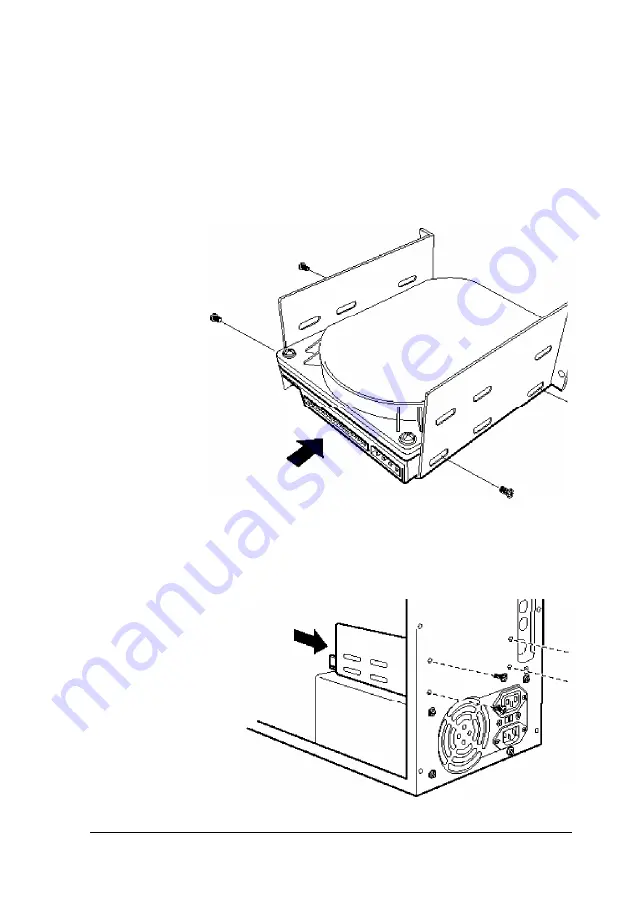
Place the rear internal drive bracket on your work surface as
shown in the illustration below.
4.
Position the drive so that its drive and power connectors
face the end of the bracket shown below. Then slide the
drive into the appropriate bay in the bracket and secure it
with the four screws that came with the drive.
5.
Replace the bracket as shown below and secure it to the back
panel with the four screws you removed earlier.
Installing and Removing Drives in the Tower Computer
6 - 1 7
Содержание Endeavor Pro
Страница 28: ...2 2 0 Setting Up Your System ...
Страница 38: ...The Integrated Peripherals options are described in the table below Running SETUP and lnstalling Drivers 2 9 ...
Страница 47: ...Green PC options continued 2 18 Running SETUP and lnstalling Drivers ...
Страница 57: ...Using Your Computer 3 5 ...
Страница 71: ...Installing and Removing Options 4 7 ...
Страница 163: ...Environmental Requirements System Memory Map A S Specifications ...
Страница 164: ...Video Resolutions and Colors Specifications A 9 ...
Страница 167: ...Hardware Interrupts System l O Address Map A 12 Specifications ...