


43
English
I
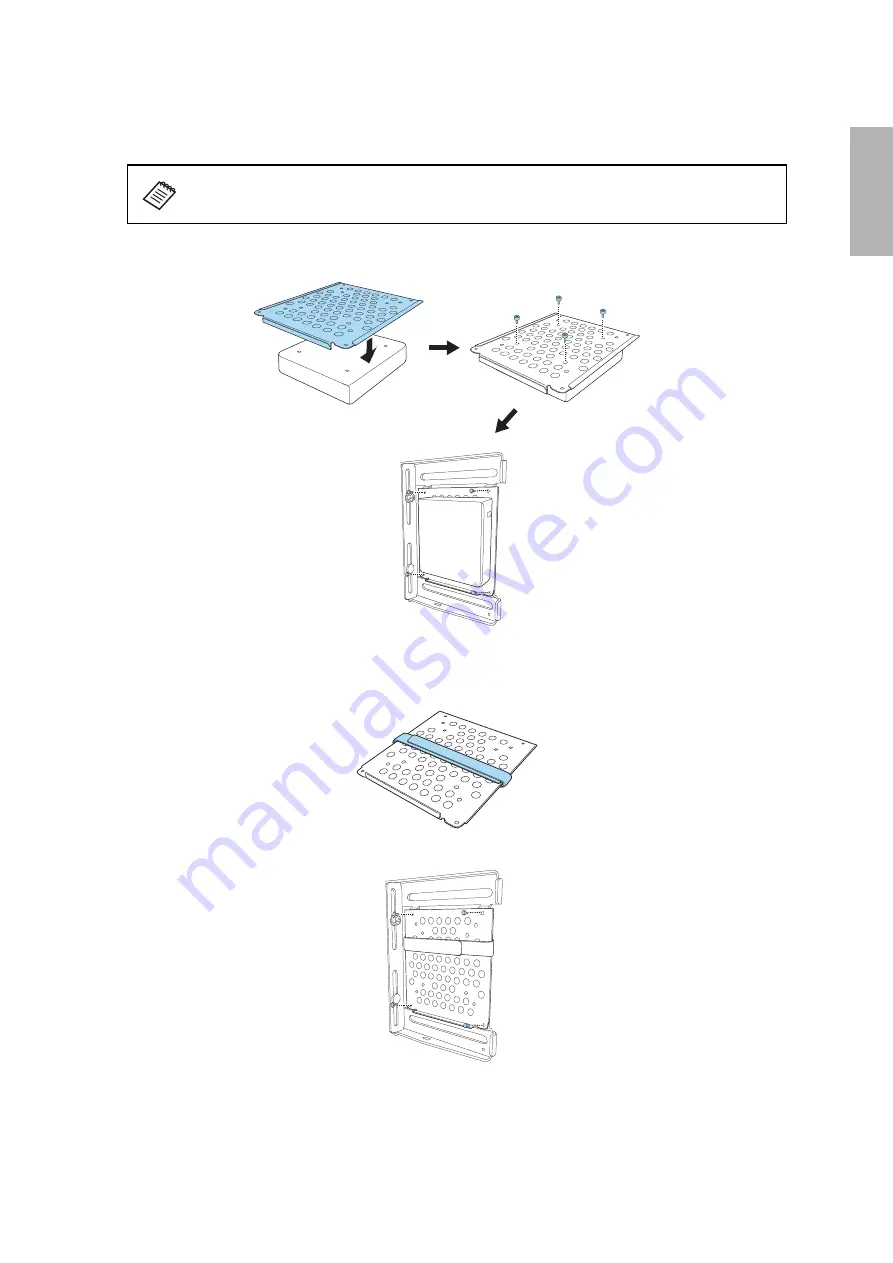
Attach a Mini PC or Stick PC if necessary
You can secure a Mini PC or Stick PC to the left or the right side of the wall plate.
If your Mini PC has screw holes that line up with the holes in the Mini PC plate, you can secure it with
the M3 × 6 mm screws (×4) supplied.
If your Mini PC does not have screw holes or they do not line up with the holes on the Mini PC plate, you
can secure it with the included Mini PC band.
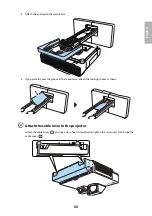
1. Wrap the band around the Mini PC plate.
2. Secure the Mini PC plate to the wall plate using the M3 × 6 mm screws (×4) supplied.
Attach the Mini PC so that the air exhaust vents of the PC are not blocked. Install the PC
so that the air exhaust vents are at the top and the air intake vents are at the bottom.
Содержание ELPMB62
Страница 1: ...Installation Guide ...
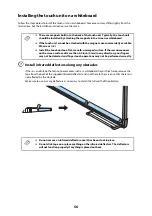
Страница 44: ...44 3 Rest the PC on the lip of the Mini PC plate and secure it with the band ...
Страница 61: ...61 English Secure the touch unit with two 2 M4 screws not included Re attach the rubber caps 0 8 in 20 mm ...
Страница 83: ...83 English F Attach the front cover ...


