9.
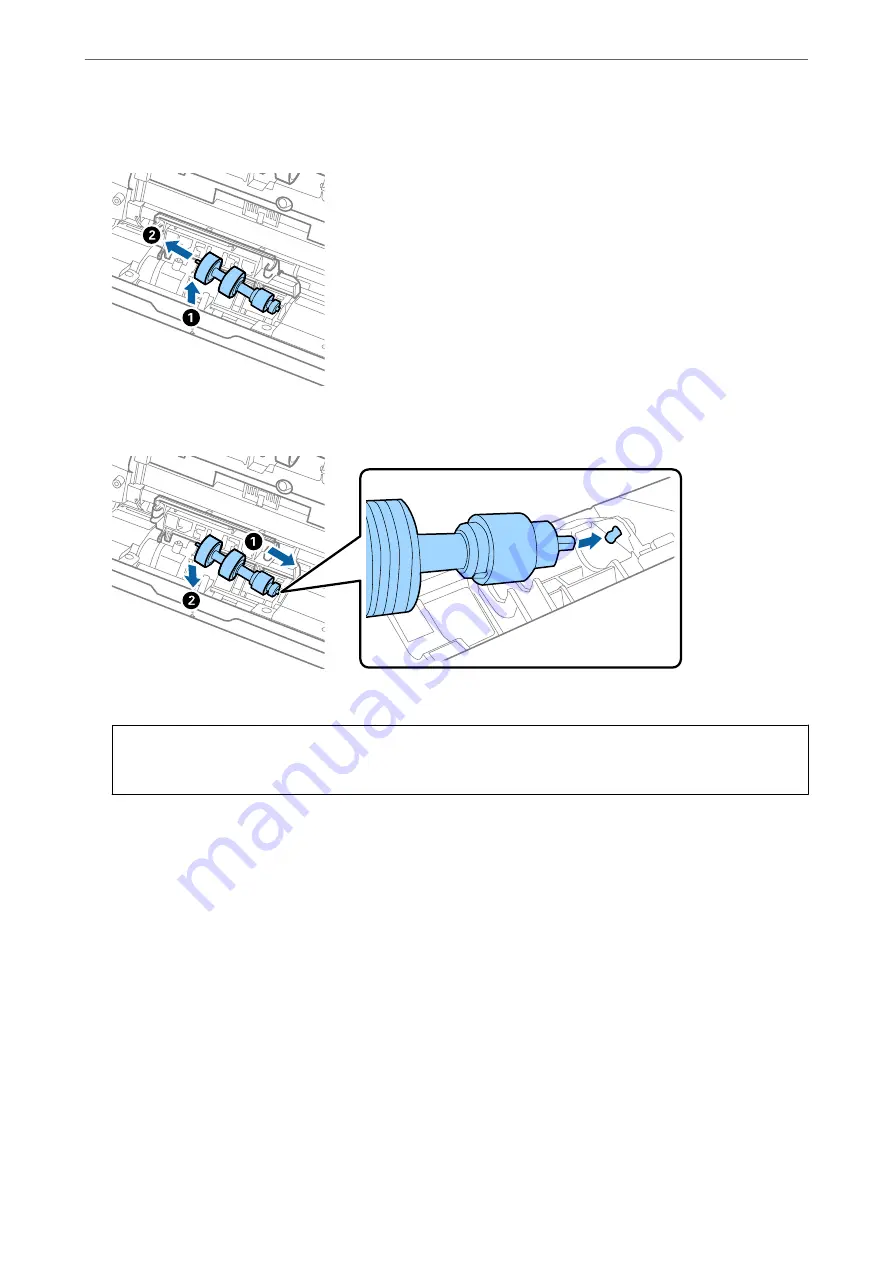
Lift the left side of the separation roller, and then slide and remove the installed separation rollers.
10. Insert the new separation roller axis into the hole on the right side, and then lower the roller.
11. Close the separation roller cover.
c
Important:
If the cover is hard to close, make sure the separation rollers are installed correctly.
12. Close the scanner cover.
13. Plug in the AC adapter, and then turn on the scanner.
14. Reset the scan number by using Epson Scan 2 Utility.
Note:
Dispose of the pickup roller and the separation roller following the rules and regulations of your local authority. Do not
disassemble them.
Related Information
&
“Roller Assembly Kit Codes” on page 27
Resetting the Number of Scans After Replacing the Rollers
Reset the number of scans using Epson Scan 2 Utility after replacing the Roller Assembly Kit.
>
Replacing the Roller Assembly Kit
>
Resetting the Number of Scans After Replacing the Rollers
92
Содержание B11B263401
Страница 10: ...Important Instructions Safety Instructions 11 Restrictions on Copying 12 ...
Страница 29: ...Specifications of Originals and Placing Originals Specifications of Originals 30 Placing Originals 35 ...
Страница 68: ...Scanning Scanning from a Computer 69 Scanning from Smart Device Epson Smart Panel 75 ...
Страница 171: ...Standards and Approvals Standards and Approvals for European Models 172 Standards and Approvals for U S Models 172 ...
Страница 174: ...Where to Get Help Technical Support Web Site 175 Contacting Epson Support 175 ...


