A-3
Establishing a Direct Serial Connection
10)
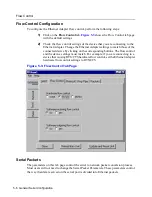
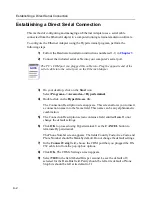
Choose None for the Flow control option.
11)
Click OK after all of the COM settings have been chosen.
The next screen appears blank.
12)
To bring up the local console management for the Ethernet Adapter, insert
one end of something similar to a tooth pick into the “config.” hole located
near the serial port on the Ethernet Adapter.
The Terminal Configurator appears on the screen. You have now successfully
opened a direct serial connection to Terminal Configurator!
If the Ethernet Adapter does not respond within a few seconds after pressing
the Configure button and is connected to power perform the following steps:
a)
Disconnect the power for a few seconds
b)
Reconnect the power.
c)
Press the configuration button again. If the terminal displays random
characters, check the baud rate and bit settings in your terminal
emulation software to insure 9600 baud, 8 data bits, no parity, and 1 stop
bit.
The serial port settings needed for use by the Terminal Configurator will
always be exactly as described here, regardless of the General Serial
Settings (
Chapter 5
).
If, after performing the above step, the Ethernet Adapter does not respond
with the configuration mode main menu, verify that there is not a cable
problem by observing the green “Serial TX” LED when pressing the ENTER
key on the PC. Each time the key is pressed, the "Serial TX" light should
blink faintly and quickly. If the “Serial TX” light is not blinking, there may
be a problem in the cable connection. If the "Serial TX" light blinks when the
ENTER key is pressed and the unit does not respond, check to see if the
serial configuration is set to 8 data bits, no parity, 1 stop bit.
NOTE
NOTE


