Using the Ethernet Adapter Manager
4-8 Ethernet Adapter Manager Installation
Upgrading the Ethernet Adapter Firmware
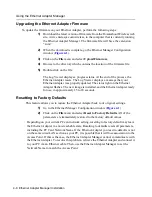
To update the firmware on your Ethernet Adapter, perform the following steps:
1)
Download the latest version of firmware from the RoamAbout Wireless web
site, www.enterasys.com/wireless, to the computer that is currently running
the Ethernet Adapter Manager. The firmware file will have the extension
“.rum”.
2)
When the download is complete, go the Ethernet Manager Configuration
window (
Figure 4-1
).
3)
Click on the File menu and select Upload Firmware.
4)
Browse to the directory which contains the location of the firmware file.
5)
Double-click on the file.
The Log Viewer displays a progress status. At the end of the process, the
Ethernet Adapter resets. The Log Viewer displays a message that your
Ethernet Adapter was properly updated. The status light on the Ethernet
Adapter flashes. The new image is installed, and the Ethernet Adapter ready
for use, in approximately 15 to 20 seconds.
Resetting to Factory Defaults
This feature allows you to restore the Ethernet Adapter back to its original settings.
1)
Go to the Ethernet Manager Configuration window (
Figure 4-1
)
2)
Click on the File menu and select Reset to Factory Defaults. All of the
parameters are immediately restored to the factory default values.
Depending on your current PC card network setting, resetting to factory default may leave
the Ethernet Adapter in a non-reachable state. Resetting to defaults resets all parameters,
including the PC Card Network Name. If the Ethernet Adapter you reset to defaults is not
on the same wired LAN section as your PC, it is possible that it will lose association to the
Access Point. If this is the case, the Ethernet Adapter Manager cannot communicate with
the Ethernet Adapter. To resolve this problem, retrieve the Ethernet Adapter and connect it
to your PC via an Ethernet cable. Then, use the Ethernet Adapter Manager to set the
Network Name to match the Access Point.


