background image

Table of Contents

vi  

4  Ethernet Adapter Manager Installation

Installation . . . . . . . . . . . . . . . . . . . . . . . . . . . . . . . . . . . . . . . . . . . . . . . . . . . . . . . . . . . . . . .  4-1
Uninstall . . . . . . . . . . . . . . . . . . . . . . . . . . . . . . . . . . . . . . . . . . . . . . . . . . . . . . . . . . . . . . . . .  4-2
Using the Ethernet Adapter Manager. . . . . . . . . . . . . . . . . . . . . . . . . . . . . . . . . . . . . . . . . . .  4-3

Starting the Ethernet Adapter Manager. . . . . . . . . . . . . . . . . . . . . . . . . . . . . . . . . . . . . .  4-3
Configuring the Ethernet Adapter. . . . . . . . . . . . . . . . . . . . . . . . . . . . . . . . . . . . . . . . . .  4-4
Saving a Configuration . . . . . . . . . . . . . . . . . . . . . . . . . . . . . . . . . . . . . . . . . . . . . . . . . .  4-6
Loading a Configuration . . . . . . . . . . . . . . . . . . . . . . . . . . . . . . . . . . . . . . . . . . . . . . . . .  4-6
Setting and Removing Passwords. . . . . . . . . . . . . . . . . . . . . . . . . . . . . . . . . . . . . . . . . .  4-7
Upgrading the Ethernet Adapter Firmware  . . . . . . . . . . . . . . . . . . . . . . . . . . . . . . . . . .  4-8
Resetting to Factory Defaults . . . . . . . . . . . . . . . . . . . . . . . . . . . . . . . . . . . . . . . . . . . . .  4-8
Changing Your PC Card Type . . . . . . . . . . . . . . . . . . . . . . . . . . . . . . . . . . . . . . . . . . . .  4-9
Using the Log Viewer. . . . . . . . . . . . . . . . . . . . . . . . . . . . . . . . . . . . . . . . . . . . . . . . . . .  4-9

PC Card Configuration. . . . . . . . . . . . . . . . . . . . . . . . . . . . . . . . . . . . . . . . . . . . . . . . . . . . .  4-12

Basic Tab Page . . . . . . . . . . . . . . . . . . . . . . . . . . . . . . . . . . . . . . . . . . . . . . . . . . . . . . .  4-12
Advanced Tab Page  . . . . . . . . . . . . . . . . . . . . . . . . . . . . . . . . . . . . . . . . . . . . . . . . . . .  4-14
Encryption Tab Page. . . . . . . . . . . . . . . . . . . . . . . . . . . . . . . . . . . . . . . . . . . . . . . . . . .  4-15

Configuring the Ethernet Adapter to Connect to a Wired Ethernet Device. . . . . . . . . . . . .  4-17
Network Configuration  . . . . . . . . . . . . . . . . . . . . . . . . . . . . . . . . . . . . . . . . . . . . . . . . . . . .  4-18

5  General Serial Configuration

Configuration Flowchart  . . . . . . . . . . . . . . . . . . . . . . . . . . . . . . . . . . . . . . . . . . . . . . . . . . . . 5-1
UART Settings . . . . . . . . . . . . . . . . . . . . . . . . . . . . . . . . . . . . . . . . . . . . . . . . . . . . . . . . . . . .  5-3
Flow Control  . . . . . . . . . . . . . . . . . . . . . . . . . . . . . . . . . . . . . . . . . . . . . . . . . . . . . . . . . . . . .  5-5

Hardware Flow Control  . . . . . . . . . . . . . . . . . . . . . . . . . . . . . . . . . . . . . . . . . . . . . . . . .  5-5
Software Flow Control . . . . . . . . . . . . . . . . . . . . . . . . . . . . . . . . . . . . . . . . . . . . . . . . . .  5-5
Flow Control Configuration . . . . . . . . . . . . . . . . . . . . . . . . . . . . . . . . . . . . . . . . . . . . . .  5-6
Serial Packets  . . . . . . . . . . . . . . . . . . . . . . . . . . . . . . . . . . . . . . . . . . . . . . . . . . . . . . . . . 5-6

6  Wireless Printing

Configuring the Ethernet Adapter to Enable Wireless Printing. . . . . . . . . . . . . . . . . . . . . . .  6-1

Содержание Wireless Ethernet Adapter I

Страница 1: ...Wireless Ethernet Adapter Installation and User s Guide 9033642 E N J O Y T H E F R E E D O M O F W I R E L E S S N E T W O R K I N G ENTERASYS COM...

Страница 2: ......

Страница 3: ...ON CONTAINED IN IT EVEN IF ENTERASYS NETWORKS AND ITS LICENSORS HAVE BEEN ADVISED OF KNOWN OR SHOULD HAVE KNOWN THE POSSIBILITY OF SUCH DAMAGES November 2000 by Enterasys NetworksTM Inc All Rights Res...

Страница 4: ...uipment off and on the user is encouraged to try to correct the interference by one or more of the following measures Reorient or relocate the receiving antenna Increase the separation between the equ...

Страница 5: ...ipment Type Environment Information Technology Equipment for use in a Commercial or Light Industrial Environment We the undersigned hereby declare under our sole responsibility that the equipment pack...

Страница 6: ......

Страница 7: ...ocuments x Getting Help xi 1 Preparing for Installation Site Requirements 1 1 Unpacking and Inspecting 1 3 Components 1 3 Ethernet Adapter 1 4 2 Configuration Overview Wireless Infrastructure Network...

Страница 8: ...Factory Defaults 4 8 Changing Your PC Card Type 4 9 Using the Log Viewer 4 9 PC Card Configuration 4 12 Basic Tab Page 4 12 Advanced Tab Page 4 14 Encryption Tab Page 4 15 Configuring the Ethernet Ad...

Страница 9: ...a Direct Serial Connection A 2 Establishing a Telnet Connection A 4 Using the Terminal Configurator A 4 Main Menu Overview A 5 The Editor A 6 Configuration File Format A 7 File contents A 7 Network B...

Страница 10: ......

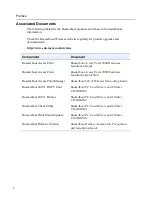
Страница 11: ...requirements and specifications Chapter 2 Contains a configuration overview Chapter 3 Contains the step by step procedures to install the RoamAbout Ethernet Adapter Chapter 4 Contains the RoamAbout Et...

Страница 12: ...ess Point RoamAbout Access Point 2000 Hardware Installation Quick Start RoamAbout Access Point Manager RoamAbout 802 11 Wireless Networking Guide RoamAbout 802 11 DS PC Card RoamAbout PC Card Drivers...

Страница 13: ...of your network environment for example layout and cable type Network load and frame size at the time of trouble if known The device history for example have you returned the device before is this a r...

Страница 14: ......

Страница 15: ...Ethernet Adapter and check the contents of the shipment Site Requirements Review the following to ensure that all site preparation tasks were completed Ensure that the Ethernet LAN is in place and is...

Страница 16: ...C Relative Humidity 0 to 90 non condensing Radio Interface RoamAbout 802 11 PC Card Ethernet Interface RJ45 10BaseT swapped to allow the use of a straight through cable when connected to a computer S...

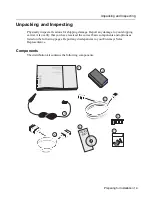
Страница 17: ...ing damage Report any damage to your shipping carrier Also verify that you have received the correct basic components and options as listed on the following pages Report any discrepancies to your Ente...

Страница 18: ...Power Cord 5 RS 232 serial cable 6 CD ROM containing the RoamAbout Ethernet Adapter Manager software and the RoamAbout Ethernet Adapter Installation and User s Guide in PDF You can access this guide...

Страница 19: ...an Access Point AP connected to a wired LAN A RoamAbout wireless infrastructure can support clients with various supported operating systems Infrastructure mode is often used in systems that have heav...

Страница 20: ...andard enable clients to move throughout the wireless LAN area and roam between Access Points Re association can occur as long as the Ethernet Adapter has the same network name as the AP to which it i...

Страница 21: ...e Figure 2 2 shows a network in which three Ethernet Adapter units are used to provide wireless connectivity between Ethernet devices In this configuration the Ethernet Adapter units and PC cards make...

Страница 22: ......

Страница 23: ...from the packaging The Ethernet Adapter ships fully assembled To install the PC Card and use the Ethernet Adapter some disassembly and re assembly is required 2 Remove the cap from the Ethernet Adapt...

Страница 24: ...own in Figure 3 2 Figure 3 2 Removing the Bottom Mounting Plate 4 Remove the small combs from the end cap The combs are generally not needed The combs when cut to an appropriate size are for use only...

Страница 25: ...late where desired as shown in Figure 3 4 Then place the Ethernet Adapter onto the mounting plate and snap it into place Ensure that the Ethernet Adapter is secure Figure 3 4 Installing the Mounting P...

Страница 26: ...dapter Manager Proceed to Chapter 4 to install the Ethernet Adapter Manager Ethernet Adapter LED Indicators As shown in Table 3 1 there are five LED indicators Table 3 1 LEDs LED Description Power Lig...

Страница 27: ...gurations Update the Ethernet Adapter firmware Installation To install the Ethernet Adapter Manager perform the following steps 1 Insert the Ethernet Adapter Manager CD ROM into the CD ROM drive If th...

Страница 28: ...f the program folder created 6 Click FINISH to complete the installation of the Ethernet Adapter Manager Uninstall To uninstall the Ethernet Adapter Manager perform the following steps 1 Select Start...

Страница 29: ...et Adapter units currently detected All Ethernet Adapter units are controlled from this main window Table 4 1 RoamAbout Ethernet Adapter Unit List The RoamAbout Ethernet Adapter Unit List window butto...

Страница 30: ...erform the following steps 1 Highlight the Ethernet Adapter that you want to configure 2 Click on the Configure button or double click on the desired Ethernet Adapter listing The Configuration window...

Страница 31: ...network configuration Serial Provides the configuration screens for serial configuration Radio Provides the configuration screens for the PC Card Button Action Close Closes the current configuration w...

Страница 32: ...save the current configuration The default path is the RoamAbout program directory 5 Click Open In this case the Open button is used to save the file Loading a Configuration The Ethernet Adapter Mana...

Страница 33: ...Update Password Now The new password is immediately active Removing a Password To remove a password perform the following steps 1 Go to the Configuration window Figure 4 1 2 Click on the File menu and...

Страница 34: ...ashes The new image is installed and the Ethernet Adapter ready for use in approximately 15 to 20 seconds Resetting to Factory Defaults This feature allows you to restore the Ethernet Adapter back to...

Страница 35: ...ribed in Resetting to Factory Defaults on page 4 8 4 Load the configuration you just saved by following the instructions described in Loading a Configuration on page 4 6 All non radio parameters will...

Страница 36: ...he event log of your Ethernet Adapter select the Read Event Log option from the File menu To clear the entries from the event log select the Clear Event Log option from the File menu Roaming Log The R...

Страница 37: ...ard Table Figure 4 3 displays the MAC addresses detected by the Ethernet Adapter The table lists the interface wire or PC card where each MAC address was observed The time for each entry indicates the...

Страница 38: ...green To configure the PC card settings perform the following steps Basic Tab Page 1 Open the configuration window for the desired Ethernet Adapter as described in Using the Ethernet Adapter Manager...

Страница 39: ...me network name will associate with each other Alphanumeric values may be used in this field 4 Enter the Station Name The Station Name is an identifier for each Ethernet Adapter The value supplied in...

Страница 40: ...anced Tab Page 1 Select the MAC Address option There are three options Detect detects the first packet received on the wired side not the radio side This feature sets the MAC address used by the wirel...

Страница 41: ...ncryption is necessary to associate to an Access Point which is configured to deny unencrypted connections Consult your PC card documentation for a detailed description of how to set up encryption In...

Страница 42: ...to the PC card documentation for the encryption levels supported by your PC card 4 Select a transmit key The transmit key is the encryption key used by the Ethernet Adapter to encrypt messages sent ov...

Страница 43: ...on to performing any one of the serial port applications discussed in the following chapters To configure the Ethernet Adapter to connect to a wired Ethernet device perform the following steps 1 Compl...

Страница 44: ...the telnet protocol To configure the network settings perform the following 1 Ensure that you complete the PC card configuration described in the PC Card Configuration section on page 4 12 2 Click on...

Страница 45: ...se the Ethernet Adapter to access computers or other Ethernet Adapter units beyond your Internet router or firewall A gateway entry is only needed for serial applications that actively connect to an I...

Страница 46: ......

Страница 47: ...ere are two groups of parameters that need to be configured to accomplish this task the UART Settings and the Flow Control Settings Configuration Flowchart Figure 5 1 can assist you with the Ethernet...

Страница 48: ...ment Serial Telnet Client Network Serial Port Socket Listen Method Socket Connect Method RMP Pipe TCP Pipe Command Prompt Method Wait For Keystroke Method Network Name Baud Rate Data Bits Stop Bits Pa...

Страница 49: ...igure the UART settings perform the following steps 1 Clicking on the Serial tab 2 Click on the UART tab The UART tab page is shown in Figure 5 2 with the default settings Figure 5 2 Serial UART Tab P...

Страница 50: ...the device you are connecting to the Ethernet Adapter Choose the Stop Bits setting that matches the Stop Bits setting of the device you are connecting to the Ethernet Adapter Stop Bits determine the n...

Страница 51: ...nsmission of data from the source to receiver In the incoming direction flow control prevents the Ethernet Adapter from sending data when the computer is not ready to accept it With incoming flow cont...

Страница 52: ...tch those of the connected device by clicking on the corresponding buttons The flow control and the device settings must match For example if you are connecting to a device that is using RTS CTS hardw...

Страница 53: ...ort to the printer Data received from the serial port is ignored This means the Ethernet Adapter ignores data received from the printer except for software flow control characters See Software Flow Co...

Страница 54: ...match those of your printer 7 Click on the Update and Reset Unit button to complete the configuration The Ethernet Adapter is now configured to act as a LPD print server for your serial printer If the...

Страница 55: ...ter communicates with a serial terminal or a computer that is running terminal emulation software Some common examples of terminal emulation software include HyperTerminal ProComm and Telix Configurat...

Страница 56: ...me into the Name field This name can be any alphanumeric combination 5 The Connection Description screen contains a field entitled Icon Do not change the default settings 6 Click OK to proceed using H...

Страница 57: ...guration button again If the terminal displays random characters check the baud rate and bit settings in your terminal emulation software to insure 9600 baud 8 data bits no parity and 1 stop bit The s...

Страница 58: ...igurator Using the Terminal Configurator Once you have established a connection to the Terminal Configurator the Main Menu screen appears Use the arrow keys to move the highlighted bar If the arrow ke...

Страница 59: ...r unit or to generate a file for Enterasys RoamAbout Technical Support if you have any difficulties Reset configuration to default Sets all configuration files to their factory default A confirmation...

Страница 60: ...otion For faster motion you can use Ctrl A to jump to the beginning of the line and Ctrl E to jump to the end To make changes in the Editor move the cursor to the point you want to change and enter th...

Страница 61: ...s Key value pairs listed before a section name are invalid Comments may be stored in the configuration file by inserting a pound sign before the text to be added This allows room for an explanation as...

Страница 62: ...2400 9600 19200 38400 57600 and 115200 are clocked precisely but values in between will be rounded to the closest possible hardware setting data bits In a UART character frame this selects the number...

Страница 63: ...mation is removed and the data inside the wrapper is sent out the serial port as fast as it can go However data being received over the serial port must be converted into packets In order to perform t...

Страница 64: ...rated list of ASCII values The values can be written as decimal or hexadecimal numbers protocol The data format of the communication between the UART and radio network is defined by the protocol Possi...

Страница 65: ...ls that have their own wires independent of the data wires The outgoing flow control options specify the method of communication that is used between the Ethernet Adapter and the host computer This co...

Страница 66: ...s are yes and no rts Allowed values are yes and no dtr Allowed values are yes and no outgoing software Allowed values are yes and no dsr Allowed values are yes and no cts Allowed values are yes no and...

Страница 67: ...the name of a section that describes the network connection to use Also the connection must use the RMP protocol This is typically set to the rmpbind section passthrough The following section specifi...

Страница 68: ...mbination ASCII values The default value is Press any key to connect to host The double quote marks are a part of this value unlike in previous examples Binary data can be added by writing data as hex...

Страница 69: ...ill be accepted All other data will be ignored that does not have the source address filter set to a specific address The default value is none destination address This address tells the Ethernet Adap...

Страница 70: ...CP protocol to specify the address to which to connect Connect must be selected for the IP address to be used local tcp port This port defines the TCP port number that the Ethernet Adapter will wait f...

Страница 71: ...his name determines the network to which the Ethernet Adapter device will be connecting Alphanumeric values may be used in this field The default is ANY The network name is case sensitive station name...

Страница 72: ...reless Networking Guide for the procedure to check firmware versions A hexadecimal digit key must start with 0x which is not counted in the number of digits For example 0xABCDEF0123 is a valid 40 bit...

Страница 73: ...k this is the IP address that is used to refer to all computers simultaneously The default automatic will work for almost all configurations There should be no need to change this value route For this...

Страница 74: ......

Страница 75: ...net Adapter is not operating properly please make sure the Ethernet Adapter is running the latest firmware and use this guide before contacting Technical Support If you receive an error message in you...

Страница 76: ...s The power light is on steady and the status light is on Configuration or software alert condition Check the System Event Log to determine the cause and refer to the following Event Log Error Table R...

Страница 77: ...f the Ethernet Adapter is attached to a hub a crossover Ethernet cable must be used If the Ethernet Adapter is attached directly to an Ethernet device i e a PC or Ethernet printer it must be a straigh...

Страница 78: ...actory Defaults Reset the Ethernet Adapter Restore configuration if applicable xxxx yyyy zzzz entry refers to non existent sec tion Entry zzzz refers to a section that is not located in file xxxx Save...

Страница 79: ...pared to the interface values Set the route value to automatic If automatic does not work for your Ethernet Adapter check the values you set for the route to make sure they correspond to your other IP...

Страница 80: ...hese steps succeed you do not have to perform the rest of the steps 1 Reset the Ethernet Adapter 2 Unplug the power wait for approximately 30 seconds and then reapply power 3 Reset the Ethernet Adapte...

Страница 81: ...cations where an RS 232 serial cable is being replaced by a pair of Ethernet Adapter units or when Ethernet Adapter units are being used to form a broadcast topology the RMP Pipe protocol should be us...

Страница 82: ...ou will need to change this setting Source Address Filter Setting this value will tell the Ethernet Adapter to only accept data coming from the specified address For example if this entry is set to 12...

Страница 83: ...uses each packet to be retried until successfully sent Select the Transmit Try Count based on the sensitivity of your application to data delay and or data loss Transmit Retry Interval When making add...

Страница 84: ...b 5 Select TCP Pipe 6 Click on the Passthrough2 tab 7 Enter the Listen on port number for each unit Ensure that this number matches the Connect to port number of the opposite unit The defaults for bot...

Страница 85: ...example TCP Listen Passthrough should be used if you have a central server that expects to open a TCP IP socket connection to the Ethernet Adapter TCP Connect Passthrough In the TCP Connect Passthrou...

Страница 86: ...thernet Adapter to listen for and accept a new connection if the active one closes 5 Click on the Update and Reset Unit button TCP Connect Port Complete the configuration described in Network Serial P...

Страница 87: ...General Serial Configuration described in Chapter 5 4 Click on the Serial tab and then select the Protocol tab 5 Select the Telnet option in the Protocol list 6 Click on the Telnet tab at the top of t...

Страница 88: ...he IP address of the host computer or device The IP address may optionally be followed by the TCP port number on which to open the connection If the port number is omitted the industry standard defaul...

Отзывы: