EDM01-14 DAG 3.6D Card User Guide
©2005
6
Version 10: May 2006
2.2 Insert DAG 3.6D Card into PC
, continued
Procedure
(continued)
Step 2. Fit Card
Insert DAG 3.6D card into PCI bus slot.
Ensure free end fits securely into a card-end bracket that supports the card
weight.
Step 3. Replace bus Slot Screw
Secure card with screw.
Step 4. Power Up Computer
2.3 DAG 3.6D Card Port Connectors
Description
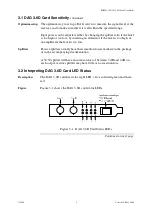
There are two metal co-axial BNC connectors on the DAG 3.6D card.
The top co-axial is Port A, furthest from the PCI slot. The bottom one is
Port B.
Port A is receive only, while port B can be ordered as either a second
receive port or a transmit port. Standard configuration is receive.
8-pin RJ45
socket
The DAG 3.6D has an 8-pin RJ45 socket for the time synchronization
input.
CAUTION: Do not connect the socket to an Ethernet.
Содержание DAG 3.6D
Страница 1: ......
Страница 5: ...EDM01 14 DAG 3 6D Card User Guide 2005 ii Version 10 May 2006...
Страница 21: ...EDM01 14 DAG 3 6D Card User Guide 2005 16 Version 10 May 2006...
Страница 22: ...EDM01 14 DAG 3 6D Card User Guide 2005 17 Version 10 May 2006...
Страница 26: ...EDM01 14 DAG 3 6D Card User Guide 2005 21 Version 10 May 2006...
Страница 34: ...EDM01 14 DAG 3 6D Card User Guide 2005 29 Version 10 May 2006...


