Step 1: Ensure that the unit has AC power connected and that the switch on the rear
panel is in the ON position. This is defined as Standby Mode.
Step 2: Verify the AC plug icon is on the LCD screen Main menu. This plug icon indicates
that the valid AC power is available.
Step 3: The AC6000 will normally initialize its startup routine when power is applied. If it
has manually been shut down or “Auto Start” has been disabled. Press and hold the
power button for 3 seconds. A countdown will appear on the screen while the button is
depressed.
Step 4: Ensure the Power icon is blinking in the lower right corner of the LCD. This
indicates that the system has started it’s initialization sequence.
Pre-Charge uses the battery to charge a large bank of capacitors. This charge time is
dependent upon how much remaining energy the capacitor bank has remaining since last
power-up, and could take up to 3 minutes to charge.
Step 5: After precharge and self-checks, the unit will power up.
5.5
Communicating with the AC6000
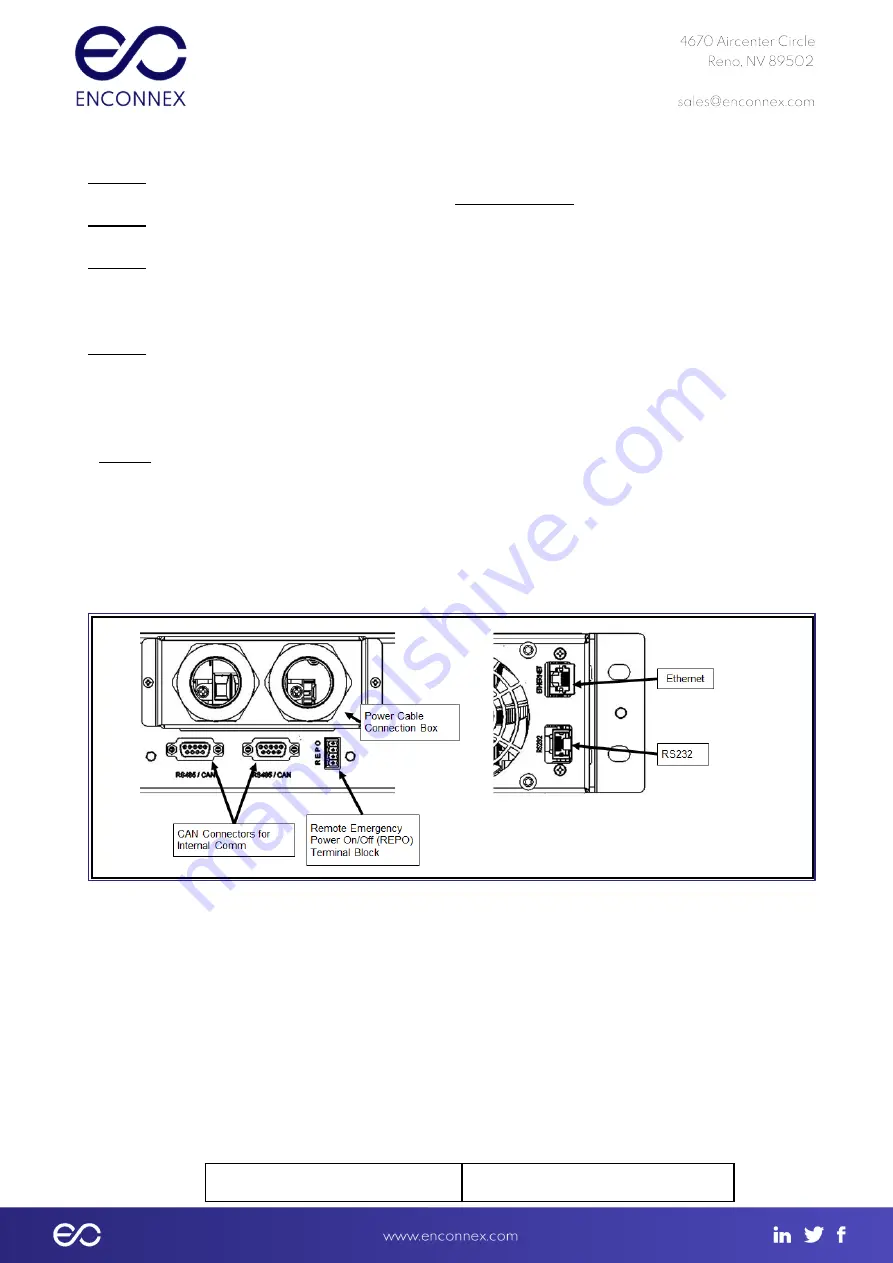
Communication with the AC6000 is necessary for either advanced unit configuration or for
field updates of component firmware. Figure 11 shows the available physical connection
ports.
Figure 5.5-1: AC6000 Rear-Panel Communication Ports for Troubleshooting
5.5.1
Webpage (HTTP) Configuration
The AC6000 webpage provides an intuitive and user-friendly interface for configuring the UPS.
The configuration page can be opened by simply opening a web browser on a computer
connected to the same subnet as the UPS and entering the IP address of the AC6000 into the
browsers URL field.
On the first attempt to access the webpage, the UPS will prompt for a username and
password. The default values are:
Username
Password
Содержание AC6000
Страница 1: ...Enconnex AC6000 UPS USER MANUAL ...


