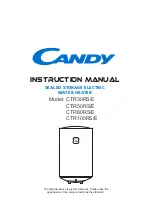
background image

Wing Nut

Mounting Nut

Rubber 

G

asket

Brass Nut

Ferrule

3

HOW TO USE THIS INSTRUCTION MANUAL

Provide

s

 a 

s

tep-by-

s

tep narrative de

s

cribing the in

s

tallation 

s

tep, with chec

k

 boxe

s

 that

can be mar

k

ed a

s

 you progre

ss

 through the in

s

tallation.

Contain

s


s

imple illu

s

tration

s

 that provide vi

s

ual in

s

truction to 

s

upport the narrative.

CAUTIONS, WARNINGS and DANGERS that will require your attention during the 

s

tep.

The

s

e in

s

truction

s

 are 

s

eparated into main 

s

ection

s

, indicated by number

s

, and 

s

ub

s

ection

s

,

indicated by capital letter

s

. The manual i

s


s

etup thi

s

 way to allow you to ta

k

e a brea

k

 at any

point after completing a 

s

ection or 

s

ub

s

ection without affecting the in

s

tallation proce

ss

What you’ll 

s

ee in the 

in

s

truction manual:

1

2

3

Valve

Lever

B

Press valve lever down for about 20 
seconds until water freely runs out of 
the spout. Hold valve open at lease 60 
seconds to let the water run to flush 
out the lines.

W

a

ter will be cold since t

a

nk h

a

s not 

been plugged in yet. 

Property D

a

m

a

ge:

 Do not connect electric power until 

tank is filled with water. Failure to do so my damage heating 
element or thermal safety fuse and will void the warranty.

1

2

An imminently hazardous situation, which, if not avoided, will result in death or serious injury.

A potentially hazardous situation, which, if not avoided, could result in death or serious injury.

A potentially hazardous situation, which, if not avoided, may result in minor or moderate injury.

3

Equipment You May Need:


For your satisfaction and safety, read all instructions, cautions, warnings and dangers before installing 
or using this instant hot water dispenser.

This particular unit is not intended for commercial use.

Make sure that all electrical wiring and connections conform to local codes.

A standard 115-volt grounded electrical outlet is required under the sink for the dispenser’s electrical power.

The wall outlet powering your dispenser must have power supplied to it continuously.

This outlet must be fused and should not be controlled by the same wall switch that operates the
disposer, unless you have a SinkTop Switch

from InSinkErator

®

.

Moving parts inside the tank causing a rattling noise is normal.

This unit does not contain a drain plug and should not be installed where periodic draining is required,
such as summer homes.

WHAT YOU SHOULD KNOW BEFORE YOU BEGIN

Equipment Required:


Compre

ss

ion fitting, 

T-fitting or 

s

addle valve


Adju

s

table wrench


Phillip

s

 and flat blade 

s

crewdriver

s


Pencil


Tape Mea

s

ure

Hole punch

Hole 

s

aw

Ba

s

in wrench

Drill

Level

If you intend to use the sprayer hole in your sink for your dispenser, you may need a basin wrench and 
a 1/8" plug or a 1/4" cap (

not supplied

) for the faucet spray hose line.

See Step 1-B.

If you need to cut a mounting hole in your stainless steel sink, you may need a 1

1

4

" - 1

1

2

" hole saw 

made for cutting stainless steel or a hole punch. Consult a professional if you are drilling into a surface
other than stainless steel.

WHAT YOU NEED TO GET STARTED

2

COMPONENTS IN THIS PACKAGE

A 115-volt grounded
outlet within 30 inche

s

of the di

s

pen

s

er i

s

required to provide
power to the tan

k

.

A minimum of
3

3

4

" of 

s

pace

i

s

 required 

between the 
center of the 
di

s

pen

s

er head

and 

s

pla

s

hboard/

wall in order for
the appliance to
operate properly.

Note:

The wall outlet for your

dispenser must have power 
supplied to it continuously and
must be fused. It should not be 
controlled by the same wall switch
that operates your disposer.

Содержание Insinkerator Hot1

Страница 1: ... ne se vidange pas correctement à cause d une faible pression d eau Le bec verseur est bloqué Débranchez l appareil Si la fuite ne cesse pas après quelques minutes vérifiez la soupape d alimentation pour vous assurer qu elle est bien ouverte et sans obstructions dans la conduite d eau réduisant la pression sous 30 psi par ex un robinet vanne mal monté un filtre d eau bloqué ou un robinet d arrêt p...

Страница 2: ...articular unit is not intended for commercial use Make sure that all electrical wiring and connections conform to local codes A standard 115 volt grounded electrical outlet is required under the sink for the dispenser s electrical power The wall outlet powering your dispenser must have power supplied to it continuously This outlet must be fused and should not be controlled by the same wall switch ...

Страница 3: ...r the sink Turn off water supply If using the sink sprayer hose hole remove nut that connects sprayer hose at bottom of faucet Using adjustable wrench remove nut connecting sprayer washer flange in sprayer hole Plug hose opening with either a 1 8 plug or a 1 4 cap not supplied 1 A B Consult a professional before drilling into a surface other than stainless steel C What if you don t have a sprayer ...

Страница 4: ...tely 2 full turns and pull out spout Mount the unit through the 1 3 8 diameter 35 mm hole in the sink Make sure the valve lever is in the up position and feed the spout end of the dispenser through the sink mounting hole A C INSTALLING THE DISPENSER While holding the dispenser in place with spout removed slip the rubber gasket and mounting nut over the valve lever and hand tighten the nut on the t...

Страница 5: ...Bend tube carefully CONNECTING WATER TO DISPENSER C B Push the tube end all the way into the T fitting or valve Hold the tube end in position and push the ferrule down as far as it will go Then tighten the nut over the ferrule with your fingers Make sure the tube end is going straight into the hole Then tighten the nut firmly with a 1 2 wrench When connecting to a compression type T fitting or val...

Страница 6: ...eplace or repair the unit in your home at no cost to you If your dispenser is replaced rather than repaired the warranty on the new unit shall be for the duration of the remaining portion of the original dispenser s warranty Note Warranty is determined by unit serial number and or date of installation Purchase or installation receipt may be required to verify warranty status When service is requir...

Страница 7: ...o reach new temperature Water is dripping from the spout vent intermittently The expansion chamber isn t draining properly due to low water pressure The spout is blocked Unplug the unit If the dripping doesn t stop after a few minutes check the supply valve to ensure that is fully open and there are no obstructions in the water line reducing the pressure below 30 psi i e a poorly mounted saddle va...

Страница 8: ...ipo que quizá necesite Para su satisfacción y seguridad lea todas las instrucciones precauciones advertencias y peligros antes de instalar o usar este surtidor de agua caliente al instante Esta unidad en particular no está diseñada para uso comercial Asegúrese de que todas las conexiones y cableados eléctricos cumplan con los códigos locales Se requiere un tomacorriente conectado a tierra estándar...

Страница 9: ...de jabón del fregadero por un surtidor de agua caliente al instante Si perfora un orificio en una taja o cubierta de acero inoxidable puede cortar un orificio de montaje para el surtidor con una broca corta círculos para acero inoxidable o puede usar un punzonador Diámetro requerido del orificio 13 8 35 mm Mínimo requerido a partir del centro del orificio hasta la pared Grosor máximo de la cubiert...

Страница 10: ...ntaje sobre la palanca de válvula y apriete con la mano la tuerca sobre el cilindro roscado Alinee el tubo surtidor de agua de modo que el agua corra hacia el fregadero y asegure el surtidor apretando la tuerca de mariposa desde la parte inferior del fregadero B D Vuelva a montar el tubo surtidor de agua asegurando el sello de goma en su sitio en la acanaladura interna del tubo surtidor antes de v...

Страница 11: ...re 10 15 minutos para que el agua alcance la temperatura deseada La presencia de borbotones o silbidos es normal durante el ciclo inicial de calentamiento También es normal que salga vapor y o agua caliente del tubo surtidor de agua sin accionar la manija Si después de la configuración se continúa emitiendo vapor quizá se necesiten ajustes del termostato pág 23 20 A 4 CONEXIÓN DE AGUA AL SURTIDOR ...

Страница 12: ...nte el periodo de garantía total a partir de la fecha de instalación en su hogar Si durante el periodo de garantía se requiere de su servicio póngase en contacto con un agente de servicio InSinkErator autorizado para reemplazar o reparar la unidad en su hogar sin costo alguno para usted Si su surtidor es reemplazado en lugar de ser reparado la garantía en la nueva unidad será por la duración de la...

Страница 13: ...tilación de manera intermitente La cámara de expansión no se ha drenado correctamente debido a la baja presión del agua El tubo surtidor de agua está bloqueado Desconecte la unidad Si no se detiene el goteo después unos pocos minutos verifique la válvula de suministro para asegurarse que esté totalmente abierta y no haya obstrucciones en la línea de agua que reduzcan la presión por debajo de 30 ps...

Страница 14: ...otre sécurité lisez toutes les instructions mises en garde avertissements et dangers avant d installer ou d utiliser ce distributeur d eau chaude instantanée Cet appareil n est pas conçu pour une utilisation commerciale Assurez vous que tous les câblages et connexions électriques soient conformes aux codes locaux Une prise électrique mise à la terre standard de 115 volts est nécessaire sous l évie...

Страница 15: ...ns le trou du pulvérisateur Bouchez l ouverture du boyau avec un bouchon de 1 8 po ou un capuchon de 1 4 po non fournis 1 A Consultez un professionnel si vous percez dans une surface autre que l acier inoxydable C Que faire si vous n avez pas de trou de pulvérisateur ou si vous ne désirez pas l utiliser De nombreux propriétaires remplacent le distributeur de savon de leur évier par un distributeur...

Страница 16: ...mplets et sortez le bec verseur Montez l appareil à travers le trou de 35 mm 1 3 8 po de diamètre de l évier Assurez vous que le culbuteur est dans la position relevée et acheminez l extrémité du bec verseur du distributeur à travers le trou de montage de l évier A C INSTALLATION DU DISTRIBUTEUR Tenez le distributeur en place avec le bec verseur retiré glissez le joint en caoutchouc et l écrou de ...

Страница 17: ...pas le fusible thermique de sécurité Si vous croyez que le fusible thermique est ouvert contactez votre centre de service autorisé Dommages à la propriété ne branchez pas le courant avant que le réservoir ne soit rempli d eau Sinon ceci pourrait endommager l élément chauffant ou le fusible de sécurité thermique et annulerait aussi la garantie 32 A 4 RACCORDER L EAU AU DISTRIBUTEUR C B Pliez et pla...

Страница 18: ...A GARANTIE Danger d incendie pour réduire les possibilités d incendie NE rangez PAS d articles inflammables comme des chiffons papier ou aérosols près du réservoir NE rangez PAS et N utilisez PAS d essence ou d autres vapeurs et liquides inflammables près de cet appareil ou de tout autre appareil élec troménager Un distributeur d eau chaude instantanée tout comme un chauffe eau a une durée de vie ...

Отзывы: