


71
EN
CCTV
4.3.6 Photos
In this tab, user can set up Resolution, quality, snap interval, snap number.
4.4 Schedule Configuration
Schedule configuration includes two sub menus: schedule and motion.
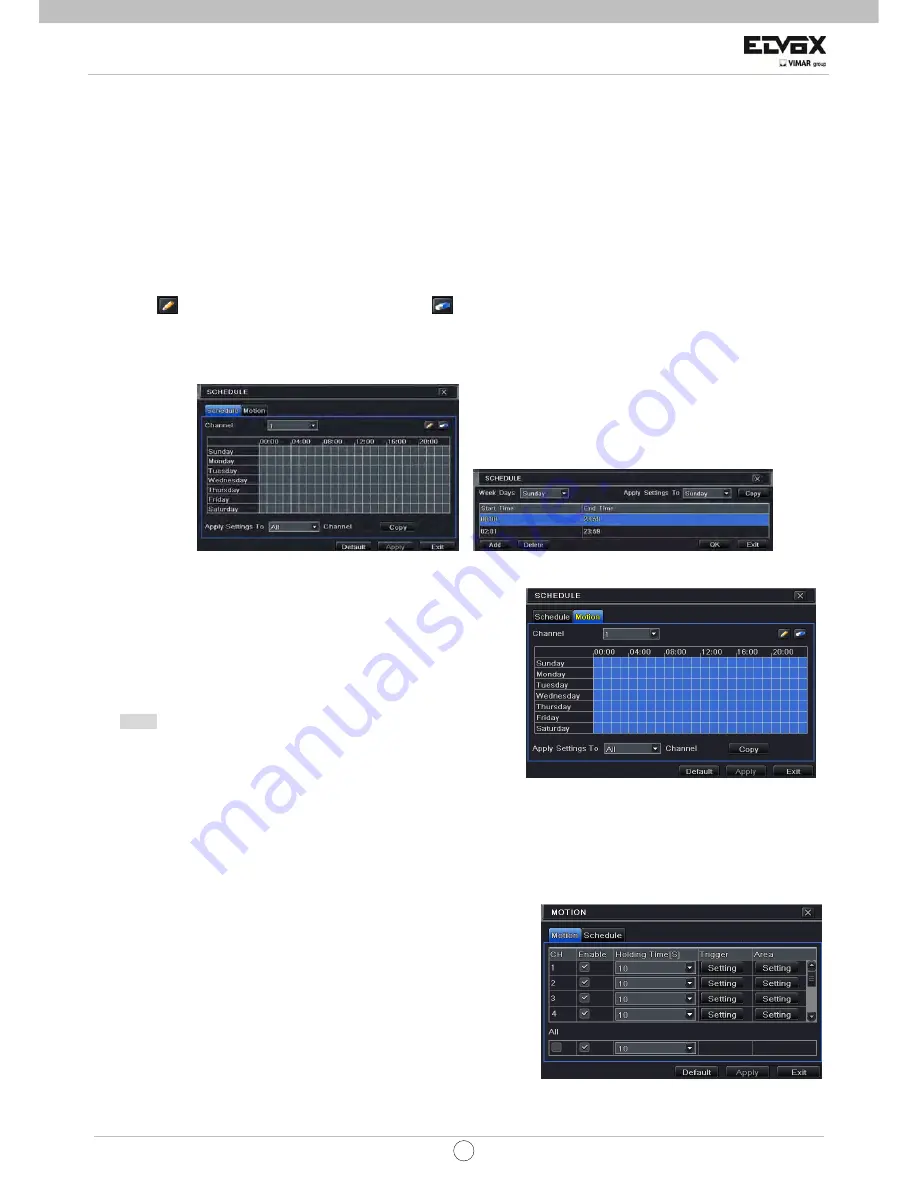
4.4.1 Schedule
This tab allows defining schedule for normal recording for seven days of a week, 24 hours of a day. Every row denotes an
hourly timeline for a day. Click the grid to do relevant setup. A highlighted area denotes selected timeline.
Step1: Enter into Menu
Æ
Setup
Æ
Schedule tab. Refer to Fig 4-14.
Step2: Select channel and double-click to pop up a window as Fig 4-15. Now you can edit week schedule:
Click “
” button to add a certain day schedule; click “
” button to delete the selected schedule;
Copy: Copy the specified schedule to other dates.
If you want to copy the schedule settings of a channel to other or all channels, you just need to select channel and click “Copy”
button.
Fig 4-14 Schedule Setup Fig 4-15 Week Schedule Setup
4.4.2
Motion
This tab allows to set up the recording program on motion-based detection.
Step1: Enter into Menu
Æ
Setup
Æ
Schedule
Æ
Motion tab. Refer to Fig
4-16:
Step2: The setup steps for schedule for motion based recording are
similar to normal schedule setup. You can refer to 4.4.1 Schedule for
details.
Note:
The default program for the movement-based registration has
all the cells coloured in dark blue; this indicates that the movement
activity is set, every day and every hour of the day. To enable this
movement-based function, it is necessary to enable the movement
alarm; to set this function, refer to (chapter 4.5.2 Movement alarm ). Fig 4-16 Program set-up
4.5 Alarm Configuration
Alarm configuration includes four sub menus: motion, video loss, other alarm and alarm out.
4.5.1 Motion
Motion includes two sub menus: motion and schedule.
The steps to set up motion alarm are as follows:
Step1: Enter into Menu
Æ
Setup
Æ
Alarm
Æ
Motion tab. Refer to Fig 4-17:
Step2: Enable motion alarm, set alarm hold time which refers to the time
till which the system will wait for further detection of motion. Eg. If the
holding time is set to 10 seconds, once the system detects a motion, it
will go into alarm but would not detect any other motion alarm (specific to
channel) until 30 seconds. If there is other motion detected during this
period, it is considered it as continuous movement, otherwise it will be
considered as a single motion.
Fig 4-17 Alarm Configuration-Motion


