Radio
Adapter
Pag. 11/12
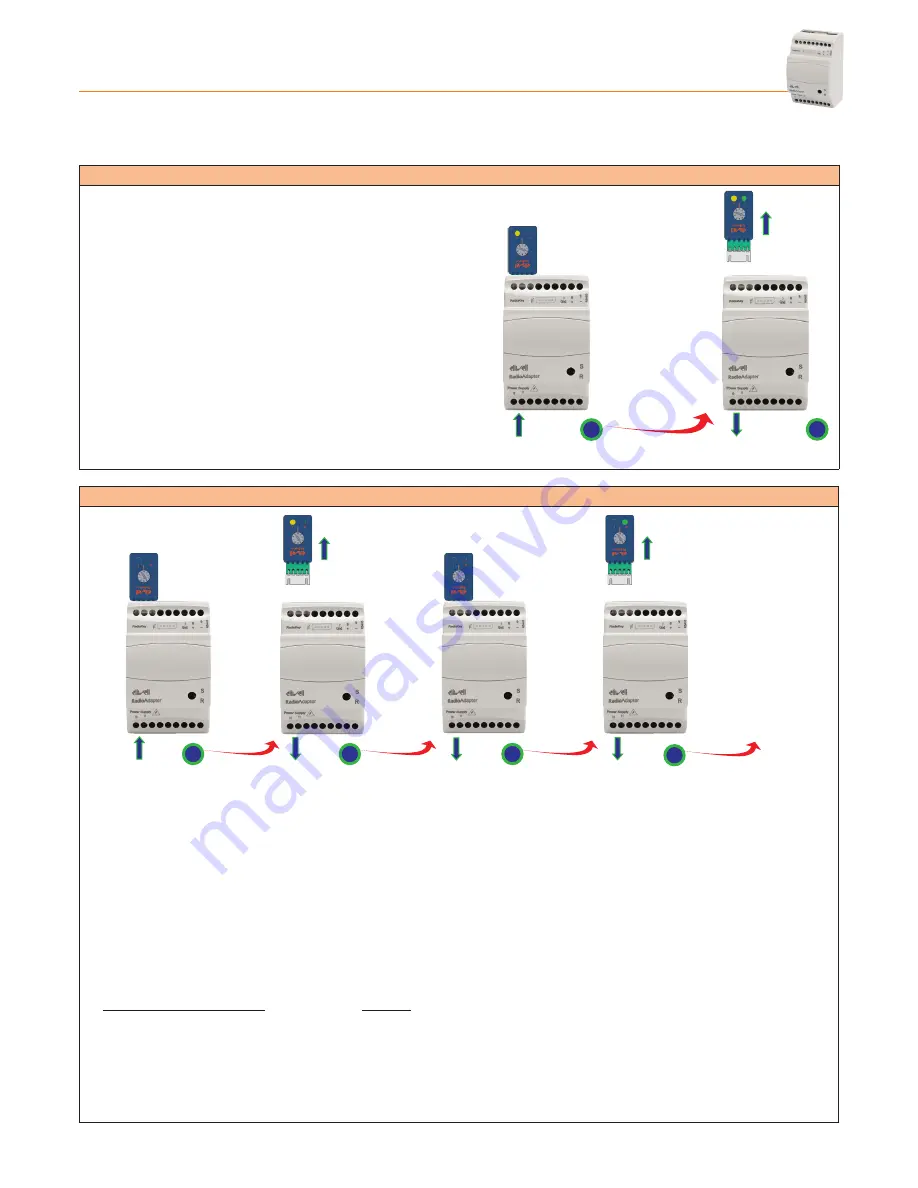
3.5 - CHANGING CHANNEL
If there is disturbance on the network channel which is affecting communication, the channel can be forced to a new one.
A new channel scan can be forced or one of the four pre-selected channels can be set.
3.5.1 - SCANNING TO FIND A NEw CHANNEL
1 - Set the switch on the
Radio
Key to position
3
Connect the
Radio
Key to the PAN-C and wait for the YELLOW LED (P) on the
Radio
Key to light up.
2 - Disconnect the PAN-C from the power supply and disconnect
the
Radio
Key.
Now follow the steps described for the PAN-C in sections ”
Channel
search
“ and ”
Saving PAN-C settings
”.
After this, for each NODE follow the steps outlined in section “
Saving
Settings
“ and for each repeater, the instructions given in section
“
Saving repeater settings
”.
Power
Supply
Power
Supply
1
2
3.5.2 - SETTING COMMUNICATION CHANNEL MANUALLY
Power
Supply
Power
Supply
Power
Supply
PAN-C
PAN-C
NODE
Power
Supply
NODE
1
2
3
4
OTHER NODES...
1 - Set the switch on the
Radio
Key to position 4, 6, 7 or 8 (depending on the channel you want to set).
Connect the
Radio
Key to the PAN-C and wait for the YELLOW LED on the
Radio
Key to light up.
2 - Disconnect the PAN-C from the power supply and disconnect the
Radio
Key.
3 - Leave the switch on the
Radio
Key in the same position (position 4 in this example).
Connect the
Radio
Key to a NODE (or to a repeater) that has been powered-on, and wait for the GREEN LED (N) on the
Radio
Key to light up.
4 - Disconnect the NODE from the power supply and disconnect the
Radio
Key.
Repeat the steps listed in points 3 and 4 for each NODE and repeater in the network without changing the setting on the
Radio
Key
Position of
Radio
Key switch Channel
4
12
6
16
7
20
8
25


