14
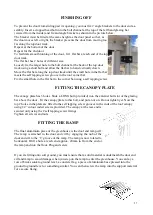
The long door end glazing bar is a slightly different profile than the
rear end block glazing bars and has 2 continuous bolt channels along
its length on the inside and 2 beading channels. During construction
the beading channels will always be on the
outside
of the greenhouse.
(Key point)
.
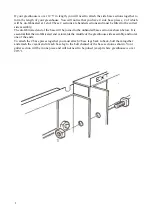
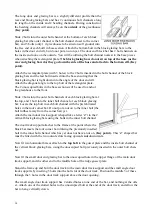
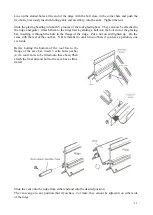
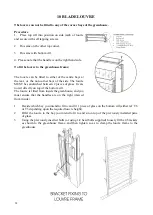
Slide 2 bolts into the outer bolt channel at the bottom of each block
glazing bar (the outer channel is the bolt channel closer to the corner
bar), and 3 bolts (only 1 if greenhouse to be sited on soft ground) into
the free end of each built in base section. Attach the bottom bolt in the block glazing bars to the
holes in the door end cill, but do not put a nut on yet. The door end block bar has 2 bolt channels on
the inside and none on the outside. You will be utilising the bolt channel nearest to the base pieces
when attaching the rectangular plate.
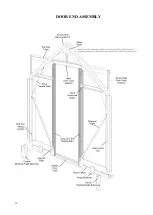
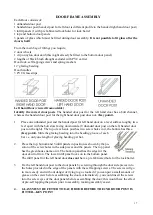
The block glazing bars do not sit on top of the base (as the
rear end glazing bars do) they go down the side of the base and attach to the bottom cill. (Key
point).
Attach the rectangular plate (with 3 holes) to the 2 bolts inserted in the bolt channel of the block
glazing bars and the last bolt inserted into the base ensuring that the
block glazing bar is tight down into the angle of the door end cill.
Attach the diagonal angle to the top bolt of the rectangular plate.
The 2 unoccupied bolts in the base sections will be used to anchor
the greenhouse to the floor.
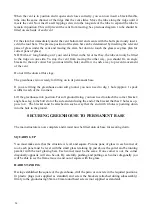
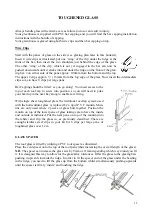
Slide 2 bolts into the outer bolt channels of each block glazing bar at
the top, and 1 bolt into the inner bolt channel of each block glazing
bar. Locate the top bolt in each bolt channel with the prefabricated
holes in the roof corner bar. Do not put a nut on to the inner bolt (the
bolt furthest away from the corner bar) yet.
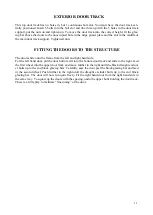
Attach the main door track support (shaped like a letter ‘Z’) to the 2
vertical block glazing bars using the bolts in the inner bolt channel
The door track support attaches to the frame at the point where the
block bar meets the roof corner bar utilising the previously inserted
bolt in the inner bolt channel which as yet does not have a nut on.
(Key point).
This ‘Z’ shaped bar
must be fitted with the two outside slots facing upwards
not
downwards.
Now fit two horizontal braces attach to the
top bolt
in the gusset plate and the inside bolt channel of
the vertical block glazing bars, using the unoccupied bolt previously inserted in the outer bolt chan-
nel.
Now fit the small door end glazing bar to the unoccupied hole in the upper flange of the main door
track support, and the other end to the middle hole of the ridge gusset plate.
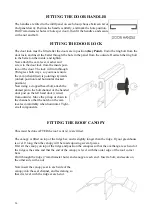
Stand the frame up and bolt the door track to the main door track support and the small angle door
track supports by inserting 5 bolts into the bolt slot of the door track. Position the middle 3 of these
through the 3 holes in the door track support above the door opening.
The small angle door track support has 2 slotted holes at one end of the bar, and nothing at the oth-
er. Attach one of the slotted holes to the unoccupied bolt at the end of the door track, and allow the
bar to hang vertically down.
Содержание 6'5" WIDE TITAN
Страница 1: ......
Страница 2: ...2 ...
Страница 3: ...3 ...
Страница 9: ...9 SIDE FRAME ASSEMBLY ...
Страница 12: ...12 REAR END ASSEMBLY ...
Страница 16: ...16 DOOR END ASSEMBLY ...
Страница 19: ...19 ...
Страница 21: ...21 ASSEMBLY OF GREENHOUSE UNIT ...
Страница 32: ...32 ELITE 1803 ...


