


Section 2 Installation Information
2-14
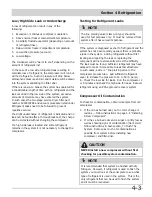
Leveling The Refrigerator And Freezer
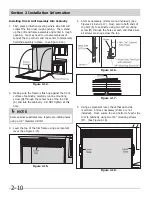
1. Remove the plastic top hinge covers and replace
with the supplied silver hinge covers (I).
2. Remove the plastic toe grill panels at the bottom of
each unit. Save the four screws as they will be used
later in the installation.
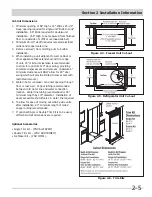
3. Place a carpenter’s level across the top of the door.
Using a tape measure, adjust all four levelers so that
each door is level and to a height of 69-3/8” across
top front edge of door. (See Figures 2-24 and 2-25).
4. Place a carpenter’s level vertically on the front of
the door and level so that the front surface of door
is vertical. Recheck to make sure top front edge
of door is still at a height of 69-3/8”. Adjust as
necessary. (See Figures 2-24 and 2-25).
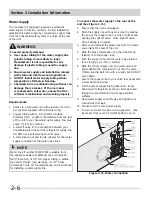
4. Attach metal toe grill (F) using the screws saved
during removal of the plastic grill panel(s). It may
help to open door of each unit to aid alignment
of screws. Run screws through the left-most and
right-most grill holes and tighten until slightly snug.
Adjust so the top of toe grill is parallel with the
bottom of both door(s). For a dual unit installation,
install two inner screws. Tighten all screws.
Figure 2-26.
Figure 2-27.
Figure 2-24.
Figure 2-25.
Final Positioning
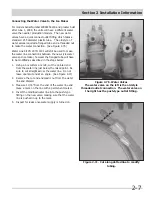
1. Connect the ice maker water lines (if so equipped).
Refer to the “Connecting Ice Maker To Water Supply”
in the literature bag for proper hook-up of water
filter and ice maker to your household water supply
before sliding the units in place. Plug power cords
into their receptacles prior to pushing unit fully
into place. If your receptacle is not centered in
the space, make sure to slide the unit on the side
opposite the receptacle into place first. Slide units
into place one at a time. Slide units carefully to
avoid pinching or damaging the ice maker and water
filter hoses on the back of the unit.
2. Re-check the level of each unit. Depending on the
flatness of your floor, you may need to readjust
several times before achieving an acceptable state
of levelness and alignment. Allow 3/8” gap between
units for center trim (G or H). (See Figure 2-27 ).
3. In the case of a side-by-side installation of two units,
install the magnetic center trim piece (G or H) in the
gap between both units. The trim piece should be
flush with tops of units and fit just above toe grill.
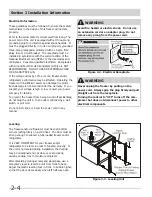
How To Adjust Levelers
1. To adjust the height of the cabinet back, use
an adjustable wrench and turn the leveling bolt
clockwise to raise or counterclockwise to lower.
(See
Figure
2-26).
2. To adjust the height of the cabinet front, turn the
front leg leveler clockwise to raise or
counterclockwise to lower. (See Figure 2-26).
Содержание FPUH17D7KF All Freezer Professional Series
Страница 2: ......
Страница 20: ...Section 2 Installation Information 2 12 Figure 2 20 Figure 2 21 ...
Страница 21: ...Section 2 Installation Information 2 13 Figure 2 22 Figure 2 23 ...
Страница 24: ...Section 2 Installation Information 2 16 Notes ...
Страница 26: ...Section 3 Electronic Control 3 2 Notes ...
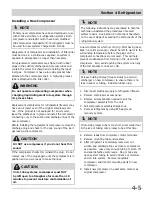
Страница 41: ...Section 4 Refrigeration 4 15 HFC 134a CFC 12 Pressure Temperature Chart ...
Страница 44: ...Section 4 Refrigeration 4 18 Notes ...
Страница 68: ...Section 6 Parts List 6 2 All Refrigerator Cabinet Exploded View And Parts List ...
Страница 70: ...Section 6 Parts List 6 4 All Refrigerator Sealed System Exploded View And Parts List ...
Страница 72: ...Section 6 Parts List 6 6 All Freezer Door Exploded View And Parts List ...
Страница 74: ...Section 6 Parts List 6 8 All Freezer Cabinet Exploded View And Parts List ...
Страница 76: ...Section 6 Parts List 6 10 All Freezer Sealed System Exploded View And Parts List ...
Страница 78: ...Section 6 Parts List 6 12 Notes ...
Страница 82: ...Section 7 Troubleshooting 7 4 Notes ...
Страница 83: ...Section 8 Wiring Diagram 8 1 All Refrigerator Wiring Diagram ...
Страница 84: ...8 2 Section 8 Wiring Diagram All Freezer Wiring Diagram ...


