Guide to diagnostics of electronic controls EWM10931
2011 SOE/DT-mdm FCPD-dp Quality tb
7/75
599 73 77-37
3 DIAGNOSTIC
SYSTEM
3.1 Accessing
diagnostics
All versions
SERIES 7
SERIES 8
SERIES 9
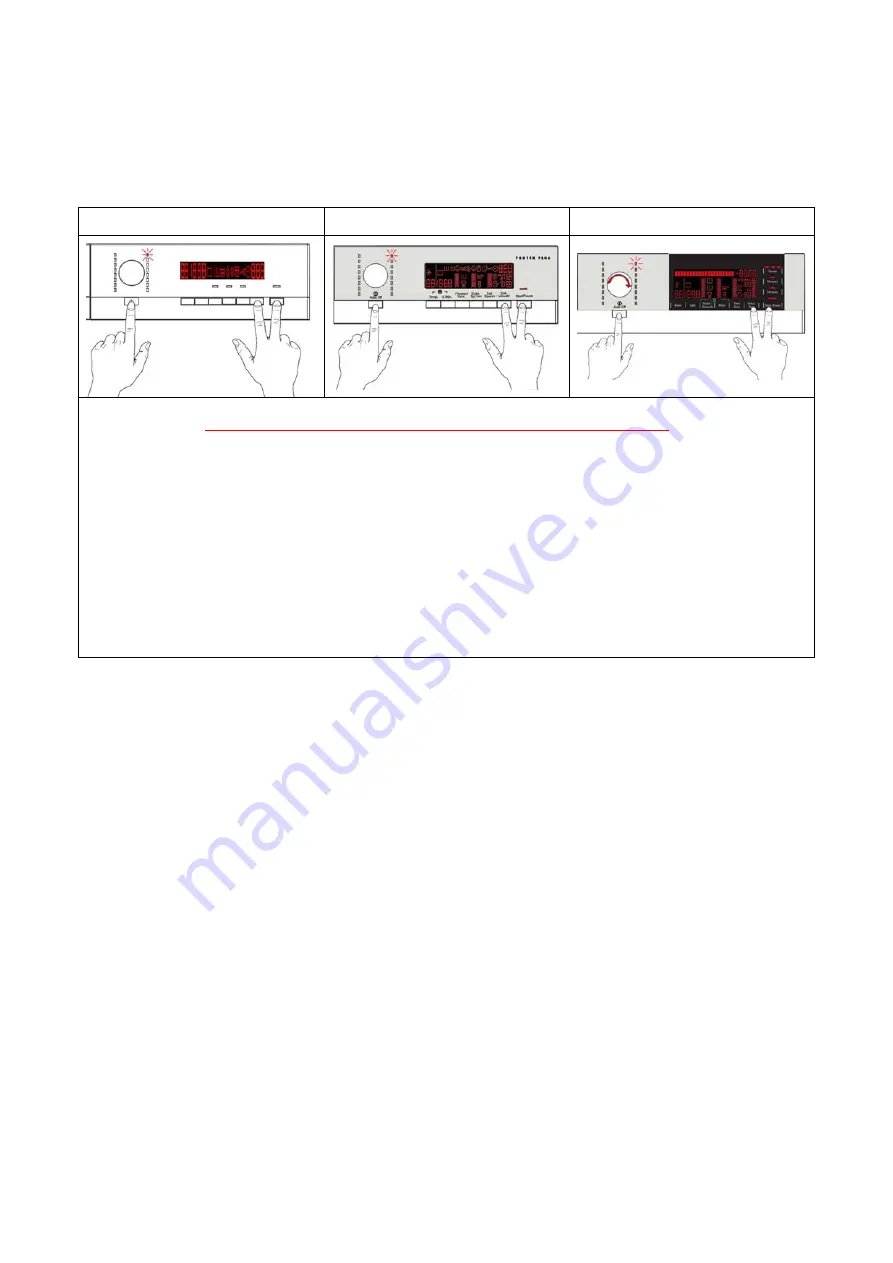
Do not start the procedure with the combination buttons pressed
1. Turn the appliance on at the ON/OFF switch and the first LED in the right-hand row turns on.
2. Press
the
START/PAUSE
button and the nearest
option
button
simultaneously (as shown in the figure).
3. Hold the buttons/sensors down/pressed until the LEDs and symbols begin to flash in sequence
(approximately 3 seconds).
In the first position, the operation of the buttons, of the related LEDs and of the groups of symbols shown on
the LCD screen is checked; turn the programme selector dial
clockwise
to run the diagnostic cycle for the
operation of the various components and to read any alarms (see diagnostic testing on the following page).
During this phase, if any key combination is pressed (except for the one relating to diagnostics), all the
combinations of options stored are deleted (Extra rinse, No buzzer, etc..) whereas for SERIES 9, the
memories with the customised programmes are also deleted
3.2 Quitting the diagnostics system
→
To quit the diagnostics system, turn the selector dial to position 0, turn the appliance back on and return
the dial to position 0.


