9
Chapter 2 Settings and Adjustments
(2) Press
.
A message “Your setting will be lost, if you press again now” appears for
five seconds.
(3) Press
again while the message is displayed.
The Auto Adjustment function begins (showing a running status icon) to
adjust flickering, screen position, and screen size automatically.
• If the screen is displayed correctly : go to step 5
• If the screen is not displayed correctly : go to step 4
4
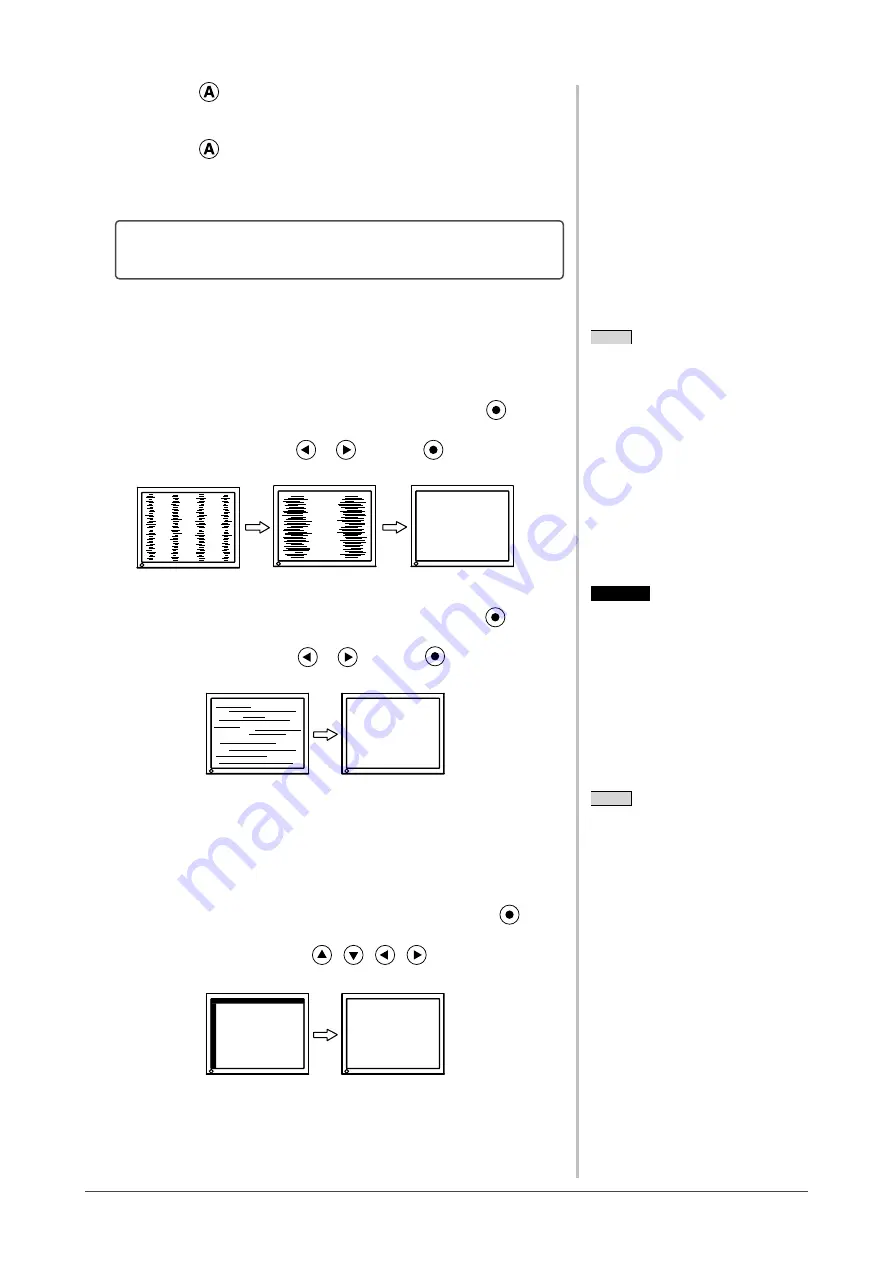
Perform advanced adjustments for the following using the
<Screen> menu of the Adjustment menu.
●
To eliminate vertical bars [Clock]
(1) Choose <Clock> from the <Screen> menu, and press
.
The <Clock> menu appears.
(2) Adjust the clock with
or
, and press
.
The adjustment is completed.
●
To remove flickering or blurring [Phase]
(1) Choose <Phase> from the <Screen> menu, and press
.
The <Phase> menu appears.
(2) Adjust the phase with
or
, and press
.
The adjustment is completed.
●
To correct screen position [Position]
Since the number of pixels and the pixel positions are fixed on
the LCD monitor, only one position is provided to display images
correctly. The position adjustment is made to shift an image to the
correct position.
(1) Choose <Position> from the <Screen> menu, and press
.
The <Position> menu appears.
(2) Adjust the position with
/
/
/
to display the image
properly in the display area of the monitor.
Attention
• Flickering or blurring may not be
eliminated depending on your PC or
graphics board.
NOTE
• Press the control button slowly so as
not to miss the adjustment point.
• When blurring, flickering or bars
appear on the screen after adjustment,
proceed to [Phase] to remove
flickering or blurring.
NOTE
• When vertical bars appear on the
screen after adjustment, go back to
“To eliminate vertical bars [Clock].”
(Clock → Phase → Position)
Содержание FLEXSCAN SX2461
Страница 41: ......


