I.B. 48003
Page 10
Effective 11/97
CONTACTOR HANDLING (Cont.)
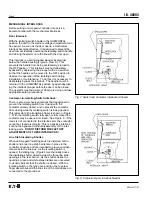
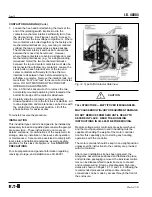
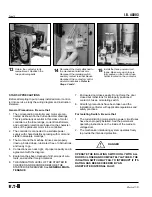
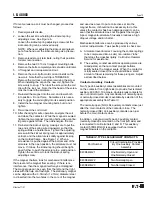
7.
Loosen the hex-head bolt attaching the clevis at the
end of the isolating switch interlock rod to the
contactor mechanical interlock sufficiently far to free
the clevis and rod. See Figures 7 and 8. Access to
this bolt is from the low-voltage compartment. Where
two contactors are bolted together by the factory and
mechanically interlocked, (e.g., reversing or reduced
voltage) the two are removed as a single package.
The mechanical interlock and bus bar connections
between them need not be removed. However,
where three contactors are behind a single door and
mechanically interlocked, (e.g., for a single-winding
two-speed motor) the two mechanical interlocks
between the top and center contactors must also be
disconnected to withdraw any contactor. Loosen the
clevis bolts on each interlock arm of the top and
center contactors sufficiently far to free the two
interlock rods between them before attempting to
withdraw a contactor. Remove the interlock rods, but
mark them “front” and “rear” to insure correct reinstal-
lation. DO NOT DISTURB ANY FACTORY-SET
INTERLOCK ADJUSTMENTS.
8.
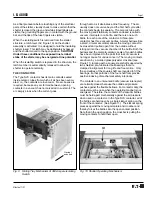
Use a 0.50-inch socket wrench to remove the two
horizontally-mounted positioning bolts located at the
bottom front edge of the contactor sidesheets.
9.
Carefully slide the contactor out to a balanced
drawout position or onto the fork truck or platform. All
routine inspection and maintenance can be done with
the contactor in the drawout position. Lift off the
phase barriers for easier access.
To reinstall, reverse the procedure.
INSTALLATION
This industrial type control is designed to be installed by
adequately trained and qualified personnel with appropri-
ate supervision. These instructions do not cover all
details, variations, or combinations of the equipment, its
storage, delivery, installation, check-out, safe operation,
or maintenance. Care must be exercised to comply with
local, state, and national regulations, as well as safety
practices, for this class of equipment. See START-UP
PRECAUTIONS.
For site preparation and general information regarding
receiving, storage, and installation see I.B. 48001.
CAUTION
TALL STRUCTURE — MAY TIP OVER IF MISHANDLED.
MAY CAUSE BODILY INJURY OR EQUIPMENT DAMAGE.
DO NOT REMOVE FROM SKID UNTIL READY TO
SECURE IN PLACE. READ THE HANDLING
INSTRUCTIONS IN I.B. 48001 BEFORE MOVING.
Medium-voltage motor controllers are extremely heavy
and the moving equipment used in handling must be
capable of handling the weight of the motor controller.
Confirm this capability prior to starting any handling
operations with the controller.
The motor controller should be kept in an upright position
unless specific instructions to the contrary are provided
with the controller.
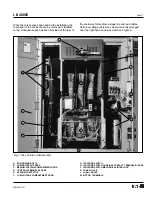
After a level installation site has been prepared, the
Ampgard
®
assemblies positioned and fastened in place,
and protective packaging removed, the individual control-
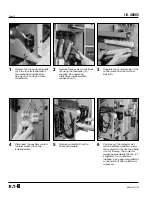
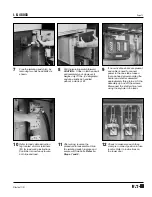
lers can be disassembled to permit access to conduit
and complete wiring. Step-by-step disassembly proce-
dures are shown on Pages 12, 13, and 14. Following the
recommended procedures will save time. All cable
connections can be made by access through the front of
the enclosure.
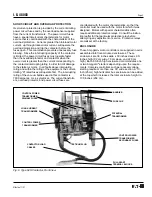
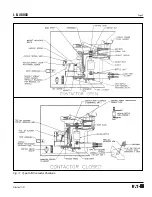
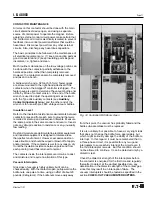
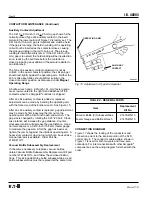
Fig. 12 Type SJS Contactor Side View
Содержание Cutler-Hammer Ampgard SC9000
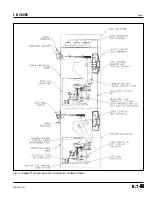
Страница 3: ...I B 48003 Page 3 Effective 11 97 Fig 4 Ampgard Components Two Starters Controllers Shown ...
Страница 9: ...I B 48003 Page 9 Effective 11 97 Fig 11 Type SJS Contactor Positions ...
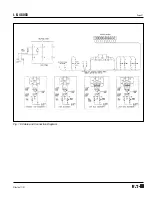
Страница 21: ...I B 48003 Page 21 Effective 11 97 Fig 16 Cable and Connection Diagram ...
Страница 24: ...I B 48003 Page 24 Effective 11 97 Printed in U S A CCI Cutler Hammer 221 Heywood Road Arden NC 28704 ...


