Web Interface Operation
Eaton Advanced ePDU User’s Guide P-164000042—Rev 1
www.eaton.com/ePDU
71
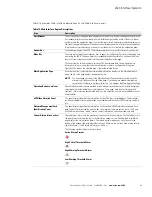
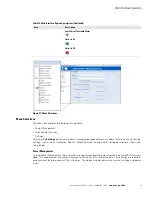
You can manage individual outlets on the ePDU Outlets page or groups of outlets on the ePDU Groups page.
These pages provide the present measurements or readings for current, load percentage, apparent power, and
active power. You can set individual outlets or groups of outlets to On, Off, or Reboot.
You can check current alarms on the Active Alarms page to see a list of alarms by date, time, and description.
See “Alarms, Notices, and Events” on page 104 for a list of alarms.
Logs & Notifications
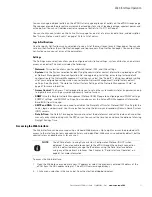
Use the Logs & Notifications menu selections to see a list of the most recent events (Logs page). You can also
set e-mail notifications (E-mail Notification page) and trap receivers (Trap Notification page). You can test these
notifications once you set or reset the parameters.
Settings
The Settings menu selections allow you to configure administrative settings, system attributes, and network
access and control. This menu includes the following:
l
Network:
This selection allows you to configure Ethernet, IPv4, and IPv6 settings.
l
System:
Use the System selection for identifying the administrator contact information, uploading an ePDU
or Network Management Card configuration file, and upgrading, restarting, or restoring factory default
configuration to the Network Management Card. You can select the “Keep IP” setting to avoid overwriting
all of your configuration settings when you restore the Network Management Card to factory default
settings. See Chapter 5, “Restore the Default Factory Settings of the Network Management Card” on
page 47 for more information.
l
Access Control:
The Access Control page allows you to set up the system administrator (superuser) and up
to eight other users with passwords and security levels of access.
l
SNMP:
Use the Simple Network Management Protocol (SNMP) page to configure general SNMP settings,
SNMPv1 settings, and SNMPv3 settings. You can also access the Eaton ePDU Management Information
Base (MIB) from this page.
l
SMTP and DNS:
This selection is used to establish the Simple Mail Transfer Protocol (SMTP) setting for the
server, login, and password. Use this selection to set up the primary and secondary Domain Name System
(DNS) servers.
l
Date & Time:
The Date & Time page allows you to select the date format and set the date and time, either
manually or by synchronizing with the NTP server. You can set the time zone and have the option of allowing
Daylight Savings Time.
Accessing the Web Interface
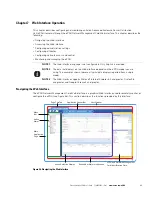
The Web interface can be accessed using a standard Web browser. Up to eight users can be provided with
access to the interface, but only one administrator can be identified. Web access is enabled by default, but the
administrator can disable access for any user.
To access the Web interface:
1.
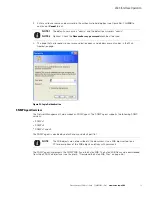
Open the Web browser and enter a new IP address or select the previously entered IP address of the
ePDU from the URL address drop list. The ePDU Overview page displays.
2.
Click a menu selection in the menu bar. An authentication dialog box displays.
NOTE
The ePDU defaults to using Dynamic Host Configuration Protocol (DHCP) when
delivered. If you are unable to connect to the ePDU through the network connection
with this default address, change the IP address using the Serial interface before
using any of the network interfaces. See Chapter 8, “Serial Interface Operation” on
page 81 for more information.

