


Copyright © 2003-2005 Eagle Tree Systems, LLC
Page 14
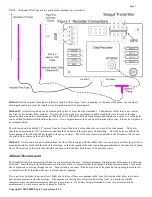
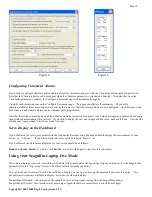
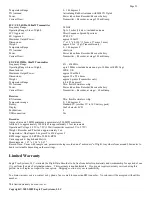
Figure 4
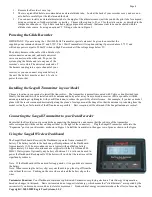
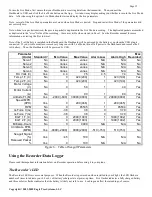
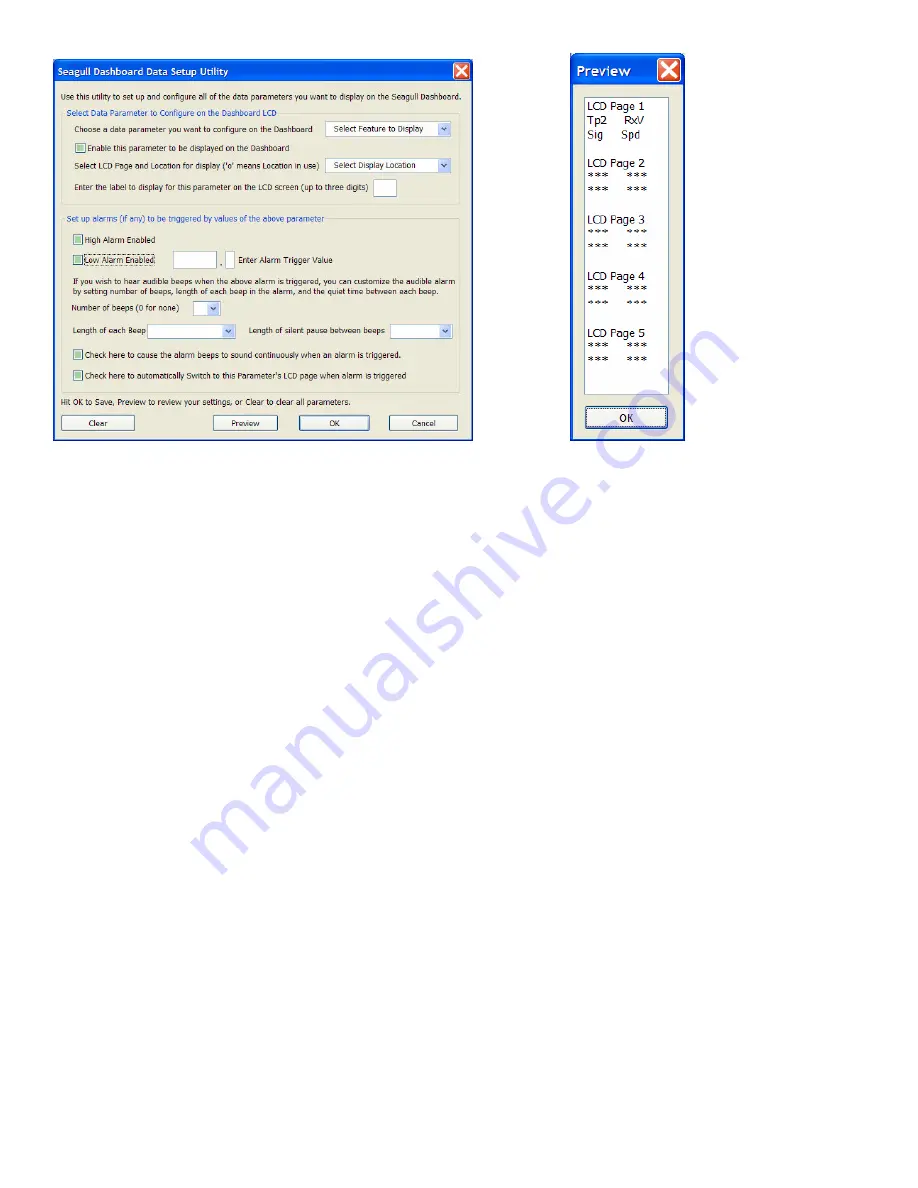
Figure 5
Configuring Variometer Alarms
If you wish to configure climbrate and/or sinkrate alarms for variometer support, click the Variometer button in the alarms section.
Note that the Climbrate button will only appear when the Climbrate parameter is selected and Enabled. Note also that when the
Variometer parameter is enabled, the Configure Variometer page will automatically appear.
Carefully read the instructions on the Configure Variometer page. This page should be self explanatory. The audible
climbrate/sinkrate alarms are configured in basically the same way that other alarm parameters are configured. One difference is that
both climbrate and sinkrate alarms can be simultaneously programmed.
Note that the altitude value displayed (if the altitude parameter is selected for display) is by default averaged and updated once during
each climbrate measurement time interval. If you wish to display the raw, unaveraged altitude value, uncheck this box. Note that the
altitude may “jump around” a bit if raw mode is chosen.
Servo Display on the Dashboard
If you calibrated your servo movements with the App during Recorder setup, the Seagull should display the correct names of your
servos, i.e., “Ailerons.” If you did not calibrate, servos will be labeled “Servo 1”, etc.
If you calibrated, the data values displayed for your servos should be as follows:
Rudder, Ailerons, Elevator
: -100 to 100;
Throttle:
0 to 100 (with negative values for idle trim down)
Using your Seagull in Laptop Live Mode
If you have a laptop at your site, or wish to see live data with your model on the bench, the App can be used to view the Seagull data
parameters live in a “big screen” format, with almost infinite recording capability!
To use Live Mode, first select “Tools, Choose What to Display” in the App, and set up the parameters you want to display. Two
Seagull specific items are available to display, as well as the other parameters:
Seagull Signal Strength – this item shows the strength of the real-time signal coming from the Seagull Transmitter.
Seagull Packet Percent – this item shows the percentage of packets that were successfully received from Seagull.