Designing a Label
11
2
Click
on the
Standard
toolbar or select
Barcode
from the
Insert
menu.
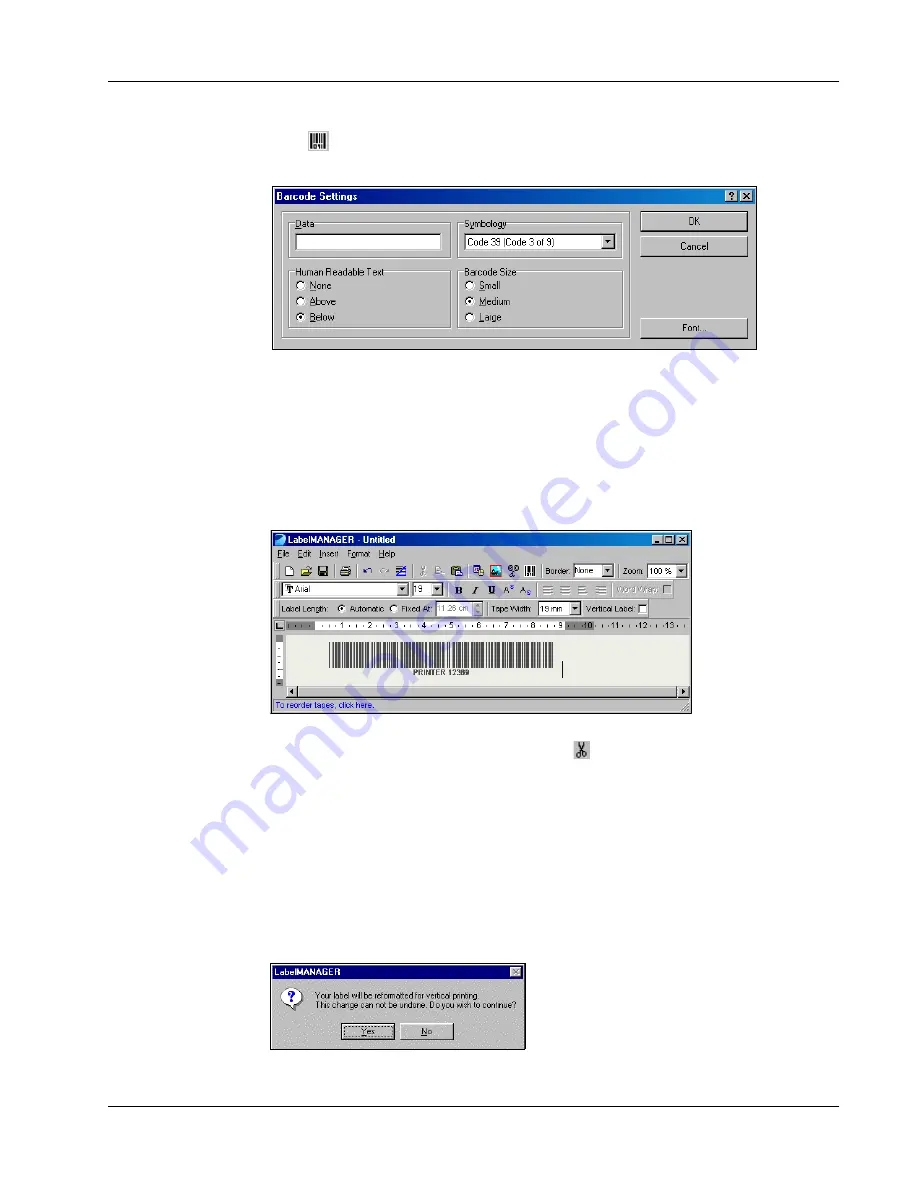
The Barcode Settings dialog box appears.
3
Type the text you wish displayed as a barcode in the
Data
field.
4
Select the type of barcode from the
Symbology
drop-down menu.
5
Select whether you want the actual text to appear above the barcode, below the barcode or not
at all under
Human Readable Text
.
6
If you selected above or below, click the
Font
button to choose the font for the text.
7
Select the size of the barcode under
Barcode Size
.
8
Click
OK
to insert the barcode on the label.
The barcode is placed on the label as a single object. To remove the barcode, you can use the
backspace key or highlight the barcode and select
.
Printing Vertically
You can print your label vertically, for example, to be placed on the spine of a binder or a video
tape. When you print vertically, the text on your label is reformatted to fit in a single column on the
label. You may wish to center the text on the label as well.
To print vertically
1
Click in the
Vertical Label
check box on the Formatting toolbar to select Vertical.
A warning dialog box appears informing you that the text will be reformatted.
Содержание LabelManager Series
Страница 1: ...LabelMANAGER User Guide ...
Страница 4: ...iv ...
Страница 26: ...Technical Specifications 22 ...
Страница 28: ...24 ...


