English
8
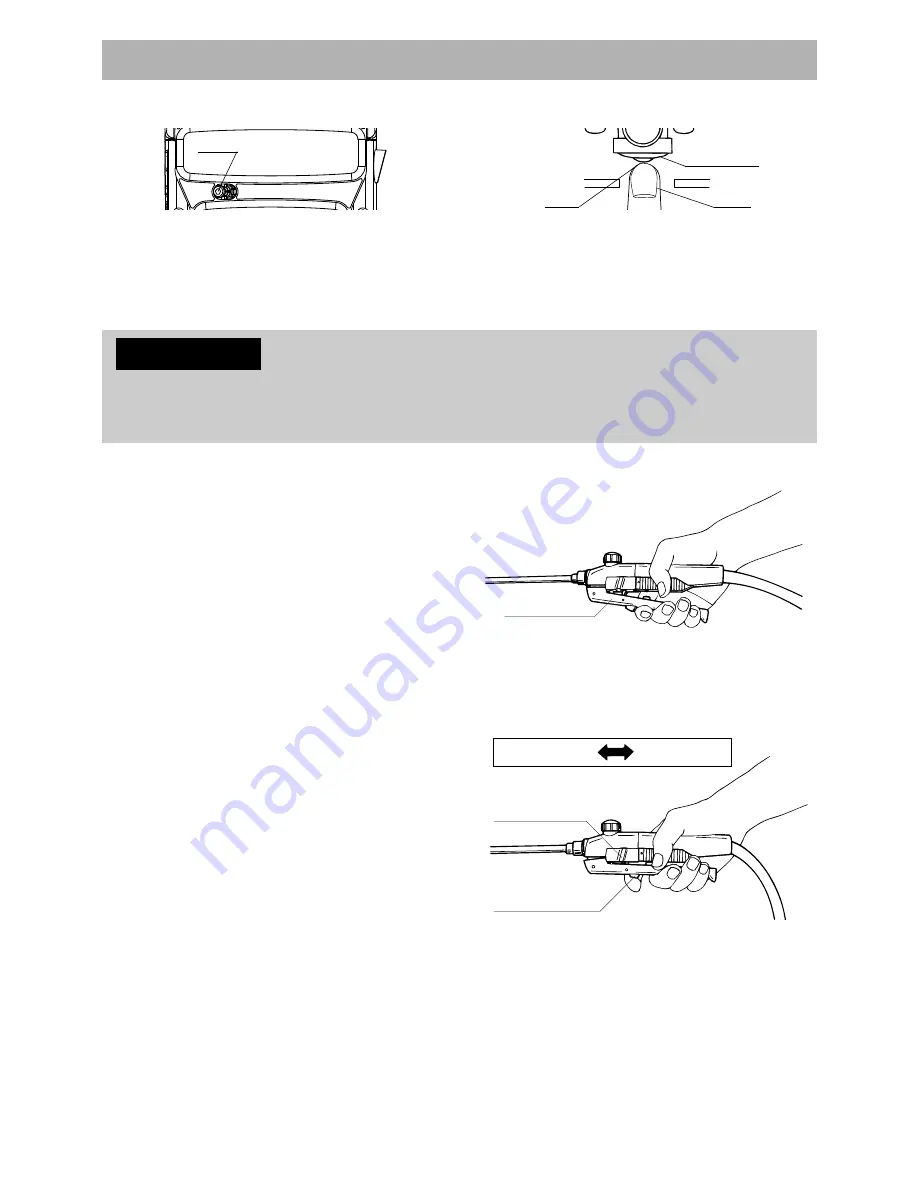
Insert a finger into the hole and depress the yellow cap for one or two.
Hole
Cap (yellow)
Note: Measures required when the pump fails to suck water after a long time of storage
グリップレバー
Grip lever
mode select lever
release button
Cap
finger
Dispensing chemicals
–
Carefully read in advance the instruction sheet of the chemical to be used, and follow the specified
dispensing method and precautions for using it.
–
When using a hydrate chemical, first dispense at its specified proportion, put it in a bucket or other
container and allow it to dissolve well before hand.
–
When pouring the solution in the tank, be sure to use the strainer provided.
CAUTION
Prior to operation
1. Make sure that the battery is charged. (Refer to
P.10 and P.12 for how to charge the battery.)
2. Confirm that the grip lever is open (switch off,
valve closed).
Starting/Operation
1. Push the power switch on the control panel to
the right to turn on power. (The lamp of the
battery checker turns on.)
2. Hold the grip lever to turn on the switch and
open the valve. The pump will start.
3. Turn the pressure-regulating valve on the control
panel clockwise to increase pressure. *Immediately
after power is turned on for the first time, pressure is
set to the minimum. (The factory default setting)
4. Adjust pressure using the pressure-regulating
valve while observing the spray from the nozzle.
Continuous spraying
Spot spraying
To stop
1. When the mode select lever is set to spot
straying, release the grip lever to turn off the
switch and close the valve, and spraying stops.
2. When the mode select lever is set to continuous
spraying, press the lock lever to release the grip
lever lock, return the grip lever to the original
position, turn off the switch, and close the valve,
and spraying stops.
3. Push the power switch on the control panel to
the left to turn off power. (The lamp of the
battery checker turns off.)


