32 / 96
5.4.1 Fitting an expansion joint (optional)
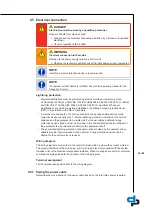
DANGER
Sparks and radiant heat
Fire hazard!
Ø
Take suitable precautions to protect the expansion joint if any welding
work is carried out.
CAUTION
Leaking expansion joint
Flooding of installation room!
Ø
Never use the expansion joint to compensate for misalignment or
mismatch of the piping.
Ø
Do not apply any paint to the expansion joint.
Ø
Keep the expansion joint clean.
Ø
Regularly check for cracks or blisters, exposed fabric or other defects.
ü
Sufficient clearance in all directions is provided for checking the expansion joint.
ü
The expansion joint is not insulated along with the pipeline insulation.
1. Sufficient clearance in all directions is provided for checking the expansion joint.
2. Install the expansion joint in the piping free of twist or distortion.
3. Evenly tighten the bolts crosswise. The ends of the bolts must not protrude from the
flange.
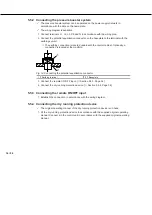
5.4.2 Fitting the pressure reducer (optional)
NOTE
A pipe length of approximately 600 mm must be provided on the inlet side to
accommodate a pressure reducer, if necessary.
NOTE
A pressure reducer must be installed if the inlet pressure fluctuation is too high
for the pressure booster system to operate as intended or if the total pressure
(inlet pressure and shut-off head) exceeds the design pressure.
The inlet pressure (p
inl
) varies between 4 and 8 bar. A minimum pressure gradient of 5 m is
required for the pressure reducer to function properly. This means that the pressure reducer
must be mounted 5 m higher than the pressure booster system. The pressure drops by
about 0.1 bar per metre of height difference. Alternatively, the pressure reducer can be
subjected to a pressure of 0.5 bar.
Example
p
inl
= 4 bar
Minimum pressure gradient = 5 m ≙ 0.5 bar
Downstream pressure: 4 bar - 0.5 bar = 3.5 bar.
ü
A minimum pressure gradient of 5 m is available.
1. Install the pressure reducer in the pipe on the inlet side.
Содержание Hydro-Unit Utility Line F
Страница 29: ...29 96 1 2 Fig 12 PE connection 1 Earthing terminal 2 Location of power connection ...
Страница 58: ...58 96 ...
Страница 92: ...92 96 T Tank 79 Timers 73 W Warnings 9 Warranty claims 7 ...
Страница 93: ......
Страница 94: ......
Страница 95: ......


