background image

DOSPEL fans are universal. They are widely used in the 
ventilation of bathrooms, kitchens, toilets as well as 
offices or apartments. There are four standard sizes of fans 
produced for ventilation ducts, diameters of 100, 120, 150, 
200 mm. Fan casings are made of high quality ABS with an 
anti-static additive, which prevents the accumulation of 
dust. Most models are made with an IP x4 protection 
class. DOSPEL fans use motors with ball bearings and 
plain bearings. The ball bearing motors extend the life of 
the fan, reduce noise, and can be installed in any position. 

ZEFIR f

ans with plain bearings can only be installed in the 

vertical position.

The fans do not require frequent and detailed 
inspections (depends on the conditions where the 
fan operates). They are designed for continuous use. 
The fan should be disassembled and cleaned of dirt 
at least once a year, and the engine should be 
inspected. 

After unpacking, check the condition of the fan casing 
(cracks, irregularities — the propeller should not rub 
against the sides). It is recommended to perform the 
above actions to determine if any possible damage 
occurred during transportation.

Fans may not be used in areas that are potentially 
explosive. In areas with a small condensation of 
moisture in the air, the fan should be installed with 
its axis in the horizontal position so that draining of 
the condensate is possible.

Installation

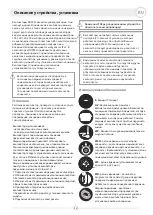
Caution! Before installation of the device, 
turn off the electrical power!

Fans may be installed:
— directly in the wall of the building,
— on the inlets of ventilation ducts.
Fans with plain bearings are designed for wall 
installations. Ball bearings can be installed in both, 
vertical or horizontal positions.
The technical specification on the rating plate must 
correspond to the electrical installation specification.
The fan should be installed at a height of no less than 2.3 
m from the floor. Avoid installations near heat sources, or 
in wet and steamy areas.
If there are no visible defects, you can proceed to install 
the fan in its designated place:
1. Prepare the electrical connection for the fan,
2. Mark the positions for the installation holes,
3. Insert the fan into the ventilation duct,
4. Mark the positions of the installation holes,
5. Take the fan out of the ventilation duct,
6.  Drill holes for the plugs, take the fan out of the 
ventilation duct.
7.  Install the fan in the designated place, tighten the 
screws,
8.  Connect the fan to the electrical installation.

Symbols used in the fans

S- 

Standard Version

Description of the appliance installation

EN

Description and Designation

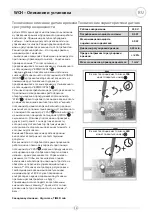
In order to remove dirt from the inside of the fan: 
disconnect the fan from the electrical installation, 
dismount the fan by unscrewing the screws, wash all 
the elements with a damp cloth and a small amount 
of detergent. Do not wet the engine. After drying all 
the elements, the fan should be installed at the 
designated place and connected to the electricity.

AZ - 

Automatic shutter. Version is equipped with 

an automatic shutter that opens when the fan is 
on and closes when the fan is off. The shutter 
prevents the outside air from entering, which is 
especially important in the winter.

WP - 

Version with a pull switch and a power cord

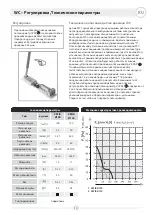
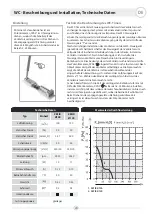
WC - 

Timer (settings of 2 to 23 min.)

PIR - 

The motion sensor — the fan turns on after 

a movement is registered in a particular area and 
continues to work within the time specified by 
the timer (from 2 to 23 min.).

Ball bearing — the ball bearing motor extends 
the working life of the fan, reduces noise, and 
can be installed in any position.

WCH - 

Timer with a humidistat — this version is 

equipped with a timer and a humidity sensor 
called a humidistat. Depending on the setting, 
the humidistat will activate the fan when the 
humidity in the room reaches a certain level.

7

Содержание ZEFIR 100

Страница 1: ...ZEFIR Wentylatory domowe Domestic fans Бытовые вентиляторы Haushaltsventilatoren Domácí ventilátory Instrukcja obsługi Manual Руководство по эксплуатации Bedienungsanleitung Návod k použití ...

Страница 2: ...podłogi Unikać instalacji blisko źródeł ciepła oraz miejsc wilgotnych i zaparowanych Jeżeli nie stwierdzono żadnych widocznych usterek można przystąpić do instalacji wentylatora w miejscu docelowym 1 Przygotować przyłącze elektryczne pod wentylator 2 Odrysować rozmieszczenie otworów montażowych 3 Umocować wentylator w kanale wentylacyjnym 4 Odrysować rozmieszczenie otworów montażowych 5 Wyciągnąć ...

Страница 3: ...łączyć wentylator od sieci elektrycznej 4 Iinstalacja elektryczna musi zawierać wyłącznik w którym odległość między stykami wszystkich biegunów wynosi nie mniej niż 3 mm 5 Należy przedsięwziąć odpowiednie środki dla uniknięcia odwrotnego przepływu gazów do pomieszczenia z otwartego przewodu kominowego lub innych urządzeń z otwartym ogniem 6 Wszystkie czynności konserwacyjne po wcześniejszym odłącz...

Страница 4: ...nacznie cofnąć potencjometr w prawą stronę Wentylator powinen się wyłączyć po czasie ustawionym potencjometrem CZAS W przypadku niewyłączenia się wentylatora należy jeszcze trochę cofnąć potencjo metr WILG Można sprawdzić nastawę progu dmuchając z odległości 15 cm na czujnik higrostatu który spowoduje rozpoczęcie pracy wentylatora Czujnik bada natężenie wilgotności względnej w miej scu w którym zo...

Страница 5: ... nie świeci W zależności od potrzeb czas pracy przedłużonej można płynnie regulować za pomocą potencjometru CZAS w przedziale od 2 do 23 min Kręcąc delikatnie wkrętakiem krzyżakowym od lewej do prawej strony zgodnie z ruchem wskazówek zegara zwiększamy czas kręcąc w kierunku przeciwnym zmniejszamy Należy uważać by nie uszkodzić potencjometru Regulacja Za pomocą śrubokręta kręcimy potencjometrem CZ...

Страница 6: ...do punktu serwisowego Reklamowany produkt zostanie wymieniony na nowy wtedy gdy firma Dospel stwierdzi że usunięcie wady jest niemożliwe lub koszty usunięcia wady w ocenie Dospel są zbyt wysokie gdy naprawiany jest po raz czwarty w okresie gwarancyjnym ze względu na tą samą wadę produkcyjną Jeżeli dane urządzenie nie jest osiągalne to może być wydane klientowi nowe o zbliżonych gabarytach i parame...

Страница 7: ...allation specification The fan should be installed at a height of no less than 2 3 m from the floor Avoid installations near heat sources or in wet and steamy areas If there are no visible defects you can proceed to install the fan in its designated place 1 Prepare the electrical connection for the fan 2 Mark the positions for the installation holes 3 Insert the fan into the ventilation duct 4 Mar...

Страница 8: ...hould disconnect the fan from the mains 4 The electrical installation must include a plug in which the distance between all the prongs is no less than 3 mm 5 The appropriate measures should be taken to prevent the reverse flow of gases into the room from a flue or other appliances with open flames 6 All maintenance should be done after disconnecting the fan from the mains even if the fan is not on...

Страница 9: ...e is set on potentiometer CZAS TIME In case the fan does not turn off the WILG potentiometer should be turned slightly more to the right You can check the settings of the operation parameters by blowing on the humidistat sensor from a distance of 15 cm which will activate the fan The sensor examines the level of the relative humidity in the place where it is installed Caution The above actions sho...

Страница 10: ... terminal During the extended operation mode the light on the fan is off Depending on your needs the extended operation mode can conveniently be adjusted via the potentiometer CZAS TIME from 2 to 23 minutes With the use of a Philips screwdriver carefully turn from the left to the right side clockwise to increase the time of operation Turn counterclockwise in order to decrease the operation time Be...

Страница 11: ...will be replaced under the following conditions Dospel confirms that repairing it is impossible or the cost of removing the defect by Dospel is too expensive is repaired for the fourth time under warranty due to the same manufacturing defect If the product is unavailable the customer may be issued a new one with similar dimensions and technical parameters After replacement the warranty period is r...

Страница 12: ...а щитке должны соответствовать параметрам данной электросети Вентилятор следует устанавливать на высоте не менее 2 3 м от пола Избегайте установки около источников тепла и в помещениях с высокой влажностью Ясли не выявлены никакие видимые дефекты можно приступить к установке вентилятора в предназначенном для этого месте 1 Подготовьте электрический разъем для вентилятора 2 Обозначьте места размещен...

Страница 13: ...отключить вентилятор от электросети 4 Электрическая сеть должна иметь выключатель в котором расстояние между контактами всех полюсов составляет не меньше 3 мм 5 Необходимо предпринять соответствующие меры для предотвращения обратного потока газов в помещение с открытого дымохода или других устройств с открытым огнем 6 Все работы по обслуживанию должны проводиться после предварительного отключения ...

Страница 14: ...нта включения вентилятора Затем верните потенциометр немного вправо Вентилятор должен выключиться по прошествии времени установленного с помощью потенциометра CZAS Если вентилятор не выключился поверните потенциометр WILG еще немного Установку порога можно проверить дунув с расстояния 15 см на датчик влажности который запустит вентилятор Датчик измеряет интенсивность относительной влажности в мест...

Страница 15: ...тилятор выключится самостоятельно Неоновая индикаторная лампа сигнализирует о работе вентилятора в непрерывном режиме когда горит освещение т е во время подачи на клемму T В режиме продленной работы индикатор не светится В зависимости от потребностей время продленной работы можно плавно регулировать при помощи потенциометра CZAS в пределах от 2 до 23 мин Медленно прокручивая его изолированной крес...

Страница 16: ...сный центр Продукт в отношении которого предъявляется претензия будет заменен новым если компания Dospel установит что устранение дефекта невозможно или же затраты на его устранение по оценкам Dospel слишком высоки он ремонтируется в четвертый раз в течение гарантийного срока из за одного и того же производственного дефекта Если данное изделие недоступно то клиенту может быть выдано новое с аналог...

Страница 17: ...den Ventilator vorbereiten 2 Die Anordnung der Montageöffnungen abzeichnen 3 Den Ventilator im Belüftungskanal platzieren 4 Die Anordnung der Montageöffnungen abzeichnen 5 Den Ventilator aus dem Belüftungskanal entnehmen 6 Öffnungen bohren in denen Dübel platziert werden den Ventilator aus dem Belüftungskanal entnehmen 7 Den Ventilator an der endgültigen Einsatzstelle befestigen und die Schrauben ...

Страница 18: ...Wartungs oder Einstellungstätigkeiten ist der Ventilator von der Stromversorgung zu trennen 4 Die Elektroinstallation muss über einen Schalter verfügen bei dem der Abstand zwischen den Kontakten aller Pole nicht weniger als 3 mm beträgt 5 Es sind entsprechende Maßnahmen zu ergreifen um einen Rückfluss der Gase in die Räume aus einem offenen Schornstein oder aus anderen Geräten mit offenem Feuer zu...

Страница 19: ...eit ausgehen Sollte der Ventilator nicht ausgehen so muss der Potentiometer WILG noch ein wenig zurückgesetzt werden Man kann die Einstellung des Schwellenwerts prüfen indem man aus einem Abstand von 15 cm auf den Feuchtigkeitsregler pustet der den Betrieb des Ventilators auslöst Der Sensor prüft die Intensität der relativen Feuchtigkeit an dem Ort an dem dieser installiert wurde Hinweis Die vorst...

Страница 20: ...eigt die Arbeit des Ventilators im Dauerbetrieb während der eingeschalteten Beleuchtung d h während der Zuführungszeit auf die Klemme T an Währen des Modus der verlängerten Arbeitszeit des Ventilators leuchtet die Neonleuchte nicht Je nach Bedarf lässt sich die Zeit des verlängerten Betriebs stufenlos mit Hilfe des Potentiometers CZAS im Bereich 2 23 Minuten einstellen indem vorsichtig mit dem iso...

Страница 21: ...egen ein neues umgetauscht wenn die Firma Dospel feststellt dass die Behebung des Mangels unmöglich ist bzw die Kosten der Mängelbehebung im Ermessen von Dospel zu hoch sind das Produkt bereits zum vierten Mal im Garantiezeitraum wegen desselben Produktionsmangels repariert wird Ist ein bestimmtes Geräts nicht mehr erhältlich so kann dem Kunden ein neues Gerät ausgehändigt werden das ähnliche Abme...

Страница 22: ...ě dotáhněte šrouby 8 Zapojte ventilátor k elektrické síti Označení používané u ventilátorů S Verze Standard Popis výrobku instalace CZ Popis a určení Čistění vnitřní časti ventilátoru vypněte ventilátor z elektrické sítě demontujte ventilátor odšroubujte upevňující hmoždinky umyjte všechny součásti vlhkým hadříkem s jemným čisticím prostředkem Zabraňte styku motoru s vodou Po vysoušení všech součá...

Страница 23: ...gulaci dělejte po předchozím vypnutí napájecího napětí 4 Elektroinstalace musí obsahovat vypínač u něhož vzdálenost mezi kontakty všech pólů činí minimálně 3 mm 5 Zabezpečte si ventilátor před opačným směrem průtoku plynů z kouřovodu anebo jiných zdrojů ohně do místnosti 6 Všechny činnosti spojené s údržbou provádějte po předchozím vypnutí napájecího napětí a i v případě že ventilátor momentálně n...

Страница 24: ... regulátor vpravo Ventilátor by se měl zapnout podle nastavení regulátora CZAS V případě když se ventilátor nevypne je nutno trošku couvnout regulátor WILG Můžete vyzkoušet nastavení foukáním z asi 15 cm na čidlo hygrostatu který zapne ventilátor Čidlo cítí intenzitu relativní vlhkosti v místě kde je nainstalován Pozor Výše uvedené činnosti by měl udělat odborný elektrikář Čas můžeme plynulé regul...

Страница 25: ...m napájení svorky T Světelná kontrolka nesvití během doběhového režimu Regulátor CZAS umožňuje plynulé nastavení doběhu od 2 do 23 min Opatrně otáčejte křížovým šroubovákem zleva doprava podle směru hodinových ručiček prodloužíte čas kroucením v protisměru zkrátíte čas Dejte pozor aby se nepoškodil regulátor Regulace Pomocí šroubováku otočte regulátor CZAS ve směru hodinových ručiček co zvětší čas...

Страница 26: ...nění vady není možné nebo náklady odstranění vady jsou podle firmy Dospel příliš velké když výrobek je opravován počtvrté během záruční doby na stejnou výrobní vadu Pokud určený přístroj není dostupný může být vyměněn na nový s podobnými rozměry a technické parametry Po výměně výrobku na nový lhůta záruky běží zase znova Záruka se avšak neprodlouží vzhledem udělaných oprav výrobku Náklady záruky N...

Страница 27: ...ryczny Nr fabryczny Data sprzedaży Data sprzedaży Pieczęć sprzedającego Karta stanowi załącznik do rach nr Karta stanowi załącznik do rach nr Pieczęć sprzedającego Nr montera Podpis Data wykonania naprawy Wyszczególnienie materiałów i czynności naprawczych 27 ...

Страница 28: ...Dospel sp z o o ul Główna 188 42 280 Częstochowa POLAND tel 48 34 365 98 43 fax 48 34 360 97 00 e mail dospel dospel com www dospel com АГ98 ...

Отзывы: