24
COOLING UN IT REPLACEMENT - RM36C, RM46, RM47, RM66, RM67
Remove the refrigerator from its recess as follows:
1.
2.
3 .
4 .
5.
6.
7.
Check that refrigerator is empty and remove
ice tray.
Turn off gas bottle.
Disconnect gas line to inlet valve
CAUTION: Use a backup wrench to prevent
undue rotation.
Unplug the electric line from the trailer
o u t l e t .
Remove the 4 screws in rear front f fame.
Check for any additional screws which the
vehicle manufacturer may have used to
fasten the refrigerator in place.
Carefully slide the refrigerator straight
out of its recess.
To remove the cooling unit from the cabinet,
proceed as follows:
1.
2.
3 .
4 .
5 .
6 .
Place the refrigerator on a work bench of
suitable height.
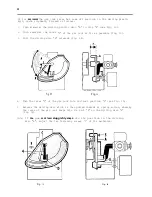
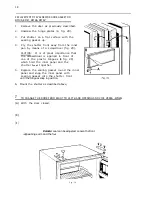
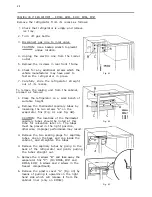
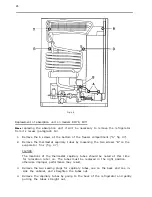
Remove the thermostat capillary tubes by
loosening the two screws “A” on the
evaporator fins (Fig. 41 and fig. 42).
CAUTION: The locations of the thermostat
capillary tubes should be noted at this
time for relocation later on. The tubes
must be placed in the right position,
i
Fig. 41
RM66
RM67
Fig. 42
otherwise, improper performance may result.
Remove the two sealing plugs for capillary
tubes, one on the back and one inside the
cabinet, and straighten the tubes.
Remove the capillary tubes by going to the
back of the refrigerator and gently pulling
the tubes straight out.
Remove the 4 screws “B” and take away the
evaporator fins “C”. (On RM46, RM47 and
RM66, RM67, 6 screws and 2 screws in the
freezer compartment).
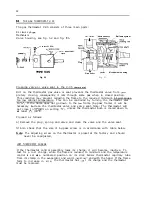
Remove the plastic cover “A” (Fig. 43) by
means of pulling it upwards on the right
hand side which will release it from the
cabinet liner (only on RM36C).
Fig. 43
Содержание RM24A
Страница 31: ...31 3 27 _ il ___ ____ 2 i Fig 51...

