4:
Operating Instructions
52
b
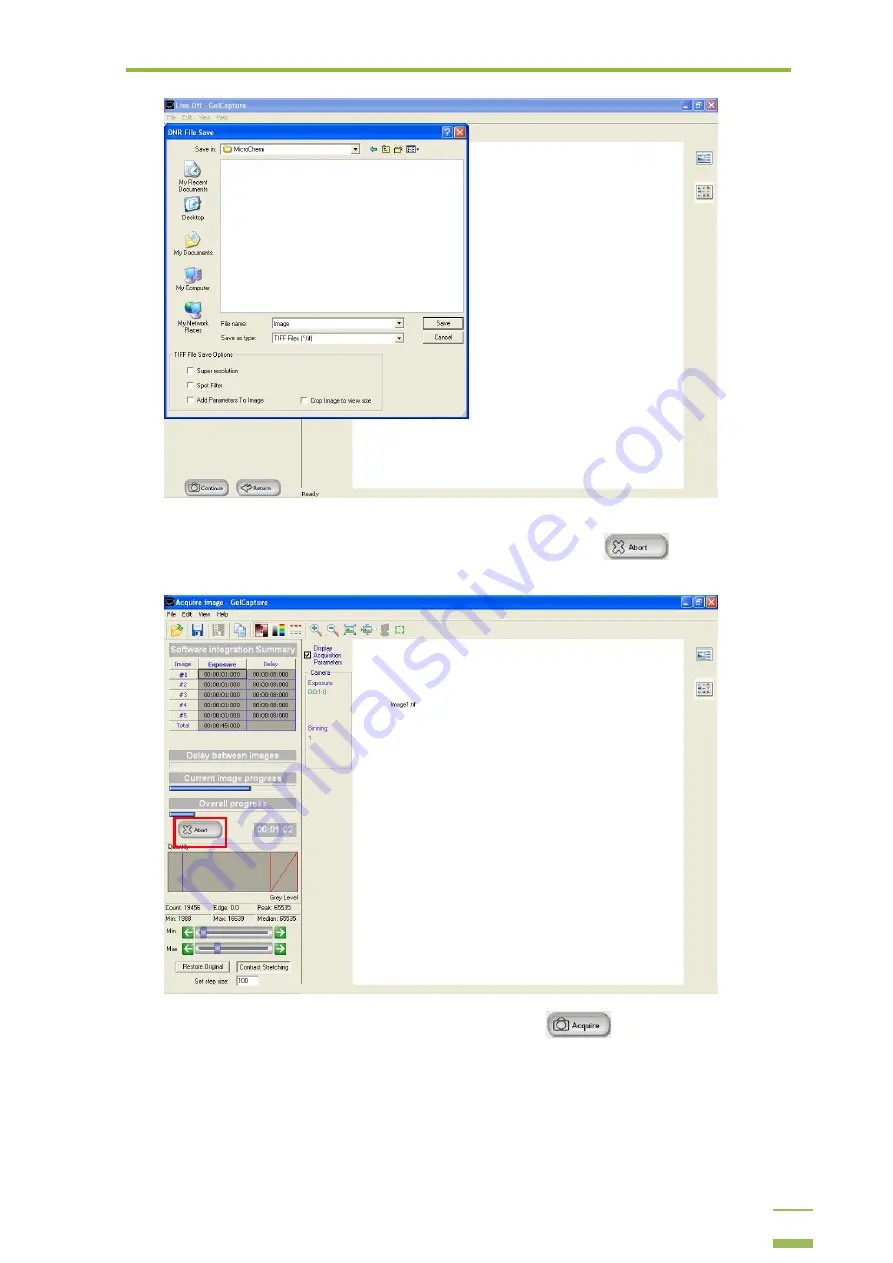
The capturing process will start and the images will be displayed in GelCapture’s main
viewing area. You can abort the process by clicking the Abort
button and only the
images that were captured up to that point will be displayed.
c
After aborting the process, you can click the Acquire
button to start the process
from the beginning, using the values you already set. This will overwrite the images that were
already acquired in the aborted process, unless you change the Image Series name.
d
When the capturing process is complete, the Image Series will be displayed in GelCapture’s
viewing area. You can toggle between single image view and multiple image view by clicking
the icons at the top-right side of the screen, as illustrated below.
Содержание MicroChemi
Страница 1: ...Welcome to the MicroChemi System...
Страница 16: ...3 Setup and Installation 15 4 Mark the checkbox if you wish to create a desktop icon and click Next...
Страница 20: ...3 Setup and Installation 19 6 Click the combo box and select the MicroChemi component from the list...
Страница 34: ...3 Setup and Installation 33 14 Click OK 15 Choose DNR Camera and click Next...


