Quick Start Guide
Page 8
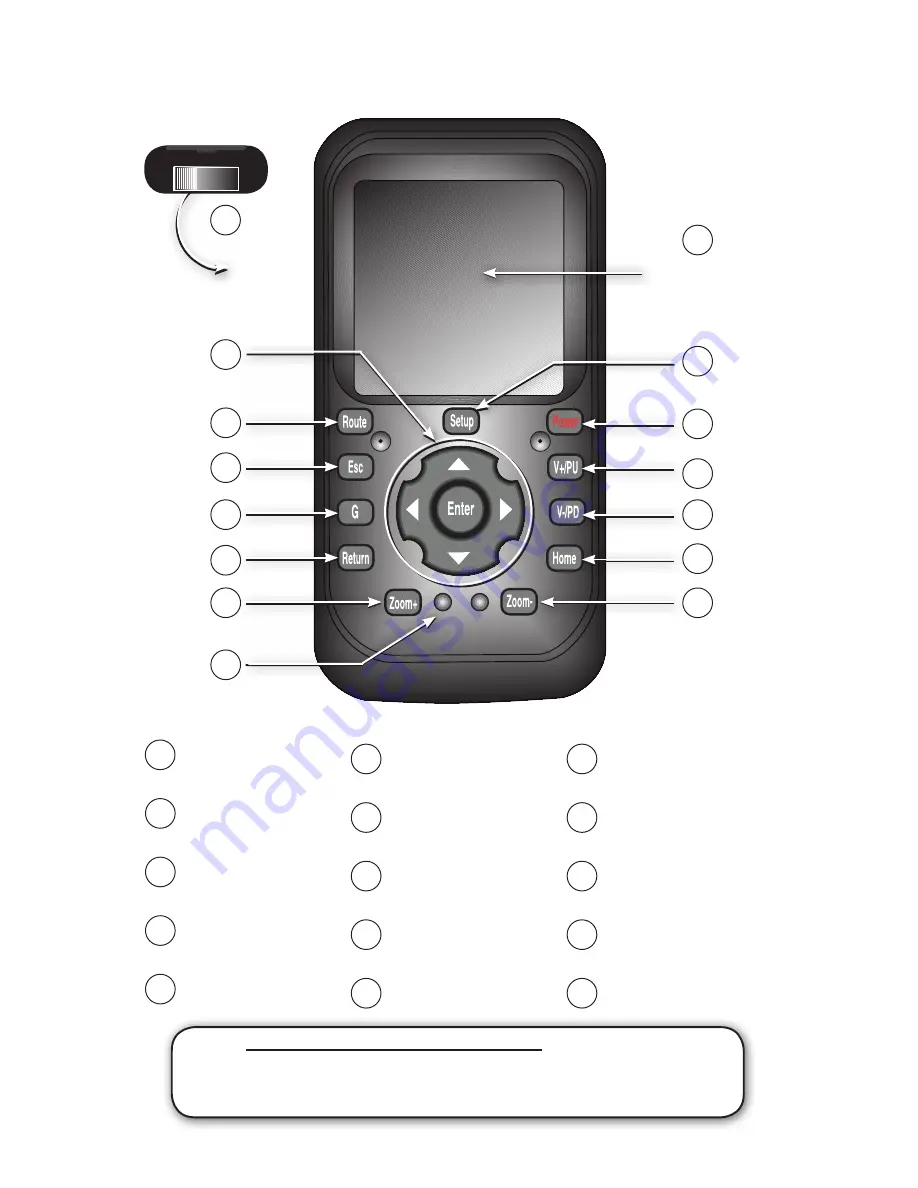
Prodigy ONE Remote Control
Touch Pad Area
(Moves cursor on
screen)
NOTE
:
Only in applications of non touch-screen installations is the use of the Prodigy ONE
remote control necessary and included as a standard item. For most applications the direct
touch-screen control of Prodigy ONE functions is the primary control mechanism, but if you wish
to control Prodigy ONE with the RF remote as well, it is available as an optional accessory.
1
2
ON OFF
Main ON / OFF Switch is
on the back side
3
4
5
6
7
8
9
10
11
12
13
14
15
1
2
3
4
5
6
7
8
9
10
11
12
13
14
15
Main ON / OFF Switch.
Switch
to OFF when unused for long
periods to preserve battery life.
Touch Pad Mouse.
Moves
cursor around if touch screen
control is not available.
Enter Button and Arrow
Controls.
Use to scroll and
select screen commands.
Route Button.
Use to jump to
the route information screen
while in Navigation.
ESC Button.
Press and hold for
1 second to turn LCD display
on or off.
Power Button.
Press 1 second
for Navigation menu. Press 3
seconds turns off Prodigy ONE.
V+ / PU Button.
Press while
in Navigation to increase the
volume of voice prompts.
V- / PD Button.
Press while
in Navigation to decrease the
volume of voice prompts.
Home Button.
Use to jump to
the route information screen
while in Navigation.
Zoom Out.
Press while in
Navigation to zoom the screen
out for a broader map view.
G Button.
Press and hold for 1
second returns to Main Menu
without exiting Navigation
Return Button.
Press while
in Navigation to return to the
mapping screen.
Zoom In.
Press while in
Navigation to zoom the screen
in closer to the map detail.
LED Indicator.
These light
up whenever the remote is
transmitting a command.
Setup Button.
Press while in
Navigation to setup preferences
for route guidance.
Optional except in non-touch screen applications
Содержание Prodigy ONE
Страница 1: ...DIRECTUS PRODIGY ONE Quick Start Guide...
Страница 43: ...This page is intentionally left blank...


