Quick Start Guide
Page 10
Navigation
Prodigy ONE Navigation functionality is intuitive and easy to learn. This section contains instruction on these
functions and features of the Navigation software:
• Getting Started - Configuring Your Navigation System
• Menu and Map Screen Detail (what the icons/symbols mean)
• Methods of Choosing a Destination
• Example of Direct Address Entry
• Example of Navigating to an Intersection
• Examples of Navigating to a POI
Automatic Start of Navigation
Prodigy ONE starts for the first time in Navigation rather than the Main Menu screen with the icons. Should you
wish to change Prodigy ONE to start up with the Main Menu screen first, you can set the system to “Auto Navi
Off” in the System menu. See page 30.
Getting Started - Configurations
When you use the Prodigy ONE’s Navigation software for the first time, you must configure it with your
preferences of language, voice prompts, regional settings, route planning options and acceptance of the End
User License Agreement.
Chances are your installer will have completed this step for you and the configurations are already set. Should
you need to complete the initial configurations, simply start Navigation and follow the on-screen prompts
choosing the appropriate choice for the selection. Please note that you can change any of these configurations
at any time later, but you must at least complete the Configuration Wizard to provide the initial (default) settings
to begin using Navigation.
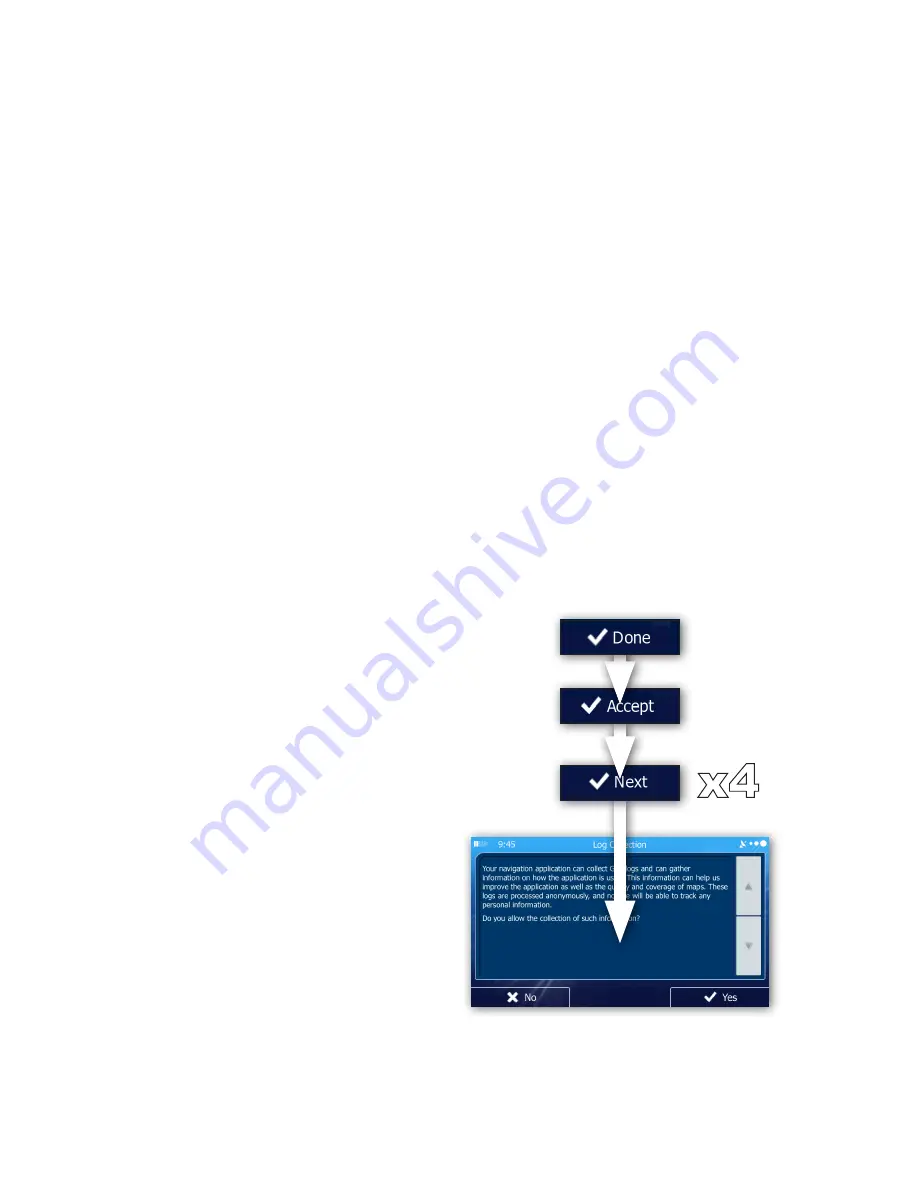
1) Select Language, then choose “
Done
”.
2) Accept the End User License Agreement by
choosing the “
Accept
” button.
3) When the Configuration Wizard begins and you’re
ready, choose “
Next
”.
4) Select your preferred language and voice style
for any voice prompts that the navigation system
will provide (if you have voice prompts enabled in
your Sound and Warning settings). Once selected,
choose “
Next
”.
5) If needed, modify the time format and unit settings.
Once selected, choose “Next”. If no changes need
to be made simply leave as is and choose “
Next
”.
6) If needed, modify the route planning options. Once
selected, choose “Next”. If no changes need to be
made simply leave as is and choose “
Next
”.
7) The initial setup should be complete at this step.
The final step asks if you wish to allow anonymous
collection data to validate mapping and GPS
accuracy. Choose “
Yes
” or “
No
”.
8) After the Setup Wizard is complete, the Navigation menu appears and you can start using Prodigy ONE
Navigation.
x4
Содержание Prodigy ONE
Страница 1: ...DIRECTUS PRODIGY ONE Quick Start Guide...
Страница 43: ...This page is intentionally left blank...


