background image

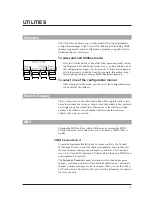
5.  Use the Data Wheel to select the desired Song Step option.

6.  Press the Utilities button once again to exit; this returns you to the

mode from which you entered.

Song Step Direction

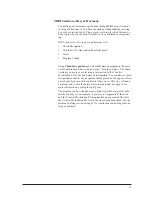
can be controlled in various ways. The Vocalist

Workstation EXÕs Song Step Forward messages can be assigned to MIDI
Continuous Controller number 17, or any MIDI note from C -1 to G 9.
Song Step Backward messages can be assigned to MIDI Continuous
Controller 18, or any MIDI note from C -1 to G 9. If MIDI notes are used
to control song steps, be sure to assign unique notes to the forward and
backward directions to avoid conflicts. 

The Song Step direction control options are:

¥

CC17 (value equals # of Steps)

Step forward

¥

CC18 (value equals # of Steps)

Step back

¥

MIDI Notes (any two)

Step forward and back

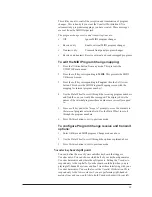
To change the MIDI Song Step direction:

1.  Press the Utilities button from any mode; this presents the

UTILITIES main menu.

2.  Press the MIDI softkey; this presents the MIDI Utilities sub-menu.

3.  Press the softkey corresponding to Song.

4.  Press the Right Arrow button three times.

5.  Use the softkeys to select Forward or Backward direction fields and

the Data Wheel to select the desired controller.

6.  Press the Utilities button once again to exit; this will return you to

the mode from which you entered.

MIDI Dump Utilities

The Vocalist Workstation EXÕs MIDI Dump Utilities allow you transmit
programs, songs, and utility settings as MIDI system exclusive messages
to other Vocalist Workstation EXs, or computer-based sysex (system
exclusive) librarian programs for future retrieval.

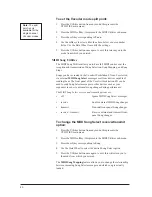
To dump a single program to another Vocalist
Workstation or a sysex librarian:

1.  Press the Utilities button from any mode; this presents the

UTILITIES main menu.

2.  Press the MIDI softkey; this presents the MIDI Utilities sub-menu. If

you are dumping the program to a sysex librarian, ensure that the
librarian is ready to receive a sysex dump.

3.  Press the softkey corresponding to 

Dump

.

4.  Use the Data Wheel to select the desired program to dump.

5. Press 

the 

Store

button to dump the program; the unit will display

ÒDumping...completedÓ after about one second to indicate that the
dump is finished.

6.  Press the Utilities button once again to exit; this will return you to

the mode from which you entered.

Note - Supporting earlier
DigiTech Harmony prod-
ucts: 
To maintain compati-
bility with earlier products,
the Vocalist Workstation
EX is able to receive a sin-
gle program dump from a
Studio Vocalist or another
Vocalist Workstation.
Consult the appropriate
owner’s manual for dump
procedure.

42

Содержание VOCALIST Workstation EX

Страница 1: ...VERSION EX 1 2...

Страница 2: ...lass B EN 50082 1 1992 Supplementary Information The product herewith complies with the requirements of the EMC Directive 89 336 EEC 1989 as amended by the CE Marking Directive 93 68 EEC 1993 IVL Tech...

Страница 3: ...22 Reverb 23 Mix 24 Harmony Editing Changing Softkey Assignments 26 Editing Individual Harmony Styles 27 Customizing A Harmony Naming Programs and Styles 30 Storing Your Edits 32 Utilities MIDI 33 MI...

Страница 4: ...Maj scale 48 PCorr 3 Min scale 49 PCorr 4 Nearest semi 50 PCorr 5 2 semi bend Control Hints Sing or play a vocal track No front panel or MIDI input required Sing or play a vocal track No front panel...

Страница 5: ...mance or studio recording The Vocalist Workstation EX s features include up to 5 part harmony generation including input vocal harmony voice gender feature extensive humanizing options front panel mix...

Страница 6: ...n a wet basement or near a swimming pool etc Care should be taken so that objects do not fall and liquids are not spilled into the enclo sure through openings POWER SOURCES The appliance should be con...

Страница 7: ...g antenna Increase the separation between the equipment and receiver that may cause undesired operation Connect the equipment into an outlet on a circuit different from that to which the receiver is c...

Страница 8: ...l signal processor If it lights reduce the input gain or front panel mixer faders The Lock LED shows that the pitch detection circuitry has recognized the input pitch 3 Mode Bypass button group The Fa...

Страница 9: ...re information on editing Programs see the Editing chapter 8 Front Panel Mixer section These faders allow you to modify mix levels quickly They are global controls in that they affect all programs The...

Страница 10: ...jack for headphones 6 Left and Right outputs These are the main mix outputs They are TRS tip ring sleeve type to send balanced or unbalanced signals depending on the number of con ductors in the conne...

Страница 11: ...you have a live performance mixer with enough effects channels This allows you to use separate processing on the Lead and Harmony voices i e EQ compression or an external mic preamp such as the DigiTe...

Страница 12: ...sequencer for automated playback later This could be useful for live vocal per formances using sequenced backing tracks You could also use the sequencer to back up your edited patches to disk If you...

Страница 13: ...nd bring the Output level fader up to the nominal level bump at halfway up the fader s travel This will set the output level to nominal 4 dB If you are sending audio to a mixer input that operates at...

Страница 14: ...character field shows the current key or chord root note in Scalic or Chordal harmony programs only Program Name A name of up to 15 characters is shown here There may be identical names in the User b...

Страница 15: ...ed to call up a different harmony variations Each Softkey corresponds to a harmony style on the LCD display see example below Several different harmony styles are assigned to each program so that you...

Страница 16: ...hord Chordal harmonies automatically move harmony inter vals so that they sound correct over your lead voice melody For examples of Chordal harmony choose any of the Factory Programs 16 through 25 Cho...

Страница 17: ...will follow the lead vocal sliding smoothly between notes sm or whether the harmony will not slide between notes but will jump from scale note to scale note in a stepped fashion st For more informati...

Страница 18: ...ormance into the correct pitch Use it to rescue a recorded track where the performance is good but some of the notes are out of tune For examples of Pitch Correct choose Programs 46 through 50 The pro...

Страница 19: ...styles from which you can choose as does Reverb Harmony uses a variation on the style concept which is described later in this chapter The Mix and Program Name parameters do not use styles Editing a...

Страница 20: ...modes each layer of the menu system contains a different group of softkey assignments They perform the following functions to select the parameter you want to modify to select the harmony voice you wa...

Страница 21: ...y are coming from a distinctly separate group of people rather than being multiples of you The two editable parameters for Gender are Assignment and Setting Assignment There are two Genders assignable...

Страница 22: ...ly for each voice Amount This sets the number of cents sharp or flat the harmony voices are The amount is editable in 1 cent increments between 100 cents 1 semitone above or below the input note Rando...

Страница 23: ...viation above and below the root pitch of the harmony note This varies in 1 cent increments between 0 and 100 cents Rate This is the modulation speed of the vibrato It is measured in Hertz Hz the numb...

Страница 24: ...domness with the Data Wheel while you sing Scoop Scooping refers to a technique singers use where they bend the pitch into a note from below the target pitch This feature makes your Vocalist Workstati...

Страница 25: ...lect the other voices with the softkeys beneath them and modify them with the Data Wheel 6 To set the Scoop rate press the right arrow button Turn the Data Wheel to edit voice 1 Zero is the slowest an...

Страница 26: ...o the overall reverb As opposed to the Brightness control which adjusts the time of high frequency decay the HF Rolloff control adjusts the amount of high frequencies present The range of control is f...

Страница 27: ...han the other three voices would also have proportionately less reverb Each program has its own mixer settings There are no Mix styles as there are for the other edit parameters To edit the Mix parame...

Страница 28: ...type with another in a Chordal harmony program for example to the point of determining exactly which notes the Vocalist Workstation EX generates for any series of input notes in a Scalic harmony prog...

Страница 29: ...he next editing level and create or modify one for yourself You have a choice of the following harmony style editing parameters Harmony Type Scale or Chord Select You can choose between Chromatic Scal...

Страница 30: ...ny Motion Chordal mode only Harmony motion gives you control over the number of break points in each octave A break point is the note at which the harmony interval changes up or down depending on the...

Страница 31: ...n 2 Press the softkey that corresponds to the Harmony parameter The LCD shows the the current softkey selected by an arrow its harmony style in quotation marks and the other softkey assignments 3 Pres...

Страница 32: ...The Custom Harmonies screens are as follows Custom Voicing You have a range of twelve input notes within one octave to assign alter native harmony voicings to You can however choose any of the notes w...

Страница 33: ...blank space the default assignment is from the lower case alphabet Also included are insert and delete functions to speed naming To change a Program or Style name 1 Select the program or style you wa...

Страница 34: ...lank user slot to store the new program to 3 Press Store again to accept the default name and destination If you want to you can change the destination with the Data Wheel To store styles to the user...

Страница 35: ...essing this soft key pro duces the introduction screen as shown when the product is first powered up Displayed on the second line of this screen is the software version number The software version num...

Страница 36: ...ow the options Turn the Data Wheel or use the upper and lower softkeys to select the desired channel Selecting the off option disables the MIDI program change fea ture Selecting the omni option causes...

Страница 37: ...The chord voicings you use in your playing are interpreted by the Vocalist Workstation EX as key and harmony information You can also set chord recognition so that it only recognizes chords played on...

Страница 38: ...sequencer Each button has its own CC16 value and is shown in the following graphic MIDI Notes give you another way to combine program changes and key and harmony changes into one MIDI channel Each MID...

Страница 39: ...e or below options and the split point note selection 7 Press the Utilities button to exit to the previous mode MIDI Continuous Controllers CC The Vocalist Workstation EX responds to MIDI CC messages...

Страница 40: ...soft key corresponding to CC 4 Use the softkeys to select one of the three editable fields in the MIDI Controllers screen the internal parameter you want to control the CC that controls it and the con...

Страница 41: ...you would like remapped The display shows the names of the internal programs these numbers are currently mapped to 5 Press a soft key under the maps to prompt to move the brackets to the internal prog...

Страница 42: ...e used to send Song Select messages to other devices such as your sequencer in order to automate song changes during performance The MIDI Song Select receive and transmit options are off Ignore MIDI S...

Страница 43: ...oll Press a softkey under the maps to prompt to move the indi cator arrow to the internal song selection field Use the Data Wheel to select the desired internal song number 6 Press the Utilities butto...

Страница 44: ...r 6 Press the Utilities button once again to exit this will return you to the mode from which you entered MIDI Dump Utilities The Vocalist Workstation EX s MIDI Dump Utilities allow you transmit progr...

Страница 45: ...are dumping all programs to a sysex librarian ensure that the librarian is ready to receive a sysex dump 3 Press the softkey corresponding to Dump 4 Press the Right Arrow button twice 5 Press the Stor...

Страница 46: ...ters as well as Continuous Controller Program Select and Song Select mappings To dump utility settings to another Vocalist Workstation or a sysex librarian 1 Press the Utilities button from any mode t...

Страница 47: ...tation EX to its initial factory state Pressing the Init softkey from within the Utilities mode presents the Initialize Utilities sub menu From the Init screen you can choose to initialize a user Prog...

Страница 48: ...s the Init softkey this presents the Initialize Utilities sub menu 3 Press the softkey corresponding to All 4 Press the Store button A warning tells you that all user programs songs and styles will be...

Страница 49: ...tered User Utilities The User Utilities allow you to select between eight different levels of LCD display contrast and to enable or disable voice editing of harmony intervals Voice editing of harmony...

Страница 50: ...produced at the outputs This feature is only available within Utilities mode When you set the internal synthesizer to On you can return to Programs mode and press any note on the front panel keyboard...

Страница 51: ...rs It is easily modified while the singer sings To adjust the Ess Sensitivity 1 Press the Utilities button from any mode this presents the UTILITIES main menu 2 Press the Audio softkey 3 Use the Data...

Страница 52: ...Press the Audio softkey 3 Press the Right Arrow button three times 4 Use the Data Wheel to increase or decrease the Anti feedback Control as desired 5 Press the Utilities button once again to exit th...

Страница 53: ...e 50 song pre sets Song mode also lets you program chord changes which are needed in the Chordal mode if you are not using MIDI Simply press the FS300 footswitch at the correct musical points to step...

Страница 54: ...ecially useful for songwriting where the arrangement of verse chorus and bridge is likely to change To create a new song section 1 Press the Songs button This presents the Performance screen 2 Turn th...

Страница 55: ...ward and back through the steps If you have missed a chord press Insert and add it as before If you have more steps than you need or an incorrect entry press the Delete softkey Editing Your Steps If y...

Страница 56: ...ng with the Data Wheel 2 Press the Edit button once 3 Press the Name softkey 4 The current name is shown on the second line The softkeys are used to move the cursor and to enter letters numbers and sy...

Страница 57: ...u need to know the arrangement of the song you are copying from or creating It might be helpful to jot it down on a piece of paper Start by writing down the whole song even the parts that don t have h...

Страница 58: ...rmanent To change the key of your song 1 Press the Songs button to enter Songs mode and use the Data Wheel to select the desired song 2 Press the Edit button once 3 Press the note on the front panel k...

Страница 59: ...tion of notes that is pleasing to sensibilities accustomed to the western twelve tone scale Harmonies that are correct are referred to as being Diatonic which is defined as any melody or group of cho...

Страница 60: ...t of understanding harmony is pinpointing the difference between the Scalic and Chordal harmony types There are many of each type of preset in the Vocalist Workstation EX that by trial and error you h...

Страница 61: ...ces that the Vocalist Workstation EX has from which to pro duce a Chordal harmony The following graphic shows where the harmo ny notes would fall in a simple 1 voice above Scalic and Chordal harmo ny...

Страница 62: ...to 20 KHz 0 1 dB Signal to Noise 92 dB A weighted Total Harmonic Distortion 0 032 Noise Power Requirements Input voltage 9 75 VDC Input current 820 mA Use only Harmon Pro Group PS750 adaptor or exact...

Страница 63: ...Y Mode 2 OMNI ON MONO Mode 3 OMNI OFF POLY Mode 4 OMNI OFF MONO O Yes X No 1 4 1 4 1 16 1 16 0 127 1 128 1 128 0 127 24 102 Memorized X X Mode 3 X X O Vocoder Scooping X X X X X O Up to 12 Semitones X...

Страница 64: ...t panel data size hi 00h data size lo 56h character set 1 byte LCD buffer 80 bytes levels 7 4 return levels 7 4 input levels LED state 2 bytes 1 bypass 2 factory 3 user 4 song 5 utility 6 edit format...

Страница 65: ...bits byte 3 data 2 byte 6 0 bits byte 4 data 3 byte 6 0 bits byte 5 data 4 byte 6 0 bits byte 6 data 5 byte 6 0 bits byte 7 data 6 byte 6 0 bits byte 8 data 7 byte 6 0 bits Example To represent the v...

Страница 66: ...mber of Styles 1 byte Style Header 2 bytes Style Data xx bytes EOX Repeated for total number of Styles see note 2 MIDI SYSEX Dump 1 Vocalist Workstation EX Program Formats see note 1 below 2 Dump 1 St...

Страница 67: ...of Styles 1 byte Style Header 2 bytes Style Data xx bytes EOX Repeated for total number of Styles see note 2 MIDI SYSEX Dump 1 Vocalist Workstation non EX version Program Formats see note 1 below 2 Du...

Страница 68: ...he dotted line is transmitted in 8 7 bit packed format e g MSbits byte followed by n 7 data bytes with MSbits cleared SYSEX Header 7 bytes Number of Styles 1 byte Style Header 2 bytes Style Data xx by...

Страница 69: ...eader 7 bytes Number of Styles 1 byte Style Header 2 bytes Style Data xx bytes EOX Repeated for total number of Styles see note 2 MIDI SYSEX Dump 1 Studio Vocalist Program Formats see note 1 below 2 D...

Страница 70: ...pth 2 0 to 100 for 0 to 100 8 depth 3 0 to 100 for 0 to 100 9 rate 0 0 to 99 for 0 to 9 9 10 rate 1 0 to 99 for 0 to 9 9 11 rate 2 0 to 99 for 0 to 9 9 12 rate 3 0 to 99 for 0 to 9 9 13 delay 0 0 to 2...

Страница 71: ...o 11 6 protected 7 bypass off 0 ON 1 OFF 8 protected 9 interval display type 0 Notes 1 SemiTones 10 protected 11 protected 12 protected 14 lcd contrast 0 to 7 7 High 15 protected 16 timbre split point...

Страница 72: ...otected 66 protected 67 protected 68 protected 69 protected 69 protected 70 protected 71 protected 72 protected 73 protected BUTTON PRESS switch 4 for key press which are on off values control absolut...

Страница 73: ...1010 27 1B 0001 1011 28 1C 0001 1100 29 1D 0001 1101 30 1E 0001 1110 31 1F 0001 1111 32 20 0002 0000 33 21 0002 0001 34 22 0002 0010 35 23 0002 0011 36 24 0002 0100 37 25 0002 0101 38 26 0002 0110 39...

Страница 74: ...00 Fax 801 566 7005 International Distribution 7 Farmington Road Amherst New Hampshire 03031 U S A Fax 603 672 4246 DigiTech is a registered trademark of DOD Electronics Corporation Copyright 1998 DOD...

Отзывы: