


3–18
Removing and Replacing FRUs
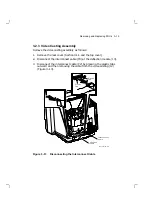
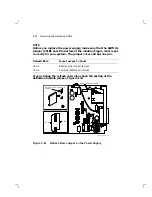
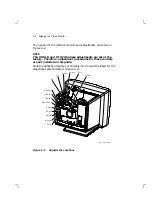
8.
Loosen the two spring-loaded captive screws until they spring out
toward you. The screws hold the video casting assembly to the
chassis.
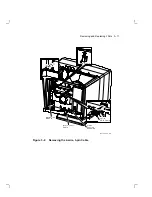
9.
Gently pull the top of the video casting assembly towards you.
10. Gently lift the video enclosure assembly up and out of the chassis
(Figure 3–16).
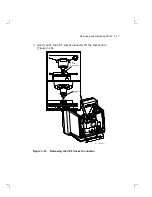
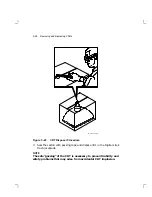
CAUTION
When you install the video casting assembly, carefully push the
CRT socket connector onto the CRT neck. Use care not to bend
the pins during this procedure.
M A - 1 2 3 7 - 8 9 . D G
S p r i n g - l o a d e d
C a p t i v e S c r e w ( 2 )
V i d e o C a s t i n g
A s s e m b l y
Figure 3–16
Removing the Video Casting