background image

ࢋ ⴽ ١ Ѩ ৻ ܢ ރ ݏ ॠ ܉ ߄ ஒ Ҹ ՛

Shenzhen Digital Dream Numerical Technology Co., Ltd.

D D C S -

E x p e r t

"MMDPQZSJHIUTSFTFSWFE

4IBMMOPUCFSFQSPEVDFEXJUIPVUQFSNJTTJPO

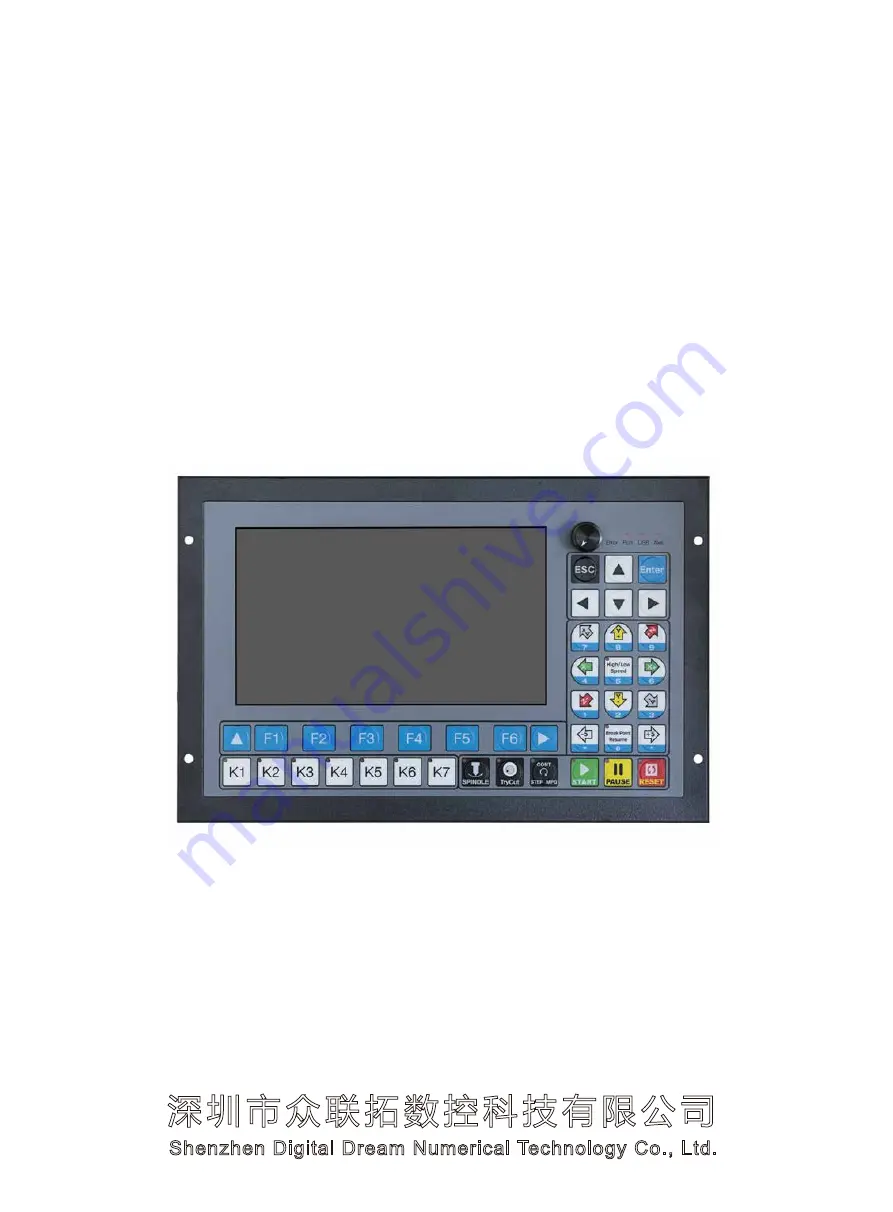
Standalone Motion Controller

Users Manual V1

5IJT.BOVBMCBTFEPO

4PGUXBSF7FSTJPO

)BSEXBSF7FSTJPO

www.nvcnc.net

Содержание DDCS-Expert

Страница 1: ...umerical Technology Co Ltd D D C S E x p e r t MM DPQZSJHIUT SFTFSWFE 4IBMM OPU CF SFQSPEVDFE XJUIPVU QFSNJTTJPO Standalone Motion Controller Users Manual V1 5IJT BOVBM CBTFE PO 4PGUXBSF 7FSTJPO BSEXB...

Страница 2: ...ard Overview 15 15 18 20 20 4 2 Power Supply Input 4 3 Spindle Wiring 4 3 1 Analog Spindle 22 4 3 2 Servo Spindle PLUSE DIRECTION 22 4 3 3 Multi Speed Spindle 24 4 3 4 Relay Wiring 25 4 4 Stepper Serv...

Страница 3: ...ind Middle Point in X Axis 72 5 1 11 2 Find Middle Point in Y Axis 74 5 1 11 3 Find a middle point f or the Arc 78 5 1 12 Work Record 80 5 1 13 Sort Process 82 6 Program 85 7 Parameters 85 7 1 Paramet...

Страница 4: ...me The DDCS Expert numerical control system adopts the ARM FPGA design framework ARM controls the human computer interface and code analysis and the FPGA provides the underlying algorithms and creates...

Страница 5: ...emote les by Ethernet 12 Spindle control mode support Multi speed 3 lines 8 kinds speed 0 10V Analog output and servo spindle output 13 Compatible with standard G code support popular CAD CAM software...

Страница 6: ...box that can t in a window of a small control box or control cabinet Four locking hooks x this controller from the frame The dimension you nd in Figure 1 1 and Figure 1 2 The front panel is 268mm 172...

Страница 7: ...ert Users Manual Page 6 The front panel consists of 40 user keys and the 7 inch 1024 600 LCD Figure 1 3 Front panel Figure 1 4 Back Side of the controller Figure 1 5 USB extended cable 7 Screen 40 But...

Страница 8: ...chine with the MPG Manual Pulse Generator BUSY Run G code Auto is showing when le is processing 1 4 Explanation of Abbreviations Keep away from exposure to moisture or water This product contains soph...

Страница 9: ...ine K1 K7 Keys Sub menu keys need to work according with the controller software In the software press the key to the next page of the sub menus In the software press the key to return to previous men...

Страница 10: ...key moves among the Para Kinds In IO page It moves the cursor left In Param Page the key moves among the Para Kinds In IO page It moves the cursor right By it we can come back to the main page cancel...

Страница 11: ...IO page the users can de ne the input port and output port and also can inpect the input output port and MPG status Power on the DDCS Expert controller system popup the main page and press F4 Key to g...

Страница 12: ...hard limit signal Negative 5th axis hard limit signal Positive X axis hard limit signal Positive Y axis hard limit signal Positive Z axis hard limit signal Positive 4th axis hard limit signal Positive...

Страница 13: ...pindle section speed 2 Spindle section speed 3 M8 M9 control signal M10 M11 control signal System alarm signal System Running signal System Brake signal System ready signal Tool release lock signal M1...

Страница 14: ...the X axis Zero Signal and when the X axis touched the limited switch it will show as below But the status is active doesn t mean that the according signal is active For example we reverse the signal...

Страница 15: ...O port Only when the users understand how to set the IO port and how to inspect the IO page it will help us on Wiring Here we move the X axis to touch the limit switch but status light doesn t light u...

Страница 16: ...er Input Port Output Port Driver Signal Output Analog Spindle PWM Spindle Start Stop 5P 5P 5D 5D 4P 4P 4D 4D ZP ZP ZD ZD YP YP YD YD XP XP XD XD COM COM COM COM IN24 IN23 IN22 IN21 IN20 IN19 IN18 IN17...

Страница 17: ...chanical Switch Outputs Ports Anolog Output Protecting Earthing 0 10V 0V Anolog Ground PWM Forward Rotation Ground PWM FOR COM The Max capacity of the output ports is 30V 500mA Shieding Twist Cable Sh...

Страница 18: ...24V PE GND 5P 5P 5D 5D 4P 4P 4D 4D ZP ZP ZD ZD YP YP YD YD XP XP XD XD ACM IN01 IN24 OUT01 OUT20 VSO ACM PWM COM FOR Protecting Earthing Connect it to the Earth DC24V 3A Power Supply Input for Contro...

Страница 19: ...t all then please go to check if you also give power to IO ports IO power gives the power to all the IO ports include the Limited switch Relay MPG Etop and all other Input and output Ports without it...

Страница 20: ...ILTER 115 250V 60 50Hz CX CX CY CY L L L CE RoHS L I N E L O A D G N L G N EMI FILTER 115 250V 60 50Hz CX CX CY CY L L L CE RoHS EMI Filter EMI Filter The Max capacity of the output ports is 30V 500mA...

Страница 21: ...ariable frequency drive only needs the Start Stop signal and the 0 10V signal to control the frequency FOR port is same wiring methods as the normal Output Ports FOR is for spindle forward rotation ou...

Страница 22: ...Digital Dream Standalone Motion Controller DDCS Expert Users Manual Page 21 Figure 4 8 Spindle Wiring Example 5P 5P 5D 5D ACM PWM VSO COM FOR Spindle Spindle Motor V W...

Страница 23: ...2 the current spindle speed is 6000 if the curernt section is 3 the current spindle speed is 9000 If the current section is 4 the current spindle speed is 12000 ect There are 3 Output ports related t...

Страница 24: ...0 as Spindle section speed 1 Out 19 as Spindle section speed 2 Out18 as Spindle section speed 3 The the wiring for the Multi Speed Spindle as follolwing Figure 4 11 The Wiring for the Multi Speed Spin...

Страница 25: ...xpert Input and Output are the user de ned IO ports as our example here we already set OUT10 as the Cooling on o output port and we already set the OUT01 as Vacuum valve on o output port If Relay Powe...

Страница 26: ...ethods The Pulse and Direction signal output voltage is 5V Pulse Twist Shielding Cable Pls use twist Shielding cable for the connection XP XD XD XP PE Pulse Direction Direction Servo Stepper Driver DS...

Страница 27: ...SE Input and Output are the user de ned IO ports In our example we already set IN24 as the 5th axis servo alarm signal input port Figure 4 15 Stepper Servo driver connect with DDCS Expert ALM ALM 5P 5...

Страница 28: ...r the wiring methods for the probe with over strock alarm here we also set one sample for it Figure 4 16 Proximity switch Mecahnical switch and normal Probe wiring methods Figure 4 17 The Probe sensor...

Страница 29: ...e IO port to sent the IN07 as the Probe signal IN06 as Negative Z axis hard limit signal Figure 4 18 The wiring methods of Probe sensor with over strock signal COM COM COM COM IN24 IN23 IN22 IN21 IN20...

Страница 30: ...B Phase Encoder A Phase Encoder B Phase Encoder A Phase Input signal COMMON Ground X10 Ratio Select Y Axis Select 4th Axis Select 5th Axis ESTOP Input Power Supply Pin No Definition Notes MPG power s...

Страница 31: ...MPG interface After nished the wiring we can check the MPG wiring is correct or not in the IO Page Look the gure 4 22 and 4 23 X100 and X block turns to red color that means the X axis and X100 ratio...

Страница 32: ...the controller is in MPG or CONT or Step mode just swtich the MPG from O to ON the controller mode just turns to MPG mode and also easily to see which axis the MPG is in there will be a little mark on...

Страница 33: ...s wiring Note It you want to use the single terminal MPG there is no A B MPG please refer to Figure 4 25 for reference As for the unlisted MPG please take the di erential MPG wiring mode Series Port i...

Страница 34: ...th 6 All Go Home 4 Go Home 6 Break Run 5 Clear 1 Start Line 2 Power Resume 3 Pause Resume 6 Clear All 1 Set X 2 Middle X 3 Set Y 4 Middle Y 7 Manual 1 Select Coord 2 Clear X 3 Clear Y 4 Clear Z 5 Z st...

Страница 35: ...dle 1 Machine 2 Manual 3 Process 5 IO 6 Home 7 Probe 8 Hard Limit 9 Software limit 10 MPG 11 backlash 12 Tools 13 System System Info 1 Registration 2 Password Set 3 System Update 4 System Set 5 System...

Страница 36: ...O displayed while processing and executing the G code le CONT indicates Jog CONTINUOUS You can Jog manually with the or keys of X Y Z and A and B STEP Indicates STEP Jog mode You can Jog manually in a...

Страница 37: ...etting When in Step Mode Pressing the rotary button knob or keys to change between the 4 distances 0 001 0 01 0 1 1 or de ne any distance When in MPG mode you can use the MPG to jog the machine High L...

Страница 38: ...ounter will add 1 the working time cleared to 0 When M47 reached to the cycle times the system pauses and the number cleared to 0 17 Cycle Times Set a limited number of cycle times When system excute...

Страница 39: ...the knob or the Up Down keys to edit the numbers The percent number increase or decrease in 1 range is 0 120 After the setting done don t forget to press Enter to active the FRO SRO Spindle Rate Overr...

Страница 40: ...ONT or MPG it is SJR When the controller mode is STEP it is Jog Step When in the CONT or MPG mode By the Rotary button Knob or the and keys we can shift among the di erent colums We move the cursor se...

Страница 41: ...Figure 5 20 new distance active Now we Press key and shift the mode to STEP We press Enter and there a pull down menu pop out Now We have 5 choise 0 001mm 0 01mm 0 1mm 1mm and INC Distance INC Distanc...

Страница 42: ...and keys we can shift among the di erent colums to Feed Rate We press the Enter button a small windown pop up from the bottom The Ignore F Yes means Ignore the F command from the G code then the syste...

Страница 43: ...42 And we can de ne the FeedRate Value by the pressing enter on Set Default F We can write in numbers and press Enter again Then the Feedrate value is done Figure 5 26 Set the Default Feed Rate Figure...

Страница 44: ...d Because DDCS Expert Controller has three kind Spindle Mode 1 Analog When the controller control the spindle speed by the anolog 0 10V voltage output 2 Plu Dir When de ne the spindle mode as the Serv...

Страница 45: ...code then the system will process by the S command we set here The Ignore S No means the system ignore the Analog Spindle speed we set control system will process by the S command from G code le Here...

Страница 46: ...the pressing enter on Set Default S We can write in numbers and press Enter again Then the Analog Spindle Speed setting is done When the spindle mode is in other two kinds mode the operation is the s...

Страница 47: ...Definition Remark Range Yes No 244 Enable realtime toolpath When processing a file active realtime toolpath or not The Toolpath display modes Can set a angle to simulate Based on X axis Can set a angl...

Страница 48: ...nd any signals Then we need to go to Program le select the le and simulate 2 If it s rst time the controller simulate the G code le the screen may not match well with the toolpath screen But after one...

Страница 49: ...Digital Dream Standalone Motion Controller DDCS Expert Users Manual Page 48 Figure 5 46 System is in Simulation Figure 5 47 System is in Simulation Figure 5 48 Simulation finished...

Страница 50: ...ve the oating probe the system pops up a window to ask if the tool is just above the sensor we press Enter the cutter start to probe down It will probe the times we set and calculate an average value...

Страница 51: ...Digital Dream Standalone Motion Controller DDCS Expert Users Manual Page 50 Figure 5 50 Floating Probe Figure 5 51 Star to Floating Probe Figure 5 52 Floating Probe Finished...

Страница 52: ...fixed tool set valid Enable or Disable the Floating Probe The probe times When the user active the Probe the system can probe 1 5 times as what the users set At last system calculate an average value...

Страница 53: ...ordinate after arrive to that position it start to probe down It will probe the times as we set and calculate an average value and the cutter retract a distance Then the xed probe nished The probe squ...

Страница 54: ...In the Monitor Page Press F3 to go to Go work Zero Page Here the users can choose singal axis go to zero or can choose the All axis go to zero In our example here we press F6 to All go Zero Figure 5 5...

Страница 55: ...ial speed when Home 111 5th axis homing speed 99 99999 mm min 5th axis initial speed when Home The movement direction when Home of X axis The movement direction when Home of Y axis The movement direct...

Страница 56: ...Users Manual Page 55 Here we can choose the single axis to Home or we can All axis go home In our example here we choose the All Go Home by F6 Figure 5 59 In Monitor Page Press F4 to Go Home Figure 5...

Страница 57: ...axis For example if we set 2 times the each axis will go to the limited swtich to be detected by two times Everytime we power on the controller DDCS Expert the system will pop up a diagram as Figure 5...

Страница 58: ...Manual Page 57 In the Monitor Page Press F5 to go to Clear Page Here the users can choose singal axis go CLEAR or can choose the All axis CLEAR In our example here we press F6 to Clear All Figure 5 6...

Страница 59: ...1 10 000 000 lines 2 Power Resume Power Cut o recovery When the power cutt o the system can remem ber the line when power cut o and create a breakpoint 3 Pause Resume When pause the processing the sys...

Страница 60: ...te in numbers and press enter system will start to work from this speci c line After power cut o or Pause the controller can create a breakpoint number If it is Power breakpoint press F2 the systme ca...

Страница 61: ...Users Manual Page 60 Figure 5 75 Go to second page of Monitor Figure 5 76 Press F1 key to Manual Page Figure 5 77 Manual Page 5 1 8 Manual In the Monitor Page and we press key to go to the second pag...

Страница 62: ...Manual page we can operate some simple functions as Home Clear and Zero We can check the input ports status to check it is conducting or not And there is 14 virtual keys by which the users can de ne...

Страница 63: ...rd Set Page we can Select coor dinate and also we can edit the o set between the G54 G55 G56 G57 G58 G59 and Mach anical Coordinate In the rst Page there is functions as Select Coord Clear X Clear Z Z...

Страница 64: ...Select Coord then the current coordinate is the one we choose For example we move the cursor to any block on G57 and we press Select Coord key then the current Coordinate change from G54 to G57 Figure...

Страница 65: ...any block of the coordinate this coordinate is selected Then we press Clear X then the X axis value is cleared and the X axis o set in G57 is created Here we took X axis for example If the users want...

Страница 66: ...d Move up We can set Z step by pressing the Z step Key F5 The one step number can be shift among 0 01mm 0 1mm 1 00mm 5 00mm It s good both for big distance and small distance setting By the Deeper and...

Страница 67: ...can edit 6 lines G code by vitual keyboard Figure 5 89 MDI Page 5 1 10 MDI Figure 5 88 Press F3 key to MDI Page By the Rotary button Knob or the and keys we can shift among the di erent Lines We move...

Страница 68: ...eam Standalone Motion Controller DDCS Expert Users Manual Page 67 Figure 5 90 Vitual Keyboard is enabled by Enter Figure 5 91 Edit a line of G code Figure 5 92 Edit a line of G code with another Vitia...

Страница 69: ...Expert Users Manual Page 68 As the users nished editing the G code press Execute 1 Execute 6 F1 F6 to execute the according G code line Figure 5 93 The 3 pages vitual keyboard shifted alternately by p...

Страница 70: ...line nd the Middle point from two points for X or Y axis And set the middle point as the Zero in the current workpiece coordinate G54 G59 2 Find a middle point for the Arc nd the Middle from 3 points...

Страница 71: ...there are 5 funcitional buttons Following we will take example of how to set the Middle to introduce how to use them Now we set a start point is X 50 an end point is X 100 We need to nd a Middle from...

Страница 72: ...e 71 Step 3 Move the X axis to X 100 Step 4 Press the Middle X key F2 the system will record the second point and calcu late the Middle point and set this point position as the Zero Figure 5 99 X 100...

Страница 73: ...72 5 1 11 2 Find Middle Point in Y Axis Now we set a start point is Y 50 an end point is Y 1 00 We need to nd a Middle from this two point Step 1 We move the Y axis to Y 50 Step 2 Press Set Y F3 Then...

Страница 74: ...the Zero Px1 First point Position in X Axis in Mechanical Coordinate Py1 First point Position in Y Axis in Mechanical Coordinate Px2 The second point Position in X Axis in Mechanical Coordinate Py2 T...

Страница 75: ...example to introduce the function To nd a middle point for an Arc we need to set 3 points on the Arc Lets say the rst point is X 50 Y 100 the second point is X 100 Y 50 the third point is X 50 Y 0 Ste...

Страница 76: ...Set the second Point Position We move the machine to X 100 Y 50 Figure 5 107 X 50 Y 100 Figure 5 108 First point Position is saved Figure 5 109 X 100 Y 50 Step 2 Press Set 1 Key F1 then the rst point...

Страница 77: ...The second point Position is saved Figure 5 112 Find Middle for the Arc Figure 5 111 X 50 Y 0 Step 6 Press Middle Key F3 then the third point Position is saved And The system calculate the Middle poin...

Страница 78: ...ordinate Second Pts X The second point Position in X Axis in Mechanical Coordinate Y The second point Position in Y Axis in Mechanical Coordinate Third Pts X The Third point Position in X Axis in Mech...

Страница 79: ...on Controller DDCS Expert Users Manual Page 78 In the Work Record Page we can check out the work record after the controller power on 5 1 12 Work Record Figure 5 113 Press F5 key to Work Record Page F...

Страница 80: ...ear all the record No The Processed G code le Number Name The G code le name Total Time The according G code le processing time No The processing times of the according G code le Start date The G code...

Страница 81: ...nt G code les in our control system Press New Key F3 to import some G code le from the Local Disk Please note that the les can only be imported from the Local Disk If you have the les in USB stick ple...

Страница 82: ...Digital Dream Standalone Motion Controller DDCS Expert Users Manual Page 81 Figure 5 119 Import the G code files from the Local Disk Figure 5 120 The G code files imported in www nvcnc net...

Отзывы: