50
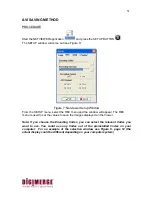
5. Set the Contrast/Bright/Sharpness/Color of each channel.
6. TIME SEARCH. This feature allows you to Search events on your DVR.
7. Used to adjust the PAN/TILT camera.
8.
a. Used to print the displayed image.
b. Used to capture the displayed image of the NetViewer in a JPEG file format
9.
a. Used to Start or Stop the recording on the DVR.
b. Used to activate REC function of the DVR
10. Local Player: Used to save the video on AVI or DVR format of the displaying image of
NetViewer or to stop it.
11. Connect/ Disconnect button
12. Information Display Screen
- The status of NORMAL/ALARM/MOTION/SCHEDULE REC is displayed.
- Marking whether currently displaying image is LIVE or PLAYBACK.
13. Video image is displayed.
Note: The Admin User has full access. The Guest User can ONLY use the No. 4 and
No. 10 buttons.
Choose the channel.
Set the Brightness Value.
Set the Contrast Value.
Set the Hue Value.
Set the Saturation Value.
Press the Search button. Select the
desire date and time and press the
Search button.
The DVR will start searching the data.
If the data were found, it will be played
automatically. If there is no data
available on specified date and time,
“DATA NOT FOUND” message will be
displayed.


