background image

7

English

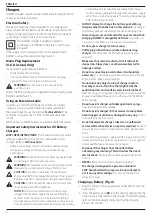
3.  The completion of charge will be indicated by the red light 

remaining ON continuously. The battery pack is fully charged 
and may be used at this time or left in the charger. To 
remove the battery pack from the charger, push the battery 
release button 

 25 

 on the battery pack.

Fig. A

23

25

nOTE: 

To ensure maximum performance and life of lithium-ion 

battery packs, charge the battery pack fully before first use.

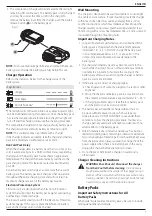
Charger Operation

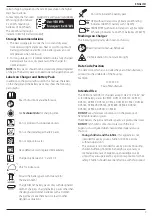
Refer to the indicators below for the charge status of the 
battery pack.

Charge Indicators

Charging

Fully Charged

Hot/Cold Pack Delay*

The red light will continue to blink, but a yellow indicator light 
will be illuminated during this operation. Once the battery pack 
has reached an appropriate temperature, the yellow light will 
turn off and the charger will resume the charging procedure.

The compatible charger(s) will not charge a faulty battery pack. 
The charger will indicate faulty battery by refusing to light.

nOTE: 

This could also mean a problem with a charger.

If the charger indicates a problem, take the charger and battery 
pack to be tested at an authorised service centre.

hot/Cold Pack Delay

When the charger detects a battery pack that is too hot or too 
cold, it automatically starts a Hot/Cold Pack Delay, suspending 
charging until the battery pack has reached an appropriate 
temperature. The charger then automatically switches to the 
pack charging mode. This feature ensures maximum battery 
pack life.
A cold battery pack will charge at a slower rate than a warm 
battery pack. The battery pack will charge at that slower rate 
throughout the entire charging cycle and will not return to 
maximum charge rate even if the battery pack warms.

Electronic Protection system

XR Li-Ion tools are designed with an Electronic Protection 
System that will protect the battery pack against overloading, 
overheating or deep discharge.
The tool will automatically turn off if the Electronic Protection 
System engages. If this occurs, place the lithium-ion battery 
pack on the charger until it is fully charged.

Wall Mounting

This charger is designed to be wall mountable or to sit upright 
on a table or work surface.  If wall mounting, locate the charger 
within reach of an electrical outlet, and away from a corner 
or other obstructions which may impede air flow. Mount the 
charger securely using screws (purchased separately) at least 
76 mm long, with a screw head diameter of 8–9.5 mm, screwed 
into wood through the mounting holes.

Important Charging Notes

1.  Longest life and best performance can be obtained if the 

battery pack is charged when the ambient temperature 
is between 18 ° – 24 °C. DO NOT charge the battery pack 
in an air temperature below 4.5 °C, or above 40 °C. This 
is important and will prevent serious damage to the 
battery pack.

2.  The charger and battery pack may become warm to the 

touch while charging. This is a normal condition, and does 
not indicate a problem. To facilitate the cooling of the 
battery pack after use, avoid storing the charger or battery 
pack in a warm environment.

3.  If the battery pack does not charge properly:

a.  Check operation of socket by plugging in a lamp or other 

appliance;

b.  Move the charger and battery pack to a location where 

the ambient air temperature is approximately 18 ° – 24 °C;

c.  If charging problems persist, take the tool, battery pack 

and charger to your local service centre.

4.  The battery pack should be recharged when it fails to 

produce sufficient power on jobs which were easily 
done previously. DO NOT CONTINUE to use under these 
conditions. Follow the charging procedure. You may also 
charge a partially used pack whenever you desire with no 
adverse effect on the battery pack.

5.  Foreign materials of a conductive nature such as, but not 

limited to, grinding dust, metal chips, steel wool, aluminum 
foil, or any buildup of metallic particles should be kept away 
from charger cavities. Always unplug the charger from the 
power supply when there is no battery pack in the cavity. 
Unplug the charger before attempting to clean.

6.  Do not freeze or immerse the charger in water or any 

other liquid.

Charger Cleaning Instructions


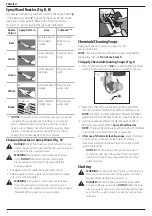
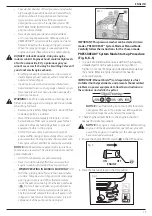
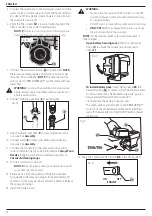
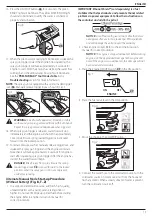
WARNING: Shock hazard. Disconnect the charger 

from the AC outlet before cleaning

. Dirt and grease 

may be removed from the exterior of the charger using a 
cloth or soft non-metallic brush. Do not use water or any 
cleaning solutions. Never let any liquid get inside the tool; 
never immerse any part of the tool into a liquid.

Battery Packs

Important Safety Instructions for All 
Battery Packs

When ordering replacement battery packs, be sure to include 
catalogue number and voltage.

Содержание DCB107

Страница 1: ...145mm 210mm ...

Страница 2: ...B Copyright DeWALT English original instructions 1 ...

Страница 3: ...d areas free from obstructions Equip areas with fire extinguisher suitable for petrol fires Definitions Safety Guidelines The definitions below describe the level of severity for each signal word Please read the manual and pay attention to these symbols DANGER Indicates an imminently hazardous situation which if not avoided will result in death or serious injury WARNING Indicates a potentially haz...

Страница 4: ...es which could cause injury to skin eyes or lungs Use only chemical cleaning soaps specifically recommended for high pressure washers Follow manufacturers recommendations Do not use chlorine bleach or any other corrosive compound DANGER RISK OF FLUID INJECTION AND LACERATION WHAT CAN HAPPEN HOW TO PREVENT IT Your pressure washer is equipped with PRESSUREADY The pressure washer can be started by si...

Страница 5: ...operation Never permanently secure trigger in pull back open position DANGER RISK OF UNSAFE OPERATION WHAT CAN HAPPEN HOW TO PREVENT IT Unsafe operation of your pressure washer could lead to serious injury or death to you or others Do not use chlorine bleach or any other corrosive compound Become familiar with the operation and controls of the pressure washer Keep operating area clear of all perso...

Страница 6: ...ts and switches DANGER RISK OF CHEMICAL BURN WHAT CAN HAPPEN HOW TO PREVENT IT Use of acids toxic or corrosive chemicals poisons insecticides or any kind of flammable solvent with this product could result in serious injury or death Do not spray acids petrol kerosene or any other flammable materials with this product Use only household detergents cleaners and degreasers recommended for use with pr...

Страница 7: ... and voltage Your pressure washer uses a DeWALT charger Be sure to read all safety instructions before using your charger For all information regarding the battery pack or charger please call Aust 1800 338 002 NZ 0800 339 258 or visit our website www dewalt com au www dewalt co nz Batteries Chargers Charge Times Minutes Cat VDC Ah Weight kg DCB104 DCB107 DCB112 DCB113 DCB115 DCB118 DCB132 DCB119 D...

Страница 8: ...hould be kept away from charger cavities Always unplug the charger from the power supply when there is no battery pack in the cavity Unplug charger before attempting to clean DO NOT attempt to charge the battery pack with any chargers other than the ones in this manual The charger and battery pack are specifically designed to work together These chargers are not intended for any uses other than ch...

Страница 9: ...ithin reach of an electrical outlet and away from a corner or other obstructions which may impede air flow Mount the charger securely using screws purchased separately at least 76 mm long with a screw head diameter of 8 9 5 mm screwed into wood through the mounting holes Important Charging Notes 1 Longest life and best performance can be obtained if the battery pack is charged when the ambient tem...

Страница 10: ...rd Transporting batteries can possibly cause fire if the battery terminals inadvertently come in contact with conductive materials When transporting batteries make sure that the battery terminals are protected and well insulated from materials that could contact them and cause a short circuit NOTE Lithium ion batteries should not be put in checked baggage DeWALT batteries comply with all applicabl...

Страница 11: ...eWALT charger may make them burst or lead to other dangerous situations Example of Use and Transport Label Marking Do not incinerate the battery pack USE without transport cap Example Wh rating indicates 108 Wh 1 battery with 108 Wh TRANSPORT with built in transport cap Example Wh rating indicates 3 x 36 Wh 3 batteries of 36 Wh Markings on Charger The following pictograms are shown on the tool Rea...

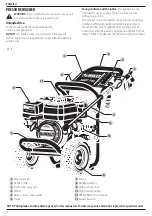
Страница 12: ...oduct is not intended for use by persons including children suffering from diminished physical sensory or mental abilities lack of experience knowledge or skills unless they are supervised by a person responsible for their safety Children should never be left alone with this product 3400 PSI 2 5 GPM 3400 Fig B 2 3 9 7 4 5 10 8 6 1 11 12 1 Panel assembly 2 Nozzle holder 3 Professional spray gun 4 W...

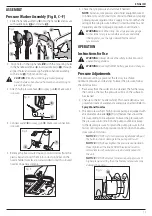
Страница 13: ...ssure before each use and while inflating tyres see the tyre sidewall for the correct tyre pressure OPERATION Instructions for Use WARNING Always observe the safety instructions and applicable regulations WARNING Use only DeWALT battery packs and chargers Pressure Adjustments The pressure setting is preset at the factory to achieve optimum pressure and cleaning To lower the pressure follow these i...

Страница 14: ...r WARNING Flying objects could cause risk of serious injury Ensure nozzle is completely inserted in quick connect socket and quick connect collar is fully engaged forward before squeezing spray gun trigger Fig H Chemicals Cleaning Soaps Applying chemicals or cleaning soaps is a low pressure operation NOTE Use only chemical and cleaning soaps designed for pressure washer use Do not use bleach To Ap...

Страница 15: ...R pull water supply or high pressure hose to move pressure washer This could damage hose and or pump inlet outlet DO NOT use hot water use cold water only Never turn water supply off while pressure washer engine is running or damage to pump will result WHEN OPERATING IN MANUAL MODE ONLY DO NOT stop spraying water for more than two minutes at a time Pump operates in bypass mode when spray gun trigg...

Страница 16: ...ng soap refer to Chemicals Cleaning Soaps 12 Turn the cold water source on NOTICE Risk of property damage Failure to do so could cause damage to the pump 13 Remove all air from the pump and high pressure hose by squeezing the spray gun trigger for approximately 30 seconds or until a steady stream of water is present Release the spray gun trigger 14 Install the battery pack WARNING Make certain the...

Страница 17: ...ed the water flow will begin DANGER Risk of injury from spray Ensure the spring loaded trigger lock 16 is moved forward to the locked position when the spray gun is not in use to prevent accidental spraying Alternate Manual Mode Start up Procedure Without Battery Fig B T Z 1 In a well ventilated outdoor area add fresh high quality unleaded petrol with a pump octane rating of 86 or higher Do not ov...

Страница 18: ...d slowly until resistance is felt Then pull cord rapidly to avoid kickback and prevent hand or arm injury 16 Gradually move the Choke to the OPEN Position after engine starts Fig Z 17 Depress trigger on gun to start water flow WARNING Risk of unsafe operation Stand on a stable surface and grip gun spray wand firmly with both hands Expect the gun to kick when triggered 18 Release trigger to stop wa...

Страница 19: ... is equipped with an oil drain hole to help make changing the engine oil easier Pump The pump was filled with oil at the factory The pump on this unit is maintenance free and requires no oil If there is a problem with the pump contact us at AUST 1800 841 749 NZ 0800 467 813 or reference the Troubleshooting Guide Nozzle Cleaning Fig CC DD If the nozzle becomes clogged with foreign materials such as...

Страница 20: ...on simultaneously pull starter rope and squeeze bottle Repeat until protector fluid exits pump outlet NOTE This step may require two people Pressure Washer WARNING Risk of Damage DO NOT store battery pack in pressure washer when not in use Remove battery pack after every use 1 Shut down the pressure washer See Shutting Down for the correct procedure 2 Drain all water from high pressure hose coil i...

Страница 21: ...See Battery charger manual PRESSUREADY SYSTEM Three 3 years from date of purchase HIGH PRESSURE PUMP DEFECTS IN MATERIAL AND WORKMANSHIP Five 5 years from date of purchase FRAME DEFECTS IN MATERIAL AND WORKMANSHIP Ten 10 year from date of purchase OTHER COMPONENTS DEFECTS IN MATERIAL AND WORKMANSHIP Includes nozzles hoses spray guns wands tires feet Ninety 90 days from date of purchase Our product...

Страница 22: ...r period of normal use 22 23 24 Water leaking at gun spray wand connection 25 26 Water leaking at pump 25 26 27 28 Pump Pulsates 12 Troubleshooting Key Key POSSIBLE CAUSE POSSIBLE SOLUTION 1 No fuel Add fuel 2 Low or no oil NOTE This pressure washer is equipped with a low oil sensor If the oil is low or the unit is not level the unit will shut off or fail to start Add required amount of oil Ensure...

Страница 23: ...essure hose is too long Use high pressure hose under 50 feet 15 24 m Lengthen water supply hose instead of high pressure hose 17 Spray wand not in low pressure See Spray Wand Nozzles under Operation 18 Chemical soap filter clogged Clean chemical soap filter 19 Chemical soap filter not in cleaning solution Make sure filter end of chemical soap hose is fully submerged into chemical cleaning soap 20 ...

Страница 24: ...he red light flashes to determine the system fault All light sequences will continue to repeat until the problem is corrected After diagnosing and solving the system fault clear and reset the fault code Example The yellow light illuminates ON and the red light flashing once then the yellow light turns OFF and the red light flashes once this indicates the engine will not start system fault This lig...

Страница 25: ...t 5 4 Replace the battery Unit is not on a level surface 6 1 Place on level surface Unit is not on a level surface 6 2 Place on level surface The yellow light turns OFF and the red light flashes a 1 2 3 or 4 sequence Water flow sensor fault 7 1 2 3 4 Take to authorised service centre RED YELLOW LIGHT SEQUENCE POSSIBLE FAULT POSSIBLE SOLUTION The yellow light turns OFF and the red light flashes a 1...

Страница 26: ...24 ...

Страница 27: ...25 ...

Страница 28: ...7113784 03 20 AUST 1800 841 749 NZ 0800 467 813 ...

Отзывы: