9-6
Dell PowerEdge 6350 Systems Installation and Troubleshooting Guide
7.
Replace the front bezel.
8.
Reconnect the computer and peripherals to their AC power sources, and turn
them on.
9.
Test the CD-ROM drive to verify that it is functioning properly.
,QVWDOOLQJWKH'LVNHWWH'ULYH
Use the following procedure to install or replace the diskette drive:
1.
Turn off the system, including any attached peripherals, and disconnect the sys-
tem from its AC power source.
2.
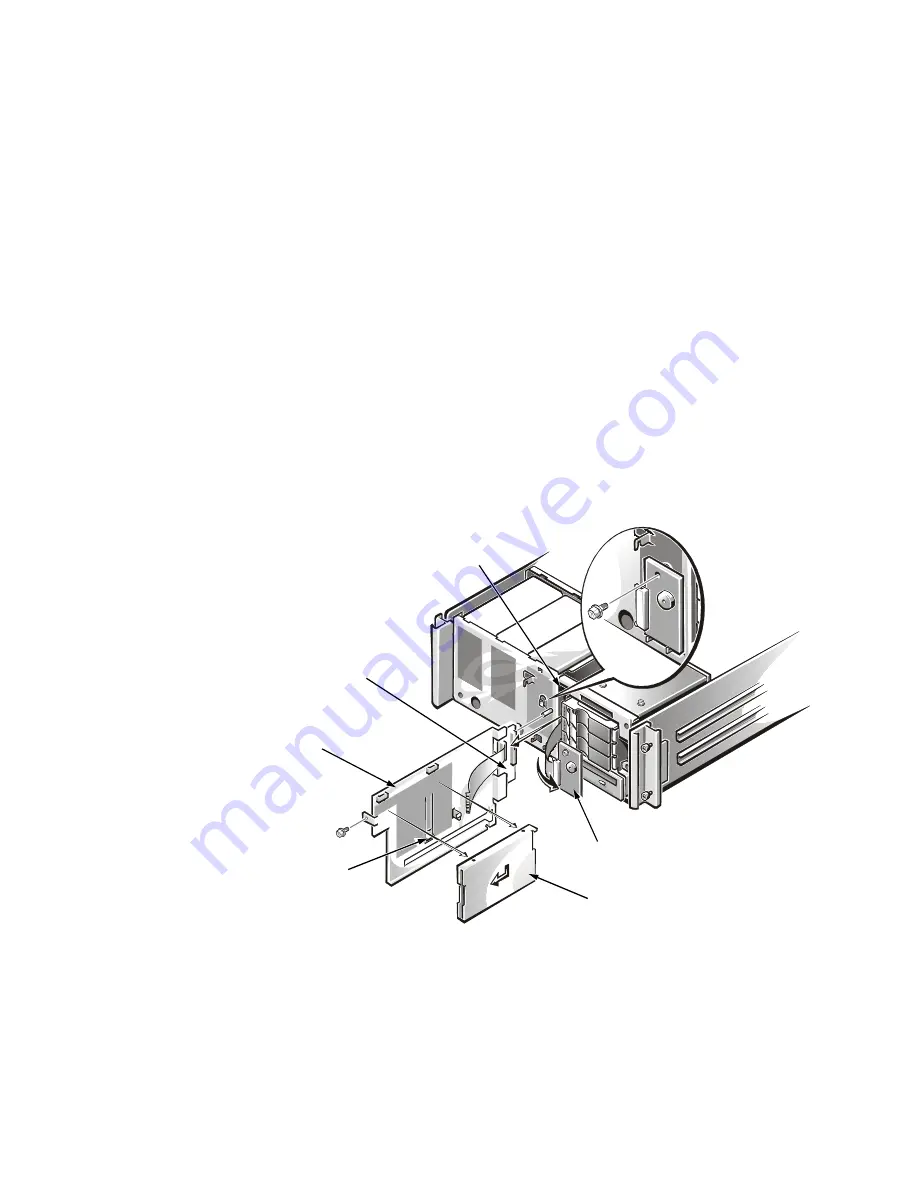
Attach the diskette drive to the diskette drive bracket.
Place the diskette drive on top of the bracket with the left edge of the drive
aligned with the two mounting stays on the left side of the bracket (see
Figure 9-6). Press the diskette drive firmly against the stays, and pull the latch on
the bracket up into the engaged position to secure the diskette drive to the
bracket.
)LJXUH ,QVWDOOLQJ WKH 'LVNHWWH 'ULYH
diskette drive
diskette drive
bracket
bracket latch
control panel
diskette drive slot
interposer card
Содержание PowerEdge 6350
Страница 1: ... ZZZ GHOO FRP HOO 3RZHU GJH 6 VWHPV 167 7 21 1 7528 6 227 1 8 ...
Страница 20: ...1 2 Dell PowerEdge 6350 Systems Installation and Troubleshooting Guide ...
Страница 50: ...4 4 Dell PowerEdge 6350 Systems Installation and Troubleshooting Guide ...
Страница 84: ...6 8 Dell PowerEdge 6350 Systems Installation and Troubleshooting Guide ...
Страница 128: ...8 18 Dell PowerEdge 6350 Systems Installation and Troubleshooting Guide ...
Страница 136: ...9 8 Dell PowerEdge 6350 Systems Installation and Troubleshooting Guide ...
Страница 182: ...A 8 Dell PowerEdge 6350 Systems Installation and Troubleshooting Guide ...
Страница 185: ...Jumpers Switches and Connectors B 3 LJXUH 6 VWHP RDUG XPSHUV jumpered unjumpered ...
Страница 192: ...B 10 Dell PowerEdge 6350 Systems Installation and Troubleshooting Guide ...


