


Back to Contents Page
I/O Board
Dell™ OptiPlex™ FX160/160 Service Manual
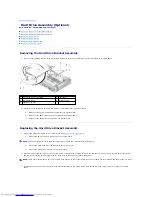
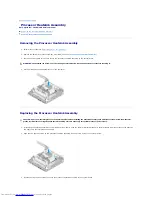
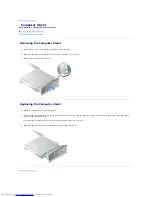
Removing the I/O Board
Replacing the I/O Board
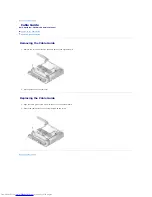
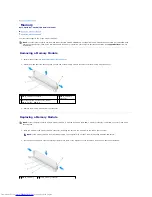
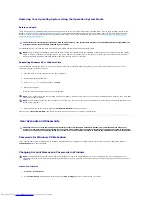
Removing the I/O Board
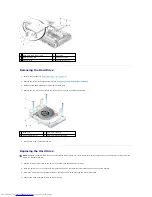
1.
Perform the procedure in
Before Working on Your Computer
.
2.
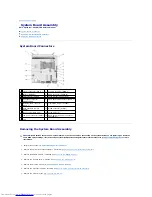
Remove the two screws that secure the I/O board to the chassis.
3.
Carefully lift the I/O board out of the computer, ensuring the three cables are clear of the cable guide.
4.
Disconnect the three cables (Audio, USB and Front Panel) from the I/O board.
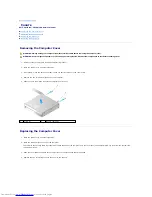
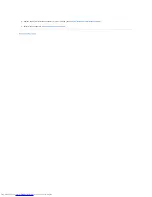
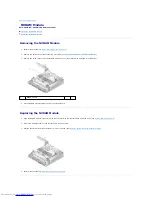
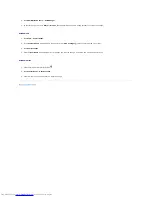
Replacing the I/O Board
1.
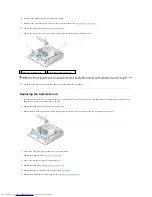
Connect the three I/O board cables (Audio, USB, and Front Panel) to the I/O board.
2.
Place the cables under the cable guide metal tab, and align the holes in the I/O board with the screw holes on the chassis, ensuring that the middle of
the I/O board rests in the metal clip.
3.
Secure the I/O board to the chassis with two screws.
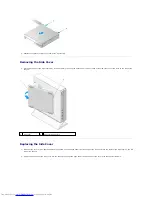
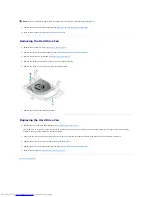
1
screws (2)
2
cable guide
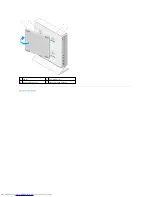
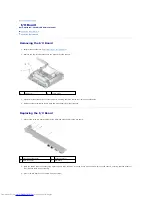
1
front panel connector
2
audio connector
3
USB connector
4
I/O board
Содержание OptiPlex 160
Страница 10: ...Back to Contents Page 1 peg 2 2 peg retainer 2 3 side cover hooks 2 4 side cover hook slots 2 ...
Страница 25: ...Back to Contents Page ...
Страница 41: ...Back to Contents Page ...
Страница 60: ......


