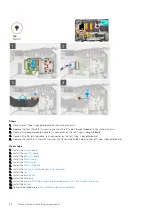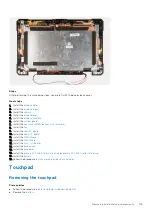
Steps
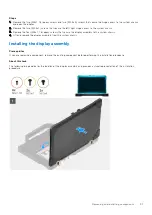
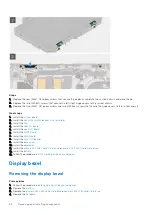
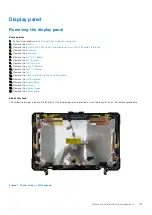
1. Remove the 4 (M2.5x6, T8) epoxy yellow screws that secure the display bezel to the display assembly.
2. Close the lid and in sequential order, remove the 11 (M2.5x6, T8) blue screws that secure the display bezel to the display
assembly.
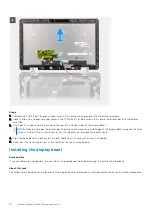
3. Use a plastic scribe to carefully pry open the top, left, and right sides of the display bezel.
NOTE:
When prying open the display bezel, ensure to pry along the outside edge of the display bezel using your hand or
a plastic scribe. Using a screw driver or any sharp object may damage the display cover.
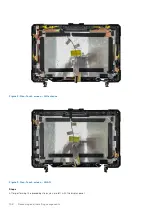
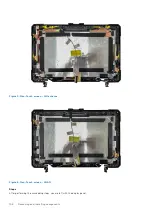
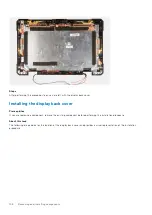
4. Flip the display bezel and disconnect the eDP cable from its connector on the LCD module.
5. Disconnect the touch cable from its connector on the touch screen board.
Installing the display bezel
Prerequisites
If you are replacing a component, remove the existing component before performing the installation procedure.
About this task
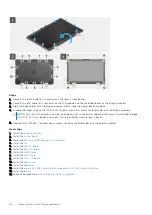
The following image indicates the location of the display bezel and provides a visual representation of the installation procedure.
94
Removing and installing components
Содержание Latitude 5430
Страница 1: ...Latitude 5430 Rugged Service Manual Regulatory Model P148G Regulatory Type P148G001 May 2022 Rev A01 ...
Страница 19: ...Removing and installing components 19 ...
Страница 21: ...Removing and installing components 21 ...
Страница 25: ...Removing and installing components 25 ...
Страница 31: ...Removing and installing components 31 ...
Страница 34: ...34 Removing and installing components ...
Страница 69: ...Removing and installing components 69 ...
Страница 73: ...Removing and installing components 73 ...
Страница 90: ...90 Removing and installing components ...
Страница 95: ...Removing and installing components 95 ...
Страница 138: ...138 Troubleshooting ...


