12
Setting Up Your Inspiron™ Mini 10
NOTE:
The following steps were written for
the Windows default view, so they may not
apply if you set your Dell
™
computer to the
Windows Classic view.
Save and close any open files, and exit any
1.
open programs.
Click
2.
Start
→
Control Panel
.
Under
3.
Network and Internet Connections
,
select
Setup or Change Your Internet
Connection
.
Click
4.
Setup
.
The
New Connection Wizard
appears.
Click
5.
Connect to the Internet
.
In the next window, click the appropriate
6.
option:
If you do not have an ISP, click
–
Choose from a list of Internet service
providers (ISPs)
.
If you have already obtained setup
–
information from your ISP but you did
not receive a setup CD, click
Set up my
connection manually
.
If you have a setup CD, click
–
Use the CD
I got from an ISP
.
NOTE:
Your computer does not have an
internal optical drive. Use an external
optical drive or any external storage device
for the procedures that involve discs.
Click
7.
Next
.
If you selected Set up my connection
manually in step 6, continue to step 8.
Otherwise, follow the instructions on the
screen to complete the setup.
NOTE:
If you do not know which type of
connection to select, contact your ISP.
Содержание Inspiron Mini 10v
Страница 1: ...SETUP GUIDE INSPIRON ...
Страница 2: ......
Страница 3: ... Model PP19S INSPIRON SETUP GUIDE ...
Страница 10: ...8 Setting Up Your Inspiron Mini 10 Press the Power Button ...
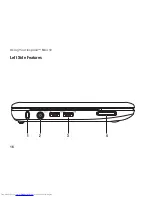
Страница 18: ...16 Using Your Inspiron Mini 10 Left Side Features 1 2 3 4 ...
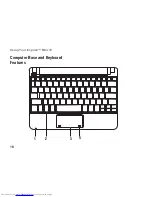
Страница 20: ...18 Using Your Inspiron Mini 10 Computer Base and Keyboard Features 1 4 3 2 ...
Страница 23: ...21 Using Your Inspiron Mini 10 ...
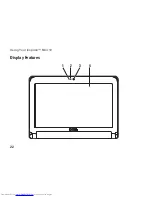
Страница 24: ...22 Using Your Inspiron Mini 10 Display Features 1 2 3 4 ...
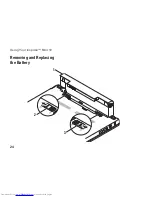
Страница 26: ...24 Using Your Inspiron Mini 10 Removing and Replacing the Battery 1 2 3 ...
Страница 41: ...39 Using Support Tools ...
Страница 67: ......
Страница 68: ...Printed in China Printed on recycled paper www dell com support dell com ...


