background image


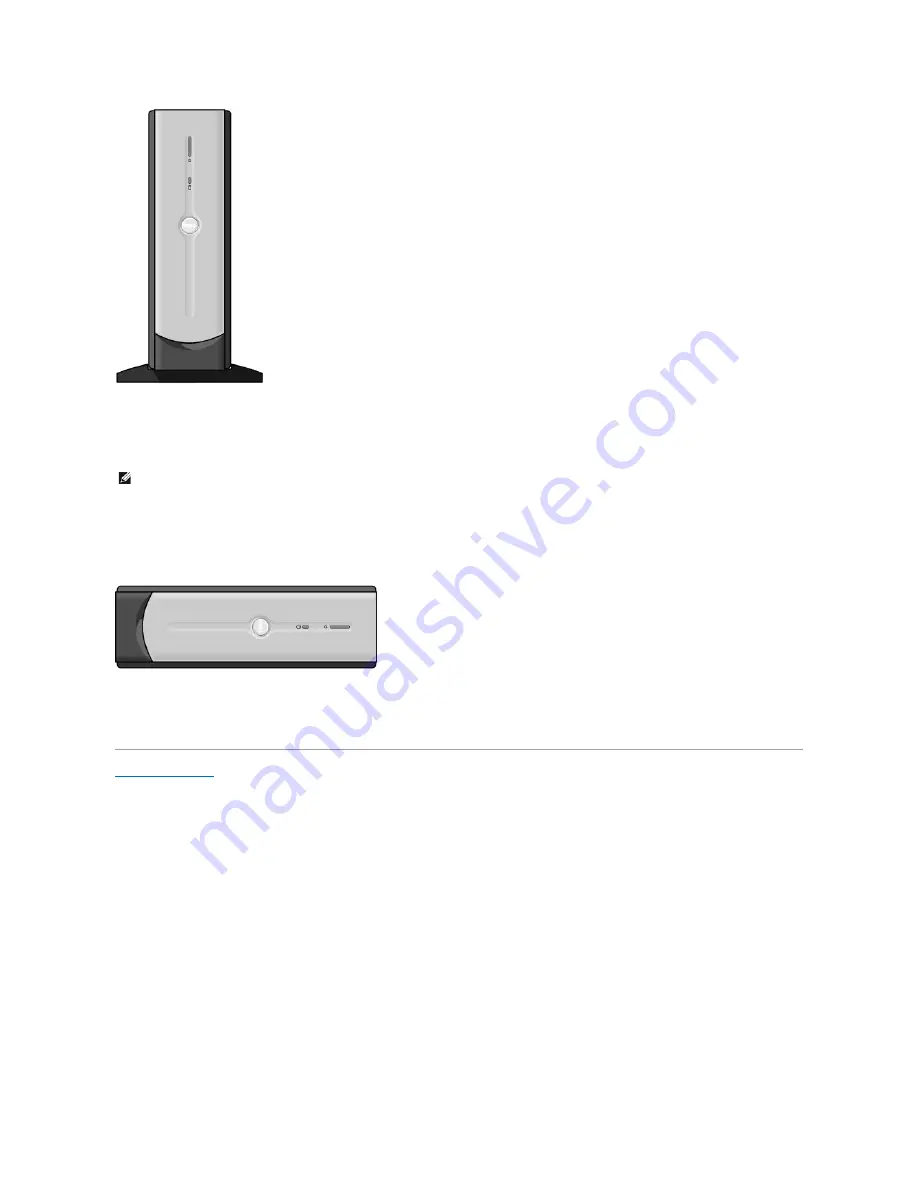
To remove the stand, perform the following steps. 


1.


Turn the computer over so that the stand is at the top.  


2.


Loosen the screw and lift the stand away.  


3.


Place the computer in a horizontal position until you reattach the stand.  


Back to Contents Page


NOTE: 

Place your computer on a soft surface to prevent scratching of the top cover. 

Содержание Dimension 4600C

Страница 1: ...f Dell Inc is strictly forbidden Trademarks used in this text Dell the DELL logo and Dimension are trademarks of Dell Inc Intel Pentium and Celeron are registered trademarks of Intel Corporation Microsoft and Windows are registered trademarks of Microsoft Corporation Other trademarks and trade names may be used in this document to refer to either the entities claiming the marks and names or their ...

Страница 2: ...nstall properly working memory of the same type into your computer l If the problem persists contact Dell See Contacting Dell in your Owner s Manual for technical assistance A possible expansion card failure has occurred 1 Determine if a conflict exists by removing a card not the video card and then restarting the computer 2 If the problem persists reinstall the card that you removed remove a diff...

Страница 3: ... there are no special memory module memory connector placement requirements l Verify that the memory modules that you are installing are compatible with your computer l If the problem persists contact Dell See Contacting Dell in your Owner s Manual for technical assistance Other failure has occurred l Ensure that the cables are properly connected from the hard drive CD drive and DVD drive to the s...

Страница 4: ...Date Not Set The system configuration information in the system setup program is incorrect or the battery charge may be low Enter the system setup program verify the system configuration and then restart the computer Diskette Boot Failure Drive A or B is present but has failed the BIOS POST Ensure that the drive is installed correctly in the computer and defined correctly in the system setup progr...

Страница 5: ...Back to Contents Page ...

Страница 6: ...ver 12 Attach the computer stand optional CAUTION Before you begin any of the procedures in this section follow the safety instructions in the Owner s Manual or Product Information Guide CAUTION A new battery can explode if it is incorrectly installed Replace the battery only with the same or equivalent type recommended by the manufacturer Discard used batteries according to the manufacturer s ins...

Страница 7: ...ectrical outlets and turn them on 14 Enter system setup and restore the settings you recorded in step 1 15 Properly dispose of the old battery See the safety instructions in the Owner s Manual or Product Information Guide Back to Contents Page ...

Страница 8: ...rom their electrical outlets and then press the power button to ground the system board In addition take note of these safety guidelines when appropriate l When you disconnect a cable pull on its connector or on its strain relief loop not on the cable itself Some cables have a connector with locking tabs if you are disconnecting this type of cable press in on the locking tabs before disconnecting ...

Страница 9: ...charge your body may have accumulated You can also take the following steps to prevent damage from electrostatic discharge ESD l When unpacking a static sensitive component from its shipping carton do not remove the component from the antistatic packing material until you are ready to install the component in your computer Just before unwrapping the antistatic packaging be sure to discharge static...

Страница 10: ...re left inside the computer 3 Close the cover a Pivot the cover down b Press down on the right side of the cover until it closes c Press down on the left side of the cover until it closes d Ensure that both sides of the cover are locked If not repeat all of step 3 4 Attach the computer stand optional 5 Connect your computer and devices to electrical outlets and turn them on Back to Contents Page N...

Страница 11: ... the illustration Then press the two release buttons as you lift the cover Raise the back of the cover and pivot it toward the front of the computer Back to Contents Page CAUTION Before you begin any of the procedures in this section follow the safety instructions in your Owner s Manual or Product Information Guide CAUTION To guard against electrical shock always unplug your computer from the elec...

Страница 12: ...ide the computer cover remove the mounting screw that secures the I O panel to the computer 10 Remove the I O panel from the computer Replacing the I O Panel To replace the I O panel follow the removal procedures in the reverse order CAUTION Before you begin any of the procedures in this section follow the safety instructions in the Owner s Manual or Product Information Guide CAUTION To guard agai...

Страница 13: ...Back to Contents Page ...

Страница 14: ...ect any telephone or telecommunication lines from the computer 4 Disconnect your computer and all attached devices from their electrical outlets and then press the power button to ground the system board 5 Remove the computer stand if it is attached 6 Open the computer cover 7 Press out the securing clip at each end of the memory module connector NOTE DDR 333 memory operates at 320 MHz when used w...

Страница 15: ...ly check the amount of memory RAM listed Removing Memory 1 Shut down the computer through the Start menu 2 Ensure that your computer and attached devices are turned off If your computer and attached devices did not automatically turn off when you shut NOTICE To avoid damage to the memory module press the module straight down into the connector while you apply equal force to each end of the module ...

Страница 16: ...t the securing clip at each end of the memory module connector 8 Grasp the module and pull up If the module is difficult to remove gently ease the module back and forth to remove it from the connector 9 Close the computer cover 10 Attach the computer stand optional Back to Contents Page NOTICE To disconnect a network cable first unplug the cable from your computer and then unplug it from the netwo...

Страница 17: ...ing and Installing Parts Dell Dimension 4600C Service Manual Back to Contents Page Reattaching the Front Door Adding PC Cards Optional Cards AGP Card Adding Memory I O Panel Drives Microprocessor System Board Power Supply Battery ...

Страница 18: ...ounter too much resistance when you insert the card do not force the card Check the card s orientation and try again 3 Your computer recognizes most PC Cards and automatically loads the appropriate device driver for use with the computer If the configuration program tells you to load the manufacturer s drivers install them with the CD that came with the PC Card CAUTION Before you begin any of the ...

Страница 19: ...stop a card from functioning before you remove it from the computer If you do not remove the card in the configuration utility you could lose data from open programs NOTE Press the button with the upper dot to eject the top card and the button with the lower dot to eject the bottom card NOTICE Do not attempt to eject a card by pulling its dongle if one is attached ...

Страница 20: ...em board and drives You must route these cables properly when you replace them to prevent their being pinched or crimped 9 Press the release button located on the floor of the computer frame 10 Slide the power supply approximately 1 inch toward the front of the computer 11 Lift the power supply up and out of the computer Replacing the Power Supply CAUTION Before you begin any of the procedures in ...

Страница 21: ...nderneath the clips and press the clips to close them over the cables 5 Close the computer cover 6 Attach the computer stand optional 7 Connect your computer and devices to electrical outlets and turn them on Back to Contents Page NOTICE To connect a network cable first plug the cable into the network wall jack and then plug it into the computer ...

Страница 22: ...ephone or telecommunication lines from the computer 4 Disconnect your computer and all attached devices from their electrical outlets and then press the power button to ground the system board 5 Move the hinge arms to the closed position 6 Align the two clips on the inside of the front door with the two hinge arms 7 Press inward on the front door until it clips to both hinge arms Back to Contents ...

Страница 23: ...nged lever and sliding the filler bracket up 2 Slide the card clip toward the front of the computer until the tab is out of the notch on the card 3 Pull the card up and out of the AGP connector CAUTION Before you begin any of the procedures in this section follow the safety instructions in the Owner s Manual or Product Information Guide NOTICE To disconnect a network cable first unplug the cable f...

Страница 24: ... on the back panel 5 Close the computer cover 6 Attach the computer stand optional 7 Connect the monitor cable to the card s video connector 8 Connect your computer and devices to electrical outlets and turn them on Back to Contents Page NOTE If you purchased the optional video card ensure that you connected your monitor cable to the correct video connector NOTICE You must use low profile cards fo...

Страница 25: ...move the computer stand if it is attached 7 Open the computer cover Installing a Card 1 Raise the retention arm 2 If you are installing a new card remove the filler bracket to create a empty card slot opening Then continue with step 4 3 If you are replacing a card that is already installed in the computer remove the card CAUTION Before you begin any of the procedures in this section follow the saf...

Страница 26: ...n the computer 8 Connect any cables that should be attached to the card See the documentation for the card for information about the card s cable connections 9 Close the computer cover 10 Attach the computer stand optional 11 Connect your computer and devices to electrical outlets and turn them on 12 Install any drivers required for the card as described in the card documentation Removing a Card 1...

Страница 27: ...puter stand optional 8 Connect your computer and devices to electrical outlets and turn them on 9 Remove the card s driver from the operating system Back to Contents Page NOTE Installing filler brackets over empty card slot openings is necessary to maintain FCC certification of the computer The brackets also keep dust and dirt out of your computer NOTICE To connect a network cable first plug the c...

Страница 28: ...s from their power sources Also disconnect any telephone or telecommunication lines from the computer 7 Disconnect the computer power cable from the wall outlet and then press the power button to ground the system board 8 Remove the computer stand if it is attached 9 Open the computer cover Removing a Hard Drive 1 Disconnect the power cable and hard drive cable from the drive CAUTION Before you be...

Страница 29: ... rails attached remove the rails from the old drive by removing the two screws that secure each rail to the drive Attach the bracket rails to the new drive by aligning the screw holes on the drive with the screw holes on the bracket rails and then inserting and tightening all four screws two screws on each rail 3 Install the hard drive into the computer by gently sliding the drive into place until...

Страница 30: ...4 Disconnect your computer and devices from their power sources Also disconnect any telephone or telecommunication lines from the computer 5 Disconnect the computer power cable from the wall outlet and then press the power button to ground the system board 6 Remove the computer stand if it is attached 7 Open the computer cover 8 If you are installing a new PC Card module instead of replacing a mod...

Страница 31: ...e into the computer until the green tabs securely click into position 4 Attach the power cable to the PC Card module s power connector 5 Attach the interposer board to the CD DVD drive 6 If you are installing a new PC Card module instead of replacing one a Attach the flat data cable and the power cable to the card that came with the PC Card module b Install the card into an empty card slot 7 Check...

Страница 32: ...he computer power cable from the wall outlet and then press the power button to ground the system board 6 Remove the computer stand if it is attached 7 Open the computer cover Removing a CD DVD Drive 1 Remove the interposer board from the drive 2 Disconnect the power cable from the interposer board 3 Press inward on the two tabs on the sides of the drive and then slide the drive upward and remove ...

Страница 33: ... inside of the cover b Attach the power cable to the interposer board 4 If you are installing a drive that has its own controller card install the controller card in an expansion slot 5 Check all cable connections and fold cables out of the way to provide airflow for the fan and cooling vents 6 Close the computer cover 7 Attach the computer stand optional 8 Connect your computer and devices to ele...

Страница 34: ...Back to Contents Page ...

Страница 35: ...clip from the retention base b Remove the heat sink blower assembly by pulling out the retention base tab while you lift one end of the heat sink CAUTION Before you begin any of the procedures in this section follow the safety instructions in the Owner s Manual or Product Information Guide NOTICE To disconnect a network cable first unplug the cable from your computer and then unplug it from the ne...

Страница 36: ...n you install your new microprocessor NOTICE Be careful not to bend any of the pins when you remove the microprocessor from the socket Bending the pins can permanently damage the microprocessor NOTICE Ground yourself by touching an unpainted metal surface on the back of the computer NOTICE Be careful not to bend any of the pins when you unpack the new microprocessor Bending the pins can permanentl...

Страница 37: ...de of the retention base b Lower the assembly until the heat sink fits securely under the tab on the retention base c Insert the securing clip by placing the notched end of the clip opposite the tab into the slot on the retention base Press on the securing clip tab and lower the securing clip into place Make sure that the notched ends of the securing clip are secured in the retention base slots 8 ...

Страница 38: ...with Intel Celeron processors are available only in Japan L1 cache 8 KB first level L2 cache 256 KB 512 KB or 1 MB pipelined burst eight way set associative write back SRAM System Information System chip set Intel 865G DMA channels four Interrupt levels 24 APIC mode System BIOS chip 4 Mb 512 KB System clock 533 or 800 MHz quad data rate Expansion Bus Bus types PCI and AGP Bus speed PCI 33 MHz AGP ...

Страница 39: ...tal line out connector Network RJ 45 connector Internally accessible Primary IDE channel 40 pin connector on PCI local bus Secondary IDE channel 40 pin connector on PCI local bus Serial ATA one 7 pin connector Video Video controller integrated Intel Extreme Graphics 2 low profile AGP video card also supported 4X and 8X Audio Audio controller ADI 1980 integrated 5 1 channel audio Network Network co...

Страница 40: ... to 65ºC 40º to 149ºF Relative humidity 20 to 80 noncondensing Maximum vibration Operating 0 25 G at 3 to 200 Hz at 1 2 octave min Storage 0 5 G at 3 to 200 Hz at 1 2 octave min Maximum shock Operating bottom half sine pulse with a change in velocity of 50 8 cm sec 20 inches sec Storage 23 G faired square wave with a velocity change of 508 cm sec 200 inches sec Altitude Operating 15 2 to 3048 m 50...

Страница 41: ...e following steps 1 Rotate the computer to an upside down position 2 Insert the screw into the bottom of the stand 3 Align the two tabs and the screw in the stand with the tab holes and screw hole in the bottom of the computer 4 Tighten the screw 5 Place the computer in the upright position NOTE Place your computer on a soft surface to prevent scratching of the top cover ...

Страница 42: ...puter over so that the stand is at the top 2 Loosen the screw and lift the stand away 3 Place the computer in a horizontal position until you reattach the stand Back to Contents Page NOTE Place your computer on a soft surface to prevent scratching of the top cover ...

Страница 43: ...sembly toward the front of the computer and then lift the assembly up and away 11 Place the system board assembly that you just removed next to the replacement system board Replacing the System Board 1 Transfer components from the existing system board to the replacement system board a Remove the memory modules and install them on the replacement board CAUTION Before you begin any of the procedure...

Страница 44: ...les that you removed from the system board 7 Reconnect all cables to their connectors at the back of the computer 8 Close the computer cover 9 Attach the computer stand optional 10 Connect your computer and devices to electrical outlets and turn them on Back to Contents Page CAUTION The heat sink assembly and microprocessor package can get hot To avoid burns ensure that the assembly and package ha...

Страница 45: ...ample the user password Dell recommends that you write down the system setup program screen information for future reference Entering the System Setup Program Viewing Settings 1 Turn on or restart your computer 2 When the blue DELL logo appears press F2 immediately If you wait too long and the operating system logo appears continue to wait until you see the Microsoft Windows desktop Then shut down...

Страница 46: ...ighted Option Function System Time Displays the system time System Date Displays the system date Drive Configuration Displays drive configurations when Enter is pressed Boot Sequence Displays boot sequence when Enter is pressed Memory Information Displays amount of system memory when Enter is pressed CPU Information Displays CPU information when Enter is pressed Integrated Devices Legacy Select Op...

Страница 47: ...ff is displayed If a device is attached the type of drive is displayed If Enter is pressed device information is displayed and the drive type can be set as Auto or Off default IDE Drive UDMA Turns IDE Drive UDMA on and off The default is On Option Function Installed System Memory Displays the amount of installed system memory System Memory Speed Displays the speed of your system memory System Memo...

Страница 48: ...omputer and devices to electrical outlets and turn them on Low Power Mode Minimizes power use when the computer is off The default is Disabled Option Function Password Status Locks and unlocks the password option The default is Unlocked System Password Enables and disables the system password The default is Not Enabled Setup Password Enables and disables the setup password The default is Not Enabl...

Страница 49: ...Turning on your computer with password jumper PWD1 installed reenables the password feature Back to Contents Page ...

Страница 50: ...tional Placement of Dell Installed Cards Internal View System Board Connectors and Sockets CAUTION Before you begin any of the procedures in this section follow the safety instructions in the Owner s Manual or Product Information Guide CAUTION To guard against electrical shock always unplug your computer from the electrical outlet before opening the cover NOTICE Be careful when opening the compute...

Страница 51: ... and do not exceed SELV requirements per electrical standards UL 1950 IEC 950 or EN60950 Par 2 3 2 Maximum continuous combined load on 5 VDC and 3 3 VDC outputs do not exceed 80 W 3 Peak 12 VDC output power up to 11 0 A does not exceed 15 seconds in duration Under this condition tolerance on the 12 VDC output is allowed to be 10 4 5 VDC minimum load is 0 2 A when there is a minimum load of 0 3 A o...

Страница 52: ... VDC Orange 2 3 3 VDC Orange 3 COM Black 4 5 VDC Red 5 COM Black 6 5 VDC Red 7 COM Black 8 POK Gray 9 5 VFP Purple 10 12 VDC Yellow 11 3 3 VDC Orange 12 12 VDC Blue 13 COM Black 14 PS ON Green 15 COM Black 16 COM Black 17 COM Black 18 5 VDC N C 19 5 VCD Red 20 5 VCD Red Sense connector ...

Страница 53: ...COM Black 2 COM Black 3 12 VDC Yellow 4 12 VDC Yellow Pin Number Signal Name 18 AWG Wire 1 12 VCD Yellow 2 COM Black 3 COM Black 4 5 VDC Red Pin Number Signal Name 22 AWG Wire 1 5 VCD Red 2 COM Black 3 COM Black 4 12 VDC Yellow Pin Number Signal Name 18 AWG Wire 1 N C N C 2 COM Black 3 COM Black 4 3 3 VDC Orange ...

Страница 54: ...nnector Location Dell Installed Drive Primary IDE master End connector on IDE1 connector cable Hard drive Secondary IDE master End connector on IDE2 connector cable CD or DVD drive Serial ATA Channel Connector Location Dell Installed Drive Primary Serial ATA master End connector on serial ATA connector cable Hard drive Card Connector Card Description AGP connector Video card on non integrated vide...

Страница 55: ...re trademarks of Dell Inc Intel Pentium and Celeron are registered trademarks of Intel Corporation Microsoft and Windows are registered trademarks of Microsoft Corporation Other trademarks and trade names may be used in this document to refer to either the entities claiming the marks and names or their products Dell Inc disclaims any proprietary interest in trademarks and trade names other than it...

Страница 56: ...s finishes Back to Contents Page NOTICE To avoid losing data turn off your computer by performing a Microsoft Windows operating system shutdown as described next rather than by pressing the power button NOTE As an alternative to turning off your computer you can set your computer to enter standby or hibernate mode For information on power conservation modes see the Tell Me How help file or search ...

Отзывы: