DDR4
DDR4 (double data rate fourth generation) memory is a higher-speed successor to the DDR2 and DDR3 technologies and allows up to 512
GB in capacity, compared to the DDR3's maximum of 128 GB per DIMM. DDR4 synchronous dynamic random-access memory is keyed
differently from both SDRAM and DDR to prevent the user from installing the wrong type of memory into the system.
DDR4 needs 20 percent less or just 1.2 volts, compared to DDR3 which requires 1.5 volts of electrical power to operate. DDR4 also
supports a new, deep power-down mode that allows the host device to go into standby without needing to refresh its memory. Deep
power-down mode is expected to reduce standby power consumption by 40 to 50 percent.
DDR4 Details
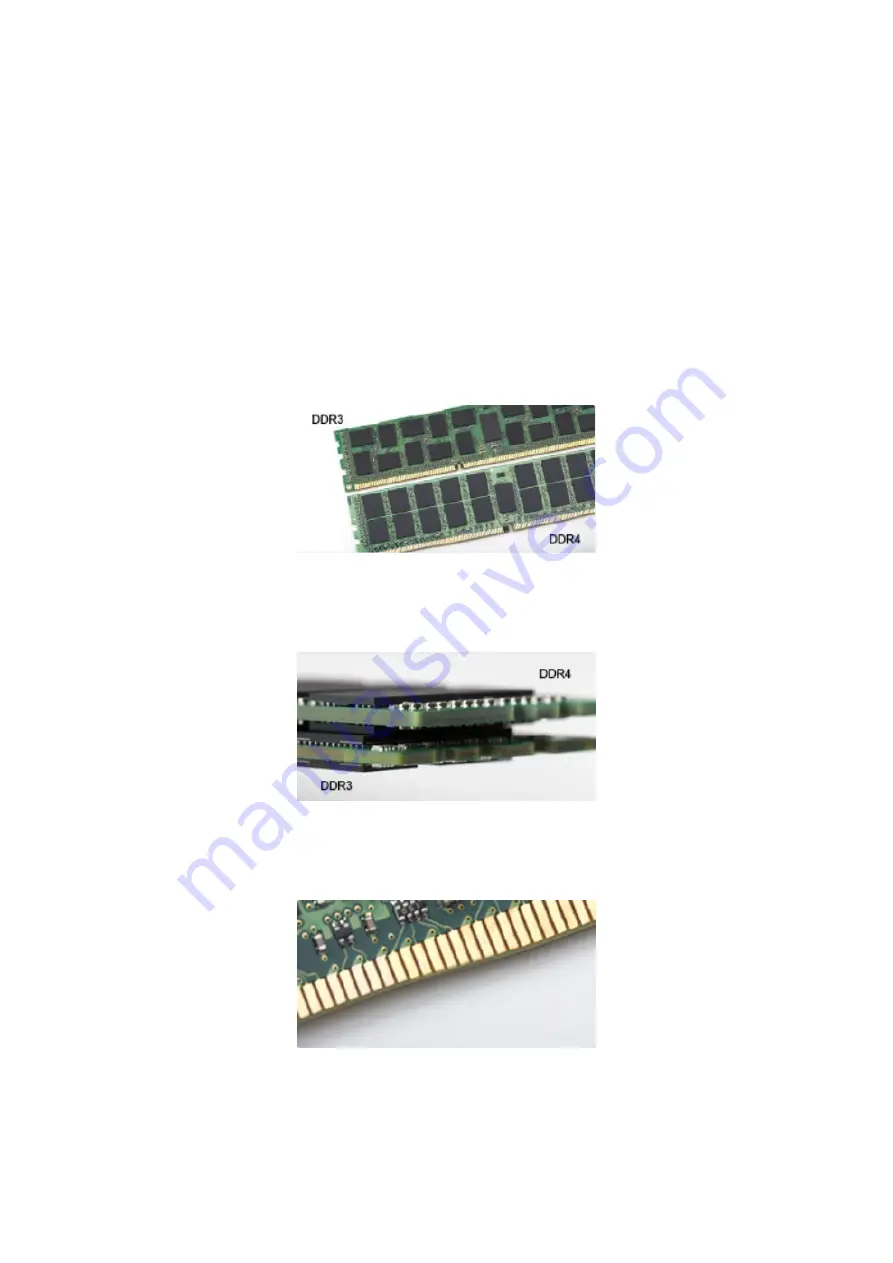
There are subtle differences between DDR3 and DDR4 memory modules, as listed below.
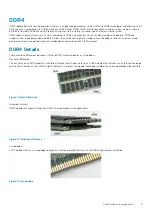
Key notch difference
The key notch on a DDR4 module is in a different location from the key notch on a DDR3 module. Both notches are on the insertion edge
but the notch location on the DDR4 is slightly different, to prevent the module from being installed into an incompatible board or platform.
Figure 1. Notch difference
Increased thickness
DDR4 modules are slightly thicker than DDR3, to accommodate more signal layers.
Figure 2. Thickness difference
Curved edge
DDR4 modules feature a curved edge to help with insertion and alleviate stress on the PCB during memory installation.
Figure 3. Curved edge
Technology and components
9
Содержание D11S
Страница 1: ...Dell Precision 3431 Small Form Factor Service Manual Regulatory Model D11S Regulatory Type D11S004 ...
Страница 15: ...Major components of your system 1 Side cover 2 Heatsink and fan 3 Major components of your system 15 ...
Страница 64: ...g Remove the plastic tube from internal antenna cable 64 Removing and Installing components ...
Страница 68: ...Installing the External Antenna 1 External antenna 68 Removing and Installing components ...
Страница 103: ...7 To install the USB Type C card a Remove the filler using a philips screwdriver Installing the USB Type C card 103 ...
Страница 116: ...7 To install the VGA card a Remove the filler using a philips screwdriver 116 Installing the VGA card ...
Страница 118: ...d Fasten the two screws to secure the VGA card to the system chassis 1 118 Installing the VGA card ...


